Specifications for parameters
Permissions and access
Minimum role: Lab manager
Client type: web client
Specifications are ranges of acceptable values that are defined only for parameters of the numeric data type and continuous modeling type. Each specification is associated to a specification set, which CoBaseKRM uses to evaluate whether observation values for related parameters in data tables fall within an acceptable range.
A specification range is defined with a minimum of a lower specification limit or a target value or a upper specification limit. For example:
| Example specification range for a parameter having a numeric data type | Lower specification limit | Upper specification limit |
|---|---|---|
| n is greater than or equal to (≥) 15 | 15 | not defined |
| n is less than or equal to (≤) 200 | not defined | 200 |
| n is greater than or equal to 90 or less than or equal to 100 (90 ≥ n ≤ 100) |
90 | 100 |
Define a specification set name
-
Navigate to the Data Governance > Specifications tab.
-
Click the New Spec Set button.
-
In the Name field, type a name for the new specification set.
-
Click Save.
Edit an existing specification set name
To edit an existing specification set name:
-
Beside the name of an existing specification set, click or tap the Edit icon
 .
. The specification set name becomes editable.
-
Edit the specification set name, as needed, and click or tap the Save icon
 .
.
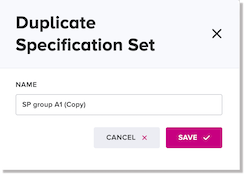
Copy a specification set object
The copy function enables you to make a copy of an existing specification set object to create a new specification set object.
The web client offers a default name for the new specification set object, which is the name of the original specification set plus the suffix "(Copy)", but you can change the name, if desired, before saving the new specification set.
To copy a specification set object:
-
Beside the name of an existing specification set, click or tap the Copy icon
 .
. The Duplicate Specification Set dialog appears. In the Name field, the web client automatically populates a default specification set name.
-
Optional: Edit the default specification set name to your preferred name, if desired, and click or tap Save.
The new specification set exists as its own object in the database.
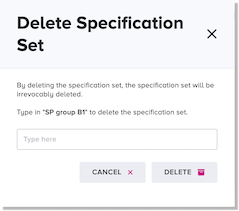
Delete a specification set
The web client will only allow you to delete a specification set if it has no associated specifications.
To delete a specification set:
-
Click the delete icon
 beside the specification set name that you want to delete.
 The Delete Specification Set dialog appears.
-
In the case-sensitive input field, type the exact name of the specification set and click or tap Delete.
Note
If the selected specification set has specifications associated to it, the web client will not allow you to delete it.
If the specification set has no associated specifications, it will be deleted. The web client will display a confirmation message when the deletion has occurred.
Create a new specification
You can create a new specification by using either the New Specification button, which presents a dialog for defining the specification, or the New Specification action for the inline capability for creating a new specification.
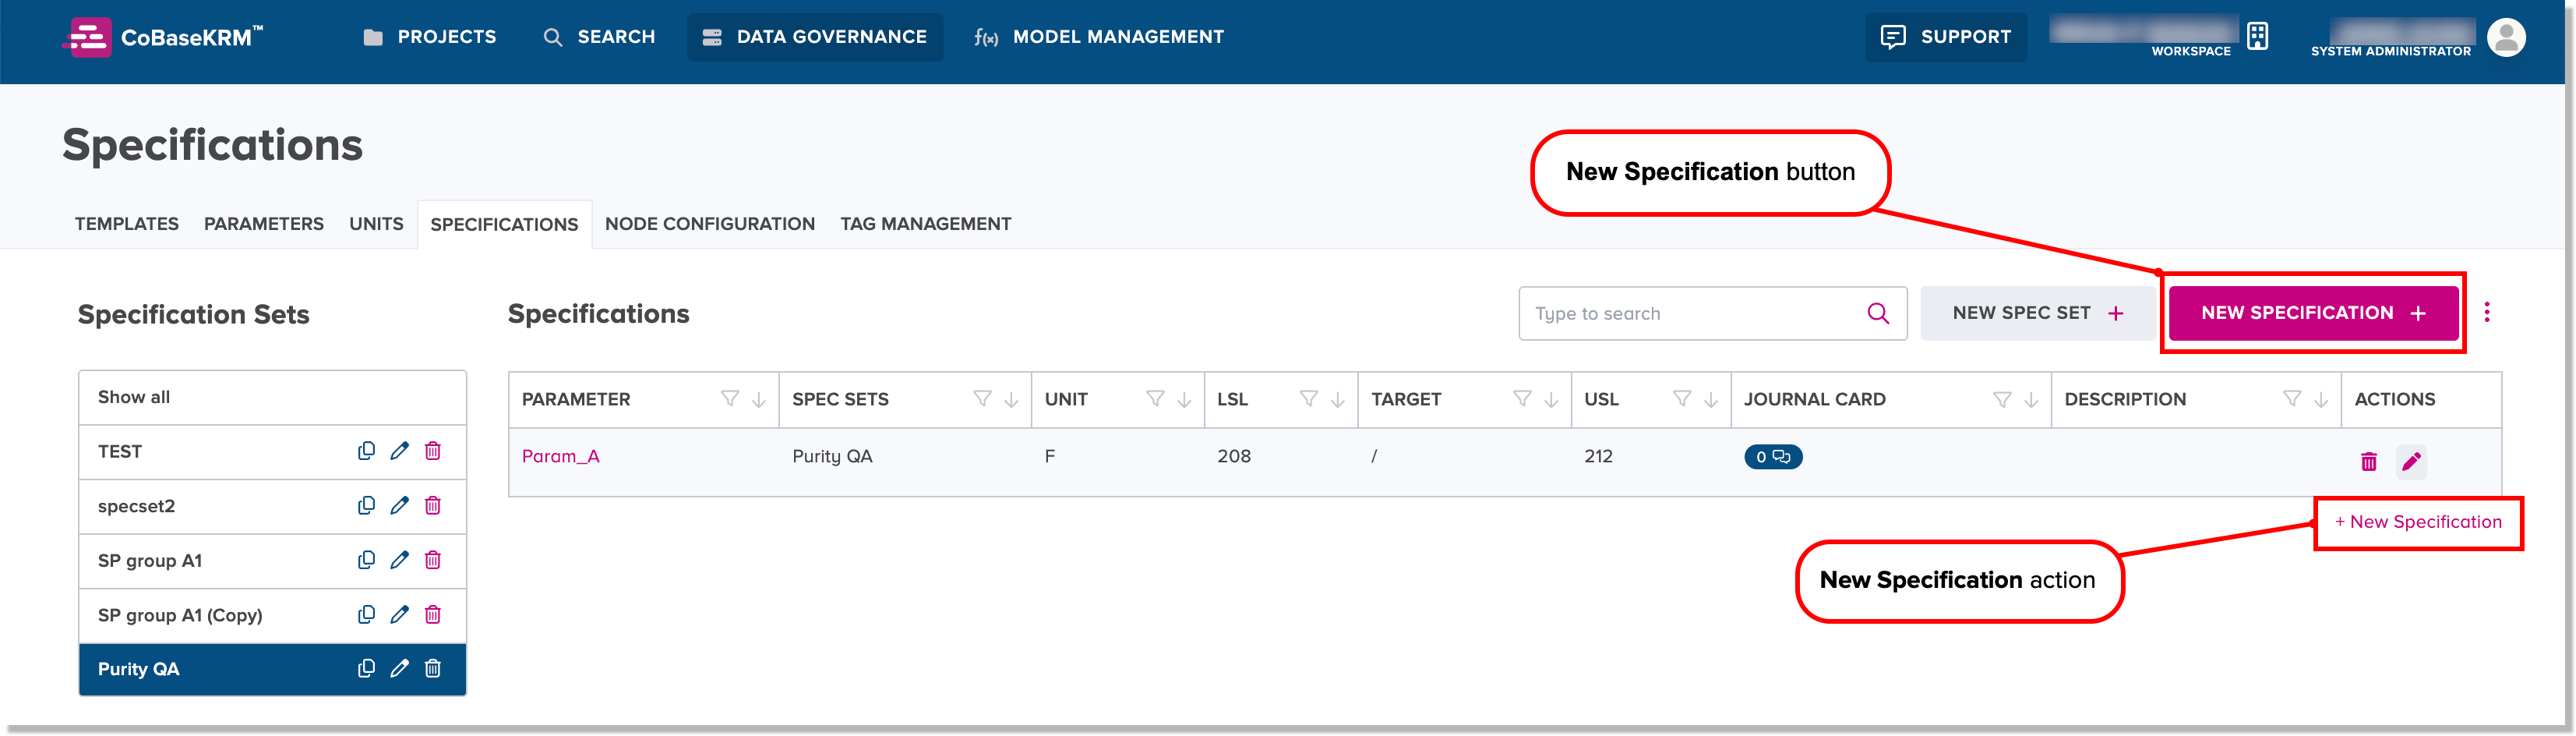
New Specification button
To define a new specification using the New Specification button:
-
Navigate to the Data Governance > Specifications tab.
-
Click or tap the New Specification button.
The Create Specification dialog appears.

-
In the Parameter field, select a parameter name from the drop-down list.
The Unit field appears, containing the defined unit for the selected parameter. If the selected parameter has no unit of measurement defined for it, the Unit field will be empty.
-
Define a range of acceptable numeric values for the new specification with a minimum of a numeric value in one of the following fields:
-
Lower Specification Limit field - the minimum numeric value
-
Target Value field - the target value
-
Upper Specification Limit field the maximum numeric value
-
-
Optional: In the Description field, type a description of the specification.
-
Click or tap Save.
New Specification action
The New Specification action lets you define a specification through inline editing and is located at the bottom right of the specifications list table.
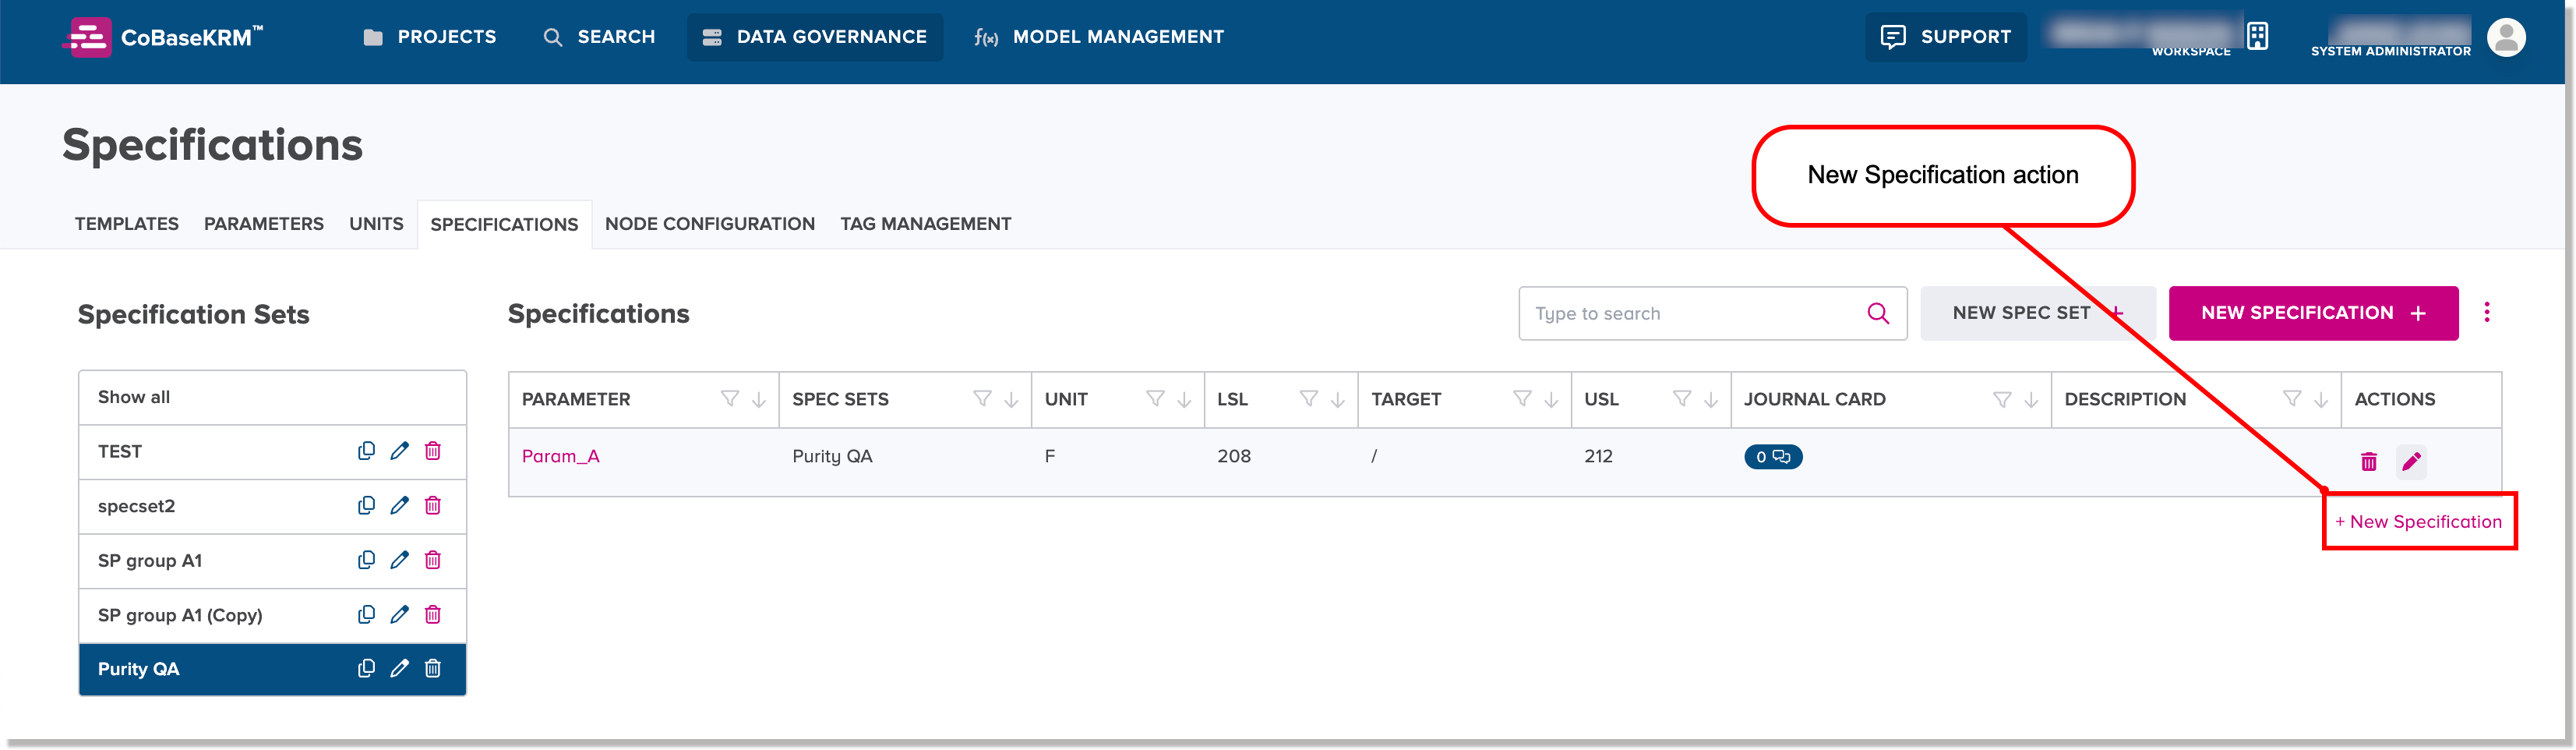
To define a new specification using the New Specification action:
-
Navigate to the Data Governance > Specifications tab.
-
Click or tap the New Specification action.
A new, empty specification object record appears in the specifications list table.
-
In the Parameter field, select a parameter name from the drop-down list.
Note
The Unit field is automatically populated with the unit of measurement that is defined for the selected parameter name. If the selected parameter has no unit of measurement defined for it, the Unit field will be empty.
-
Define an acceptable range for the new specification by inputting a numeric value in a minimum of one or more of the following fields:
-
Lower Specification Limit field - the minimum, acceptable numeric value for a specification range
-
Target Value field - the acceptable target value for a specification
Note: The value in the Target Value field will be used in a future enhancement for using parameter specifications to evaluate acceptable parameter values in data tables in the JMP add-in for CoBaseKRM.
-
Upper Specification Limit field - the maximum, acceptable numeric value for a specification range
-
-
Optional: In the Description field, type a description of the specification.
-
Click or tap the Save icon
.
Journal card entries for an existing specification
The journal card icon lets you add a journal card entry to an existing specification. The same icon also lets you view posted journal card entries. The number displayed on the icon represents the total count of posted journal card entries.
![]()
Add a journal card entry to an existing specification
To add a journal card entry to an existing specification:
-
Click the icon in the Journal Card field beside a specification name in the specifications list table.
The Journal Card dialog appears.
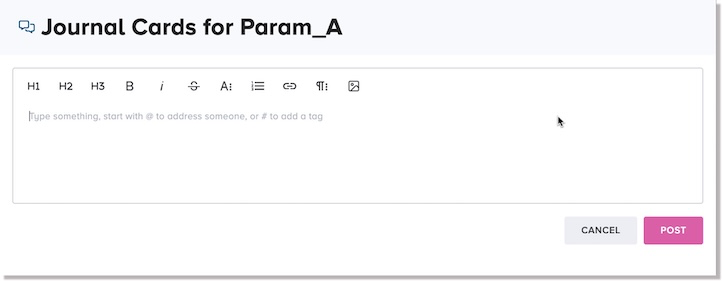
-
In the Journal Card dialog, follow the same workflow steps as for adding a journal card to the related node of an upload.
-
Click Post.
The total count within the journal card icon is incremented to show that a new journal card entry has been added to the given specification.
View journal card entries for an existing specification
To view posted journal cards for an existing specification, click or tap the icon that shows a total count value that is higher than zero (0) in the Journal Card field beside a specification name in the specifications list table.
![]()
The Journal Card dialog appears. Below the journal card editor is a list of posted journal card entries that you can view.
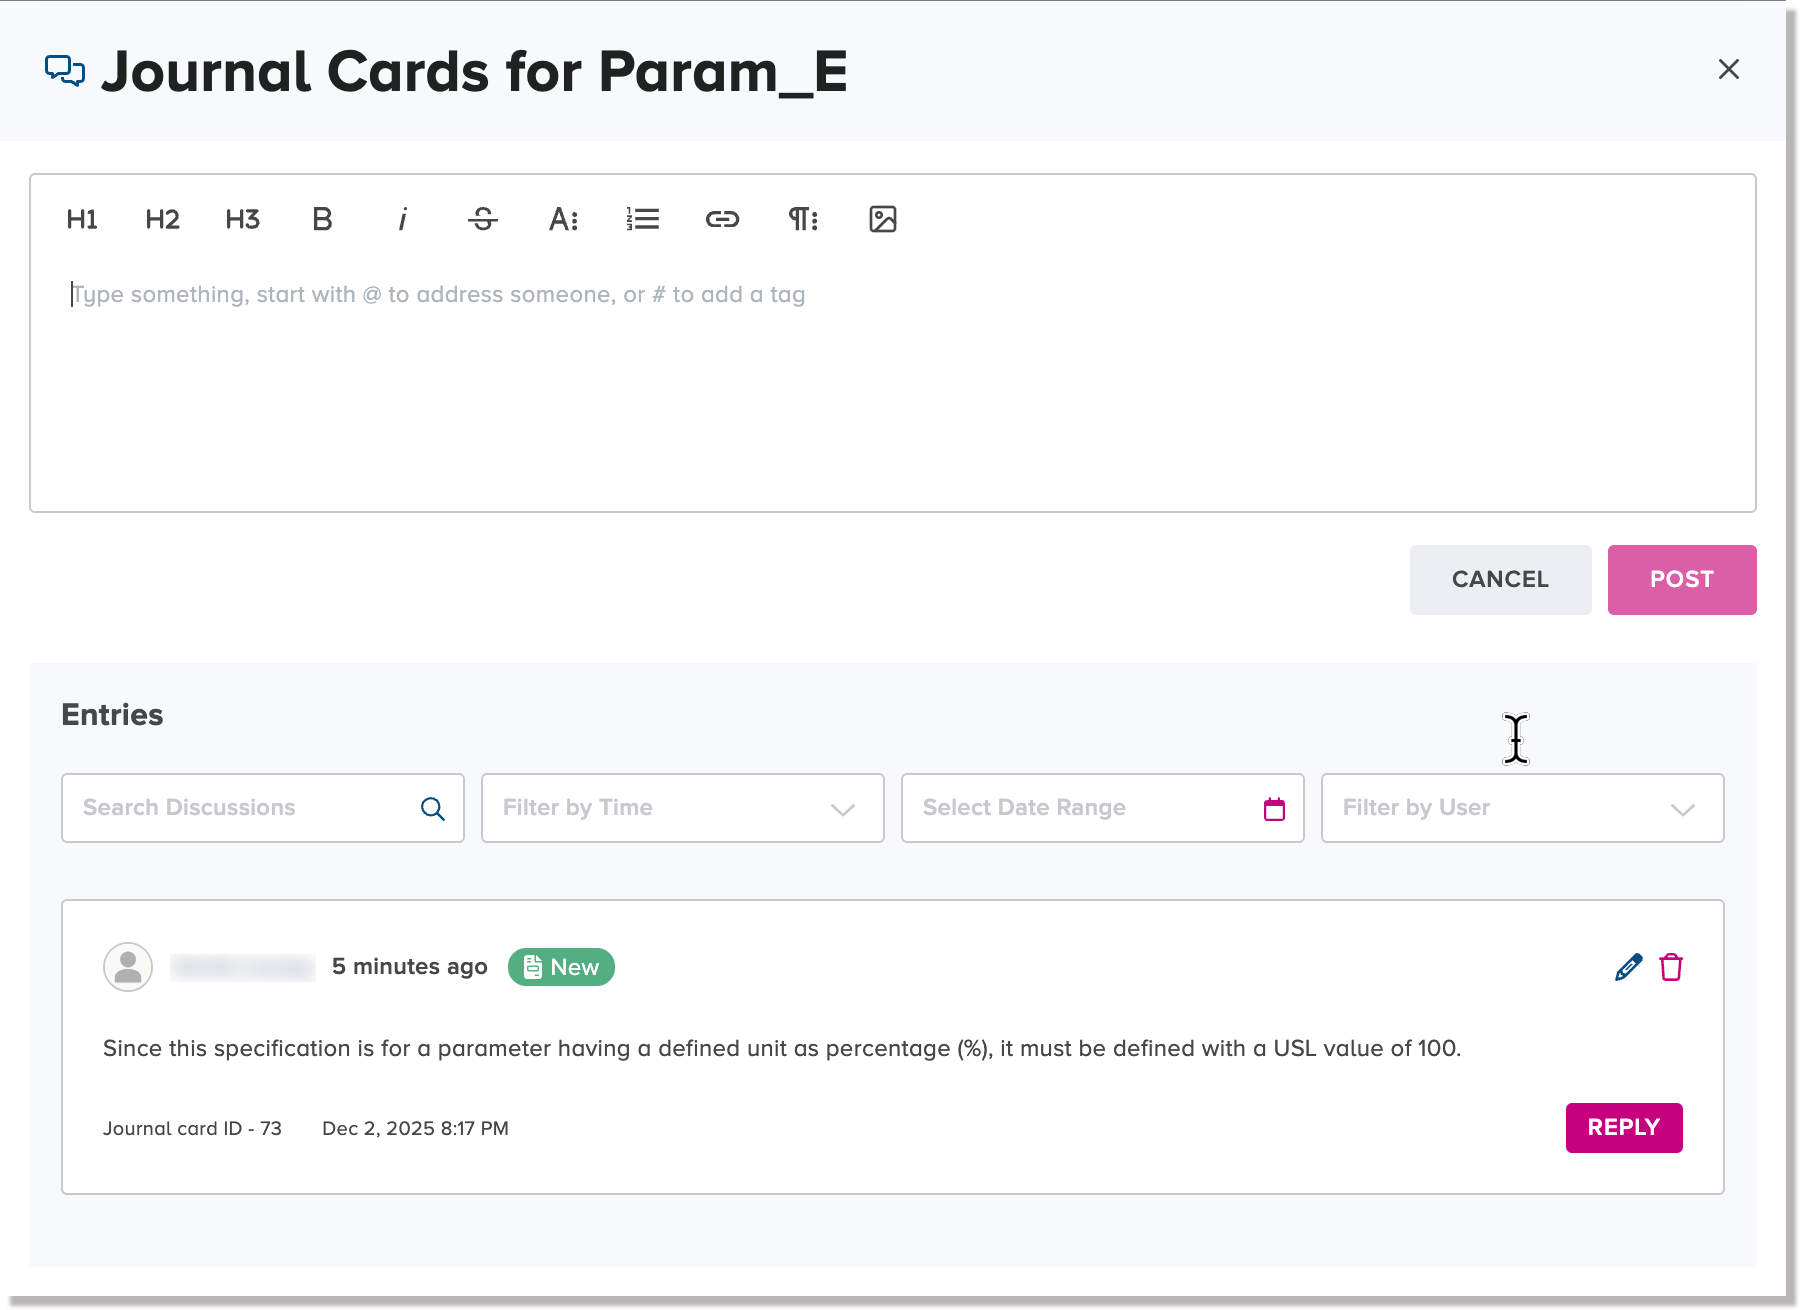
Reply to a journal card entry for an existing specification
To reply to a journal card entry for an existing specification:
-
Click or tap the icon that shows a total count value that is higher than zero (0) in the Journal Card field beside a specification name in the specifications list table.
The Journal Card dialog appears. Below the journal card editor is a list of posted journal card entries that you can view and reply to.
-
Click or tap the Reply button beside a posted journal card in the Journal card dialog.
A new editing pane appears, in which you can type and edit your reply.
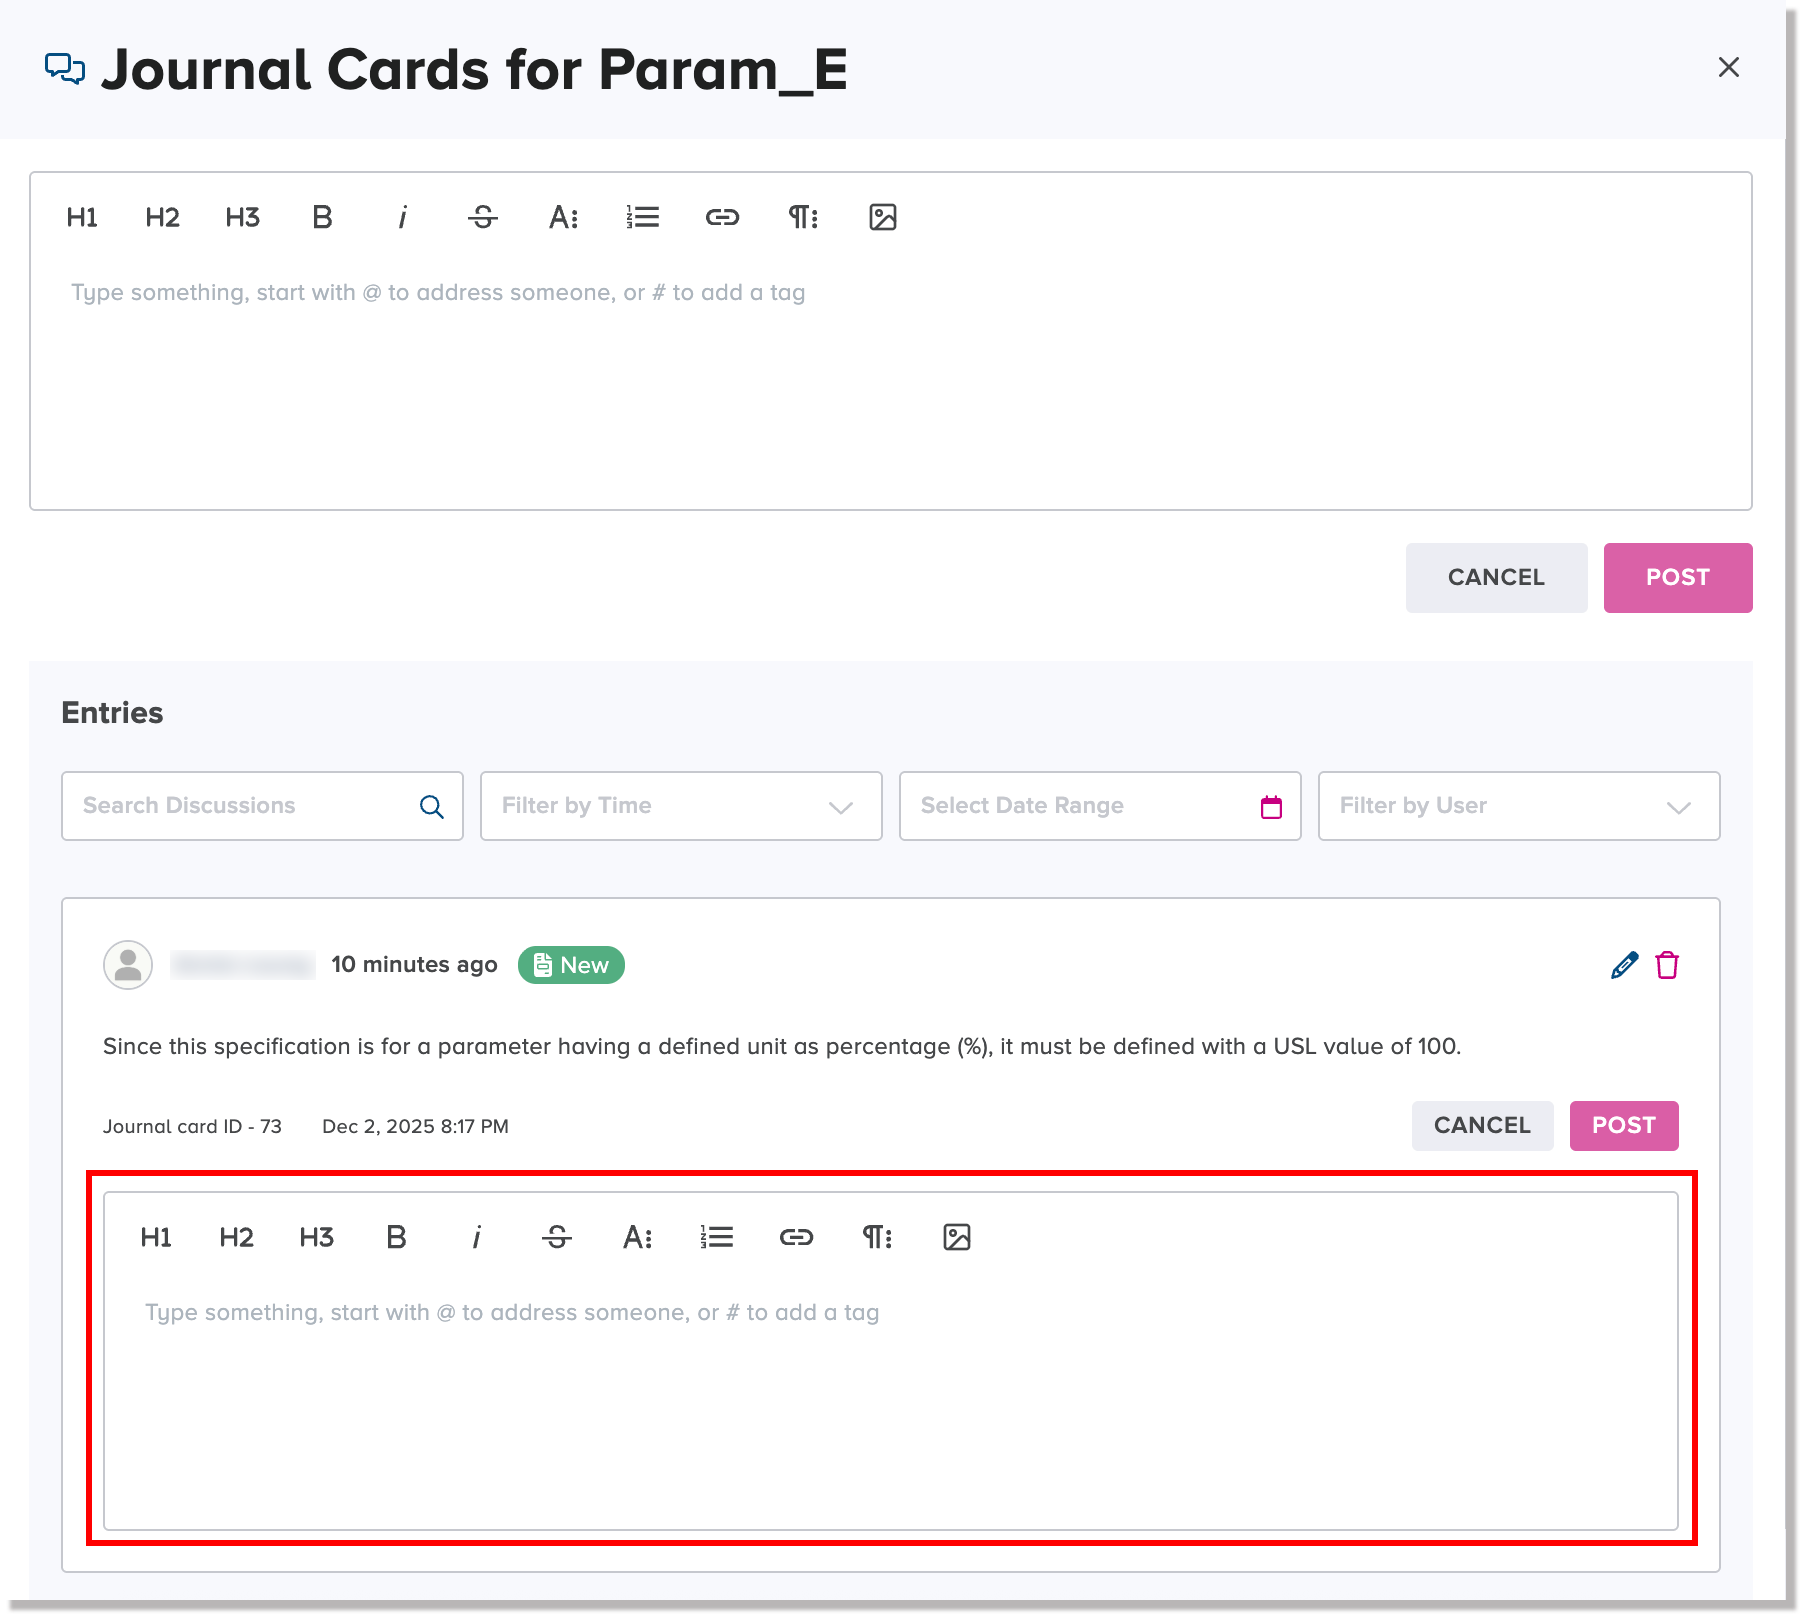
-
To post your reply, click the Post button below the journal card that you are replying to.
Your reply is then posted below the journal card in a discussion thread format.
Delete a specification
If you want to delete a specification, it will become unassociated from the specified parameter and will be unassociated from a defined specification set. All of the metadata for the given specification will also be deleted.
To delete a specification:
-
On the Specifications tab, click or tap the Delete icon
beside the specification name that you want to delete. The Delete Specification dialog appears.

-
In the case-sensitive input field, type the exact name of the specification and click or tap Delete.
The web client will display a confirmation message for the deleted specification.
Change the display configuration of the specifications list table
The specifications list table on the Specifications tab displays all of the supported columns of metadata for specifications by default.
The specifications list table features a menu icon ![]() that contains a menu option for changing the display configuration. You can show or hide columns for the specifications list table, as you prefer.
that contains a menu option for changing the display configuration. You can show or hide columns for the specifications list table, as you prefer.
![]()
Show or hide columns in the specifications list table
To show or hide columns in the specifications list table:
-
Click the menu icon at the top right of the specifications list table and select the Show, hide and sort columns option.
The Show, hide and sort columns dialog appears. The default settings are that all of the columns are selected to be shown.
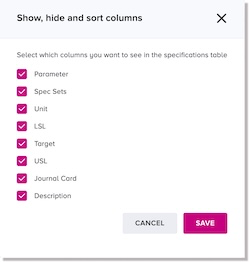
-
To hide any of the columns, unselect the corresponding checkbox(es).
-
For any hidden columns having unselected checkboxes that you want to be shown, select the corresponding checkbox(es).
-
Click or tap Save.
The display configuration of the specifications list table is updated according to your selections.