Model management in the JMP add-in
Permissions and access
Minimum role: Lab manager
Overview of fit models saved in JMP data tables
If you have one or more fit models saved in their own columns within JMP data tables, you can upload them to the database where they will be tracked using model version control. CoBaseKRM assigns a unique model ID to each model and metadata for each model are saved, including file name of the data table in which a model resides, model version number,
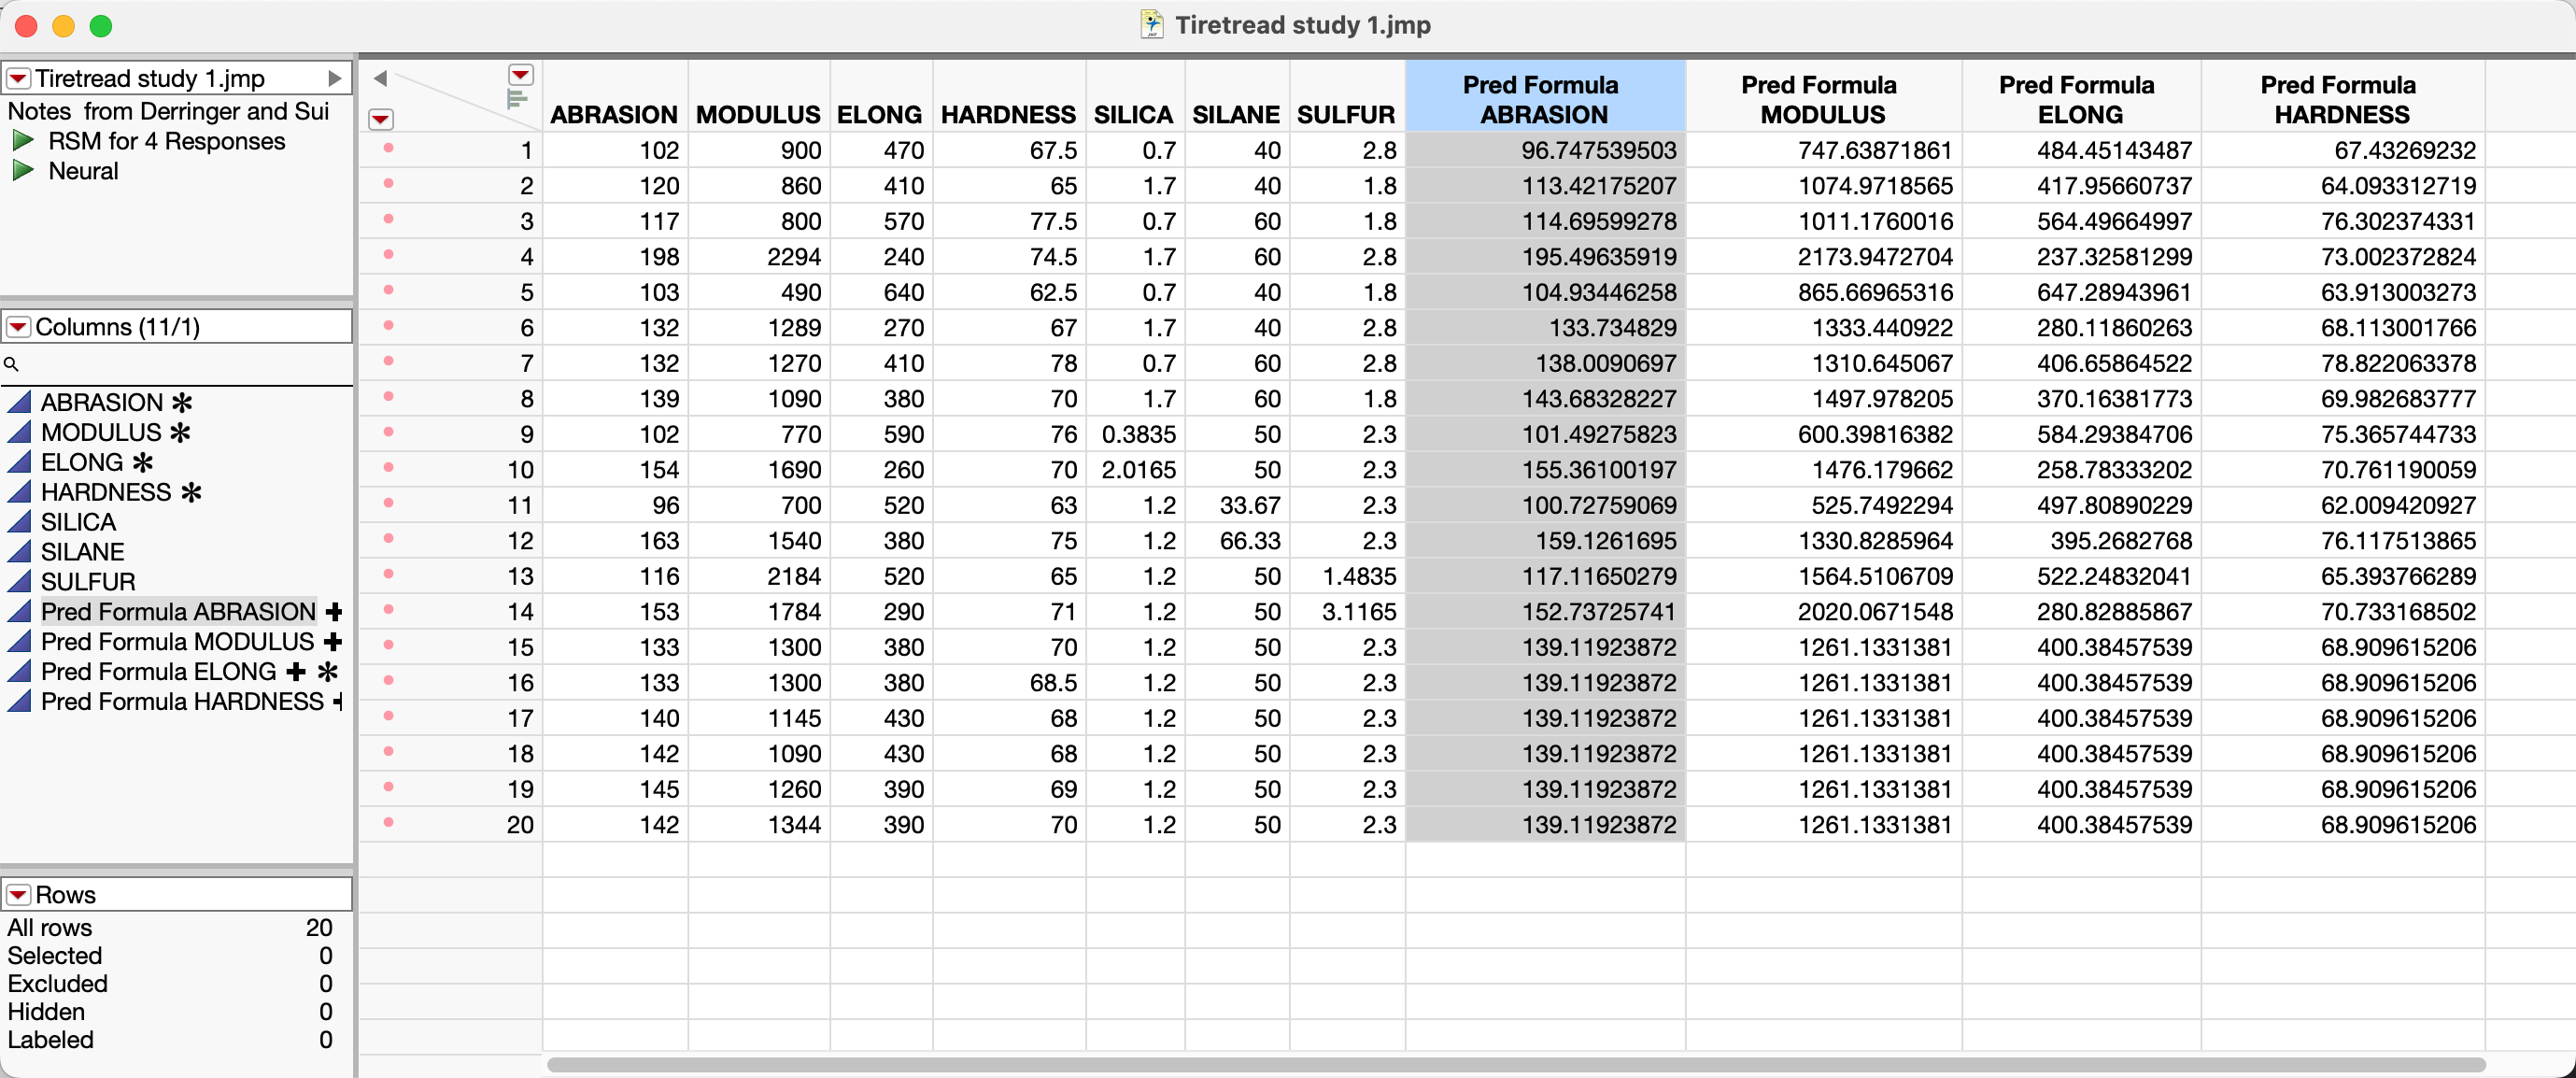
Model columns have the following characteristics:
-
The label of a model column contains the prefix "Pred Formula" in front of the parameter name that was selected as the response.
-
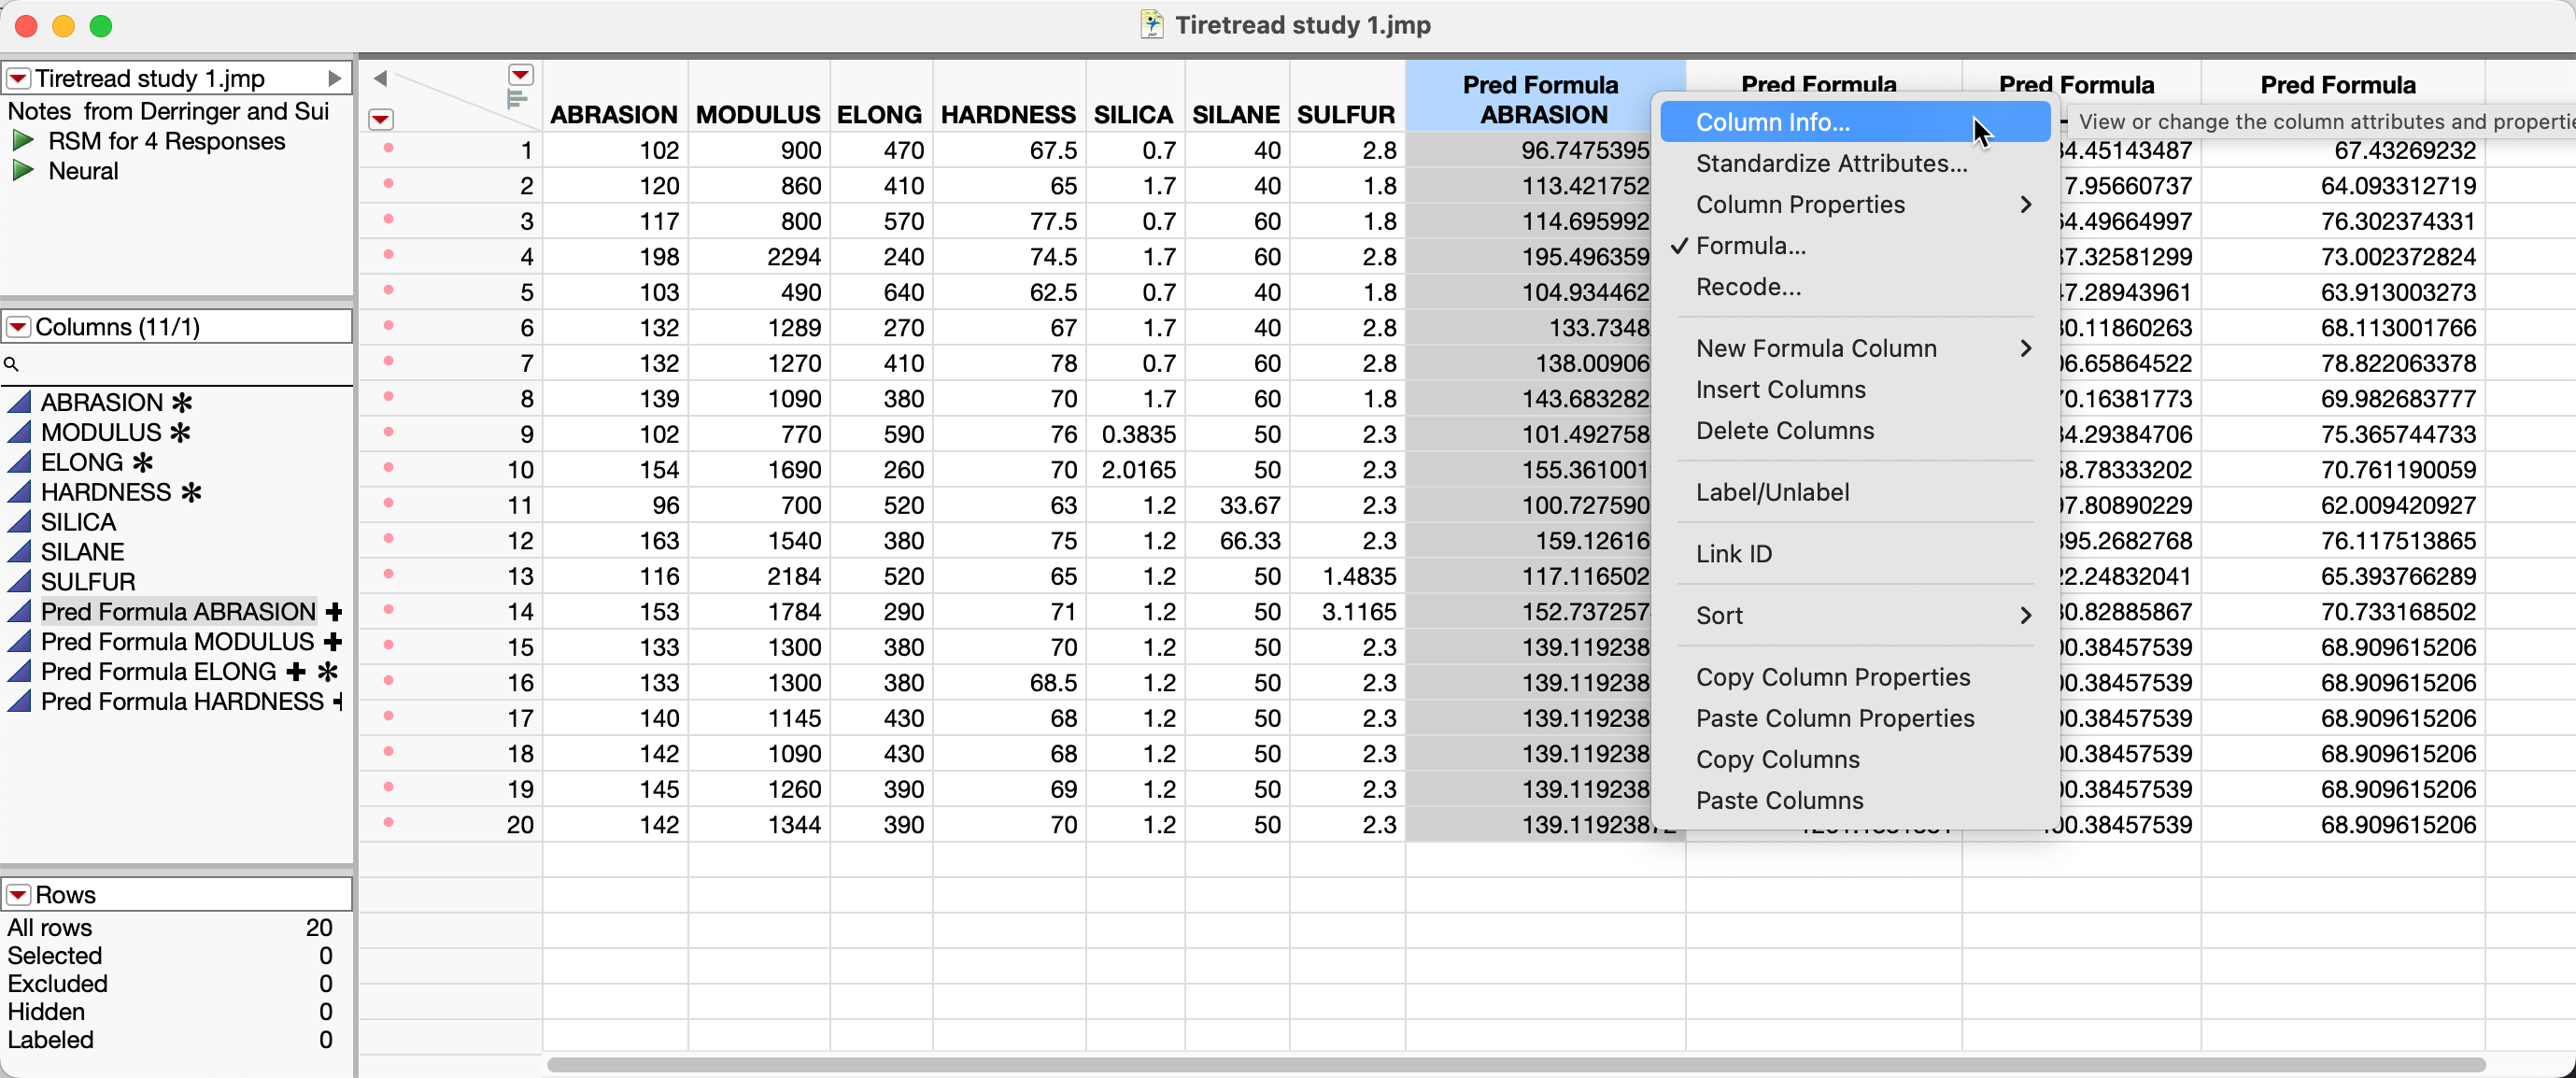
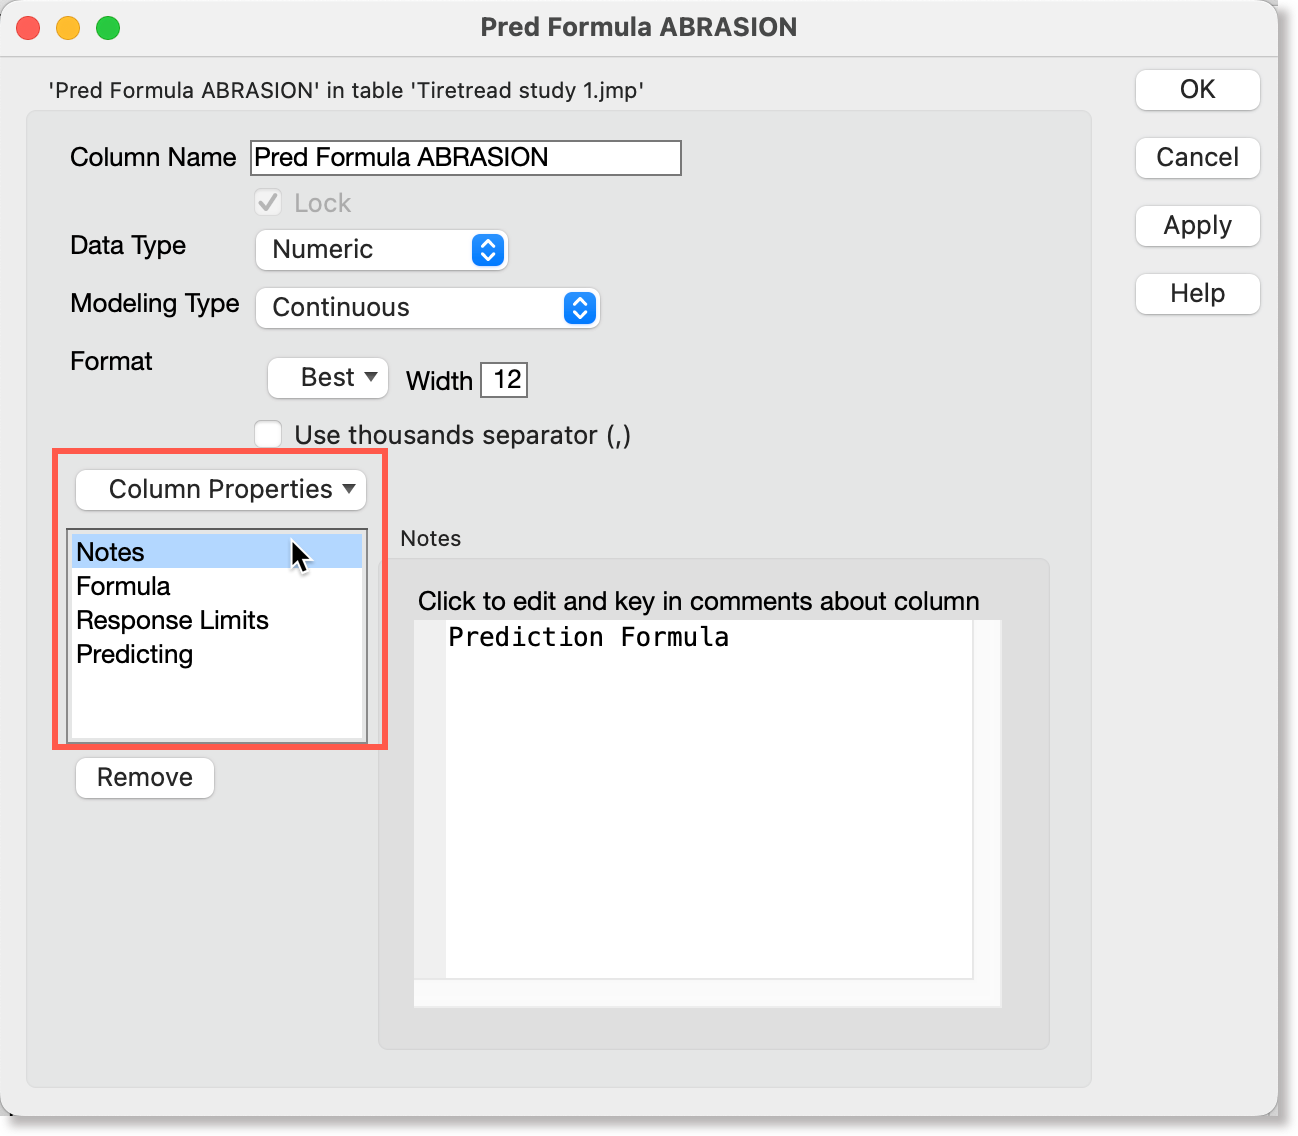
Several column properties are assigned to a model column. To view the column properties, right-click on the column heading of the model column to display a menu and select Column Info.
-
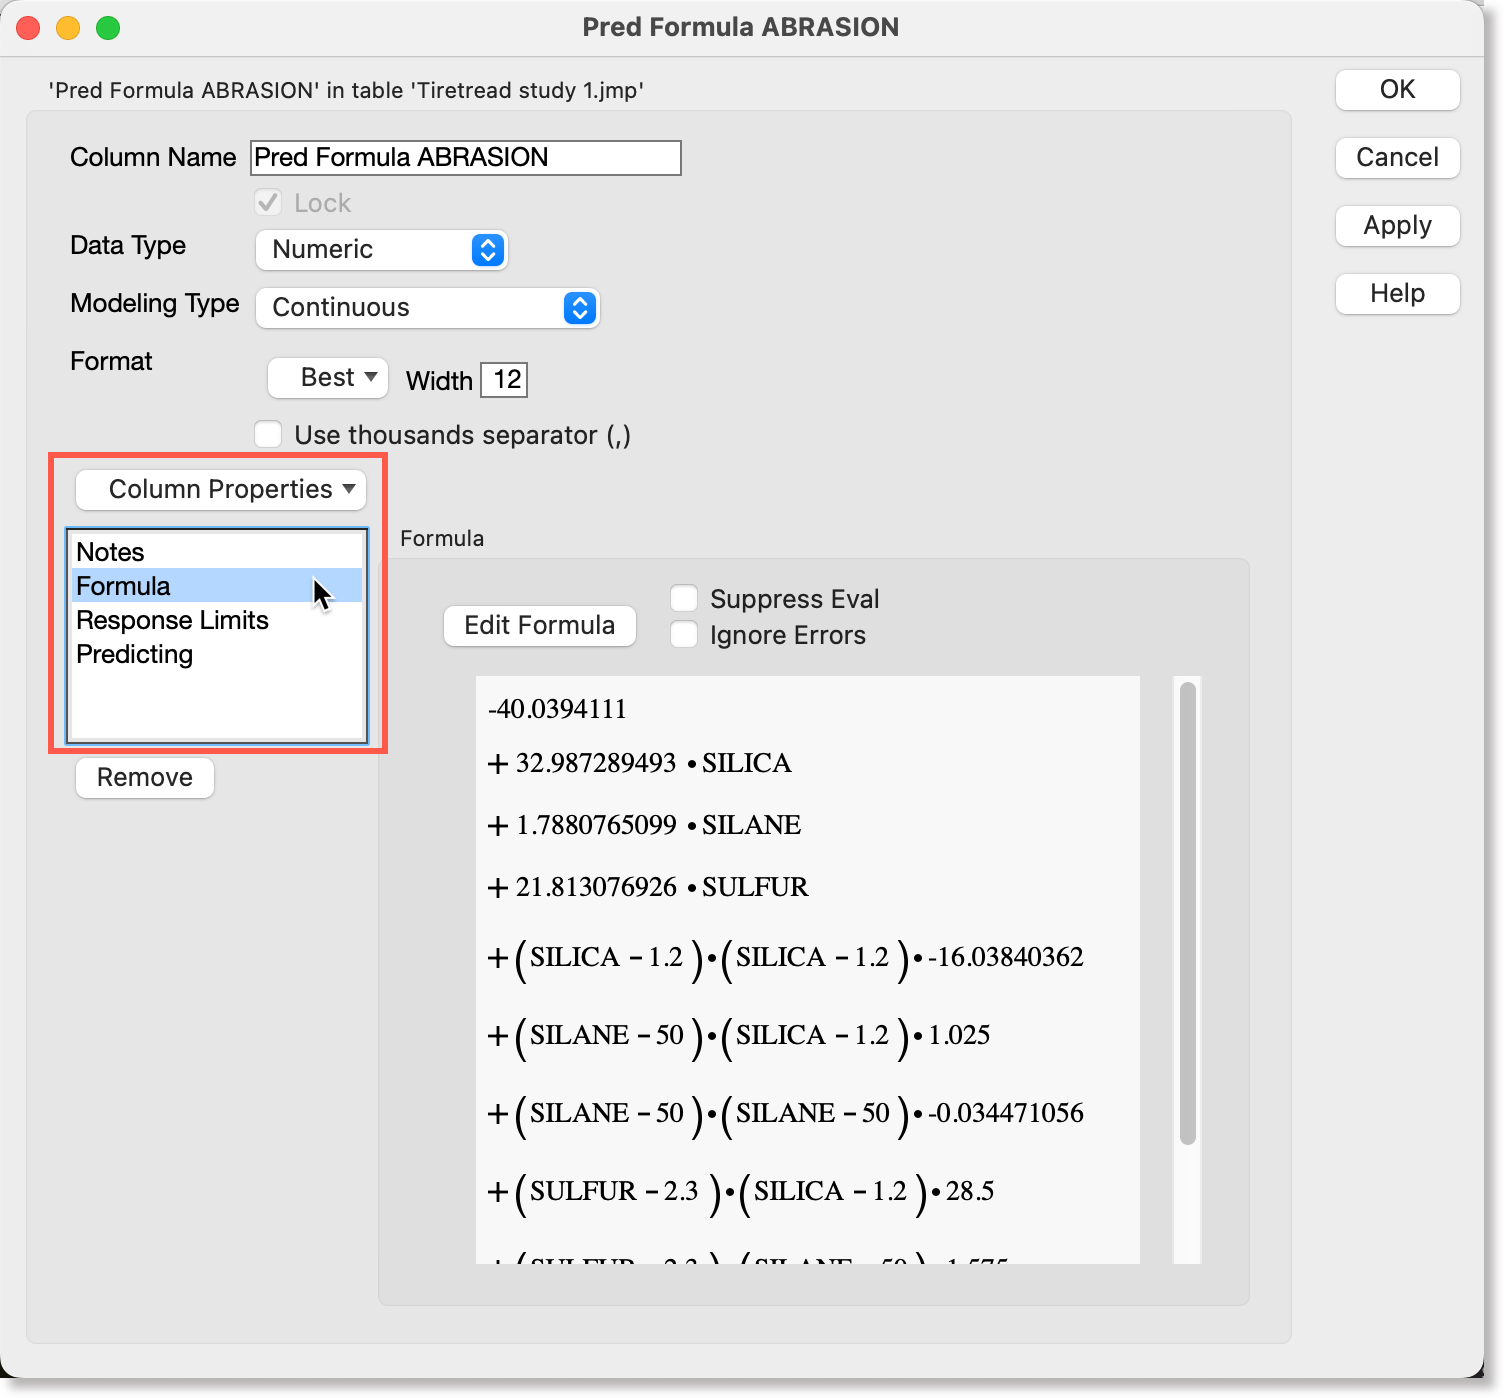
In the column properties section, a column property named "Formula" is assigned to a model column and the actual math expression is saved as the property's value.
In the Column Properties section of the dialog, select the Formula property to view the math expression saved as the property value.
-
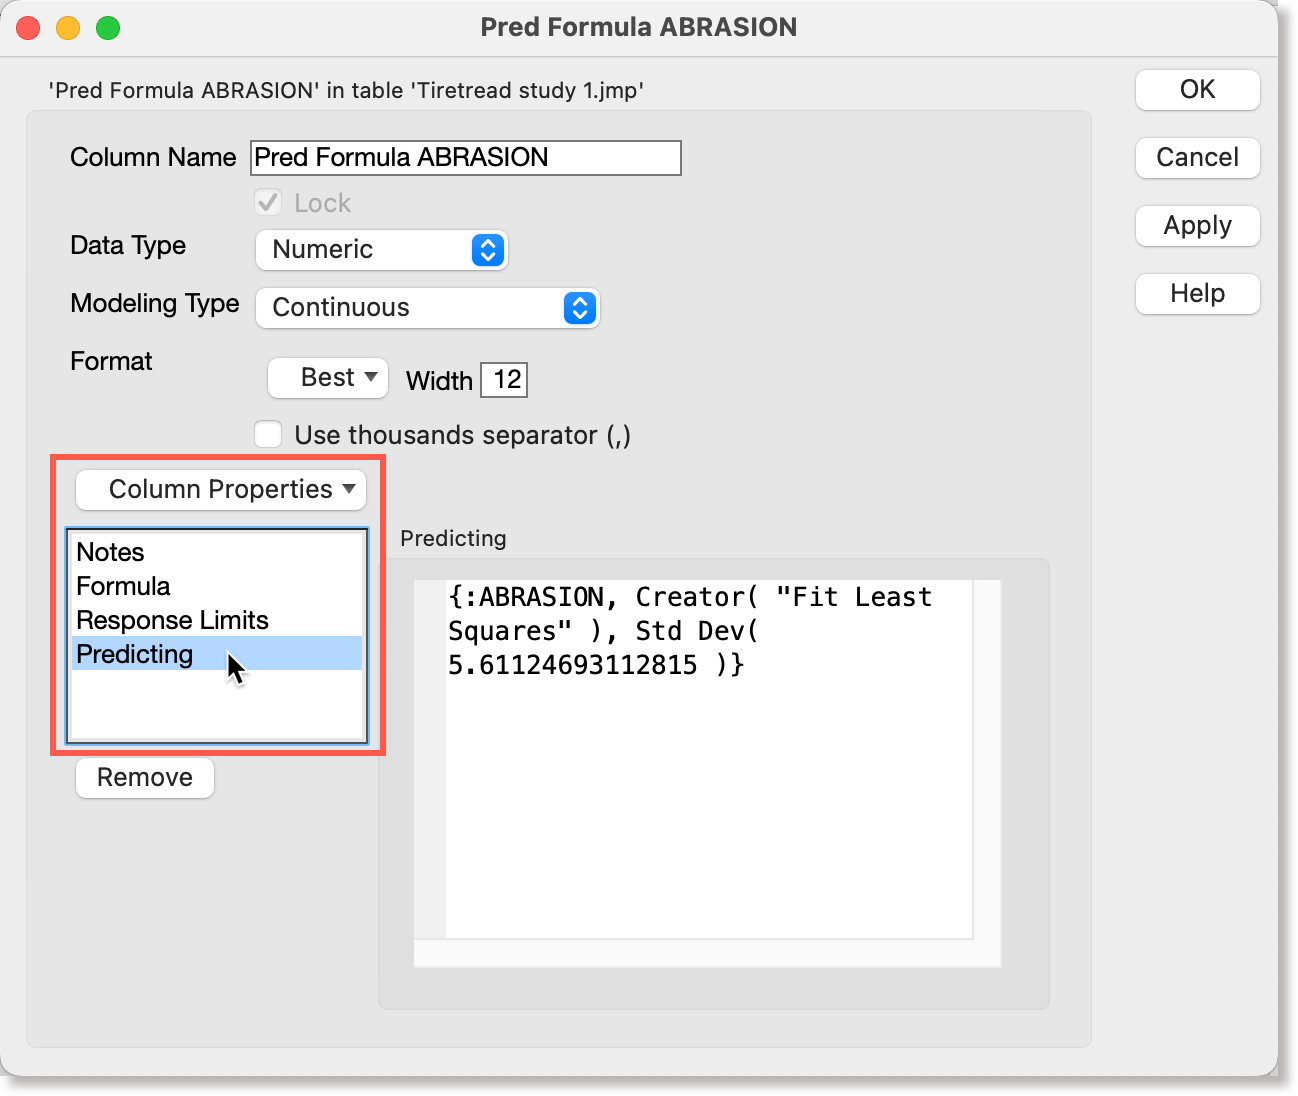
A column property named "Predicting" is assigned to a model column.
-
A column property named "Notes" has the value "Predicting Formula"
-
Prepare models for upload
To prepare and upload a new model in a data table to the database:
- Follow the steps in the following sections on the Upload files to the database.
The JMP add-in displays the parameters in the data table, as well as the model information in a accordion panel that is collapsed by default.
-
To view the model information, click the right arrow icon on the left side of the accordion panel to expand it.

When you have expanded the accordion panel containing the model information, you will see that
-
New option button - the given model is considered new and is assigned a model ID and an initial version number of 1.
-
Update option button - the add-in looks for the same model name in the database, upversions the model version number, and designates this version as the latest version of the model.
-
Apply option button - the add-in applies the given model to the current data set
-
Include toggle button - when turned on, the model is included in an upload and is tracked by version control. When turned off, the model is excluded from an upload and is not tracked by version control.
The panel box for a model also displays tabs of the following summary information:
- The Plots tab displays a "parameter vs model" plot to visualize how close a fit the data values are to the model.

-
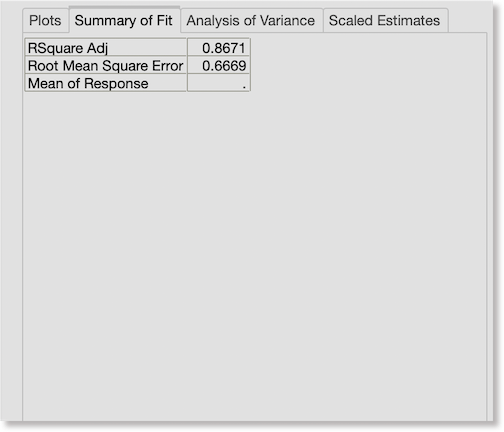
The Summary of Fit tab displays a summary table of the R-squared adjusted value, the Root Mean Square Error value, and the Mean of Response value.
-
Assign tags to models to be uploaded
It is highly recommended that you assign one or more tags to models before you upload them so that they will be searchable.
To assign tags to models to be uploaded:
-
In the Tag Type field, select a tag type to filter the list of tags by a certain group.
-
In the Tag field, select a tag name.
-
Click the Add button to add the tag name to the selected tags list.
-
To assign more tags, repeat steps 1 to 3.
Note
To remove a tag from the selected tags list, highlight it and click or tag Remove.
To remove all of the tags in the selected tags list, click or tap Remove All.
Add a journal card entry to models to be uploaded
You have the option of adding a journal card entry when you prepare models for an upload, where you define notes or comments about files or other details. Journal card entries are recorded with a username and a date and timestamp in the context of the project activity for which you upload files.
To add a journal card to an upload, type some notes or comments in the Journal Card field.
The defined journal card entry for the files in the upload and in the context of a given project activity will be recorded once the upload has been completed successfully.
-
To complete the upload, click the Upload button.
If you need to make changes to a model that exists in the database, see the section on how to edit an existing model.
Examine models in search results
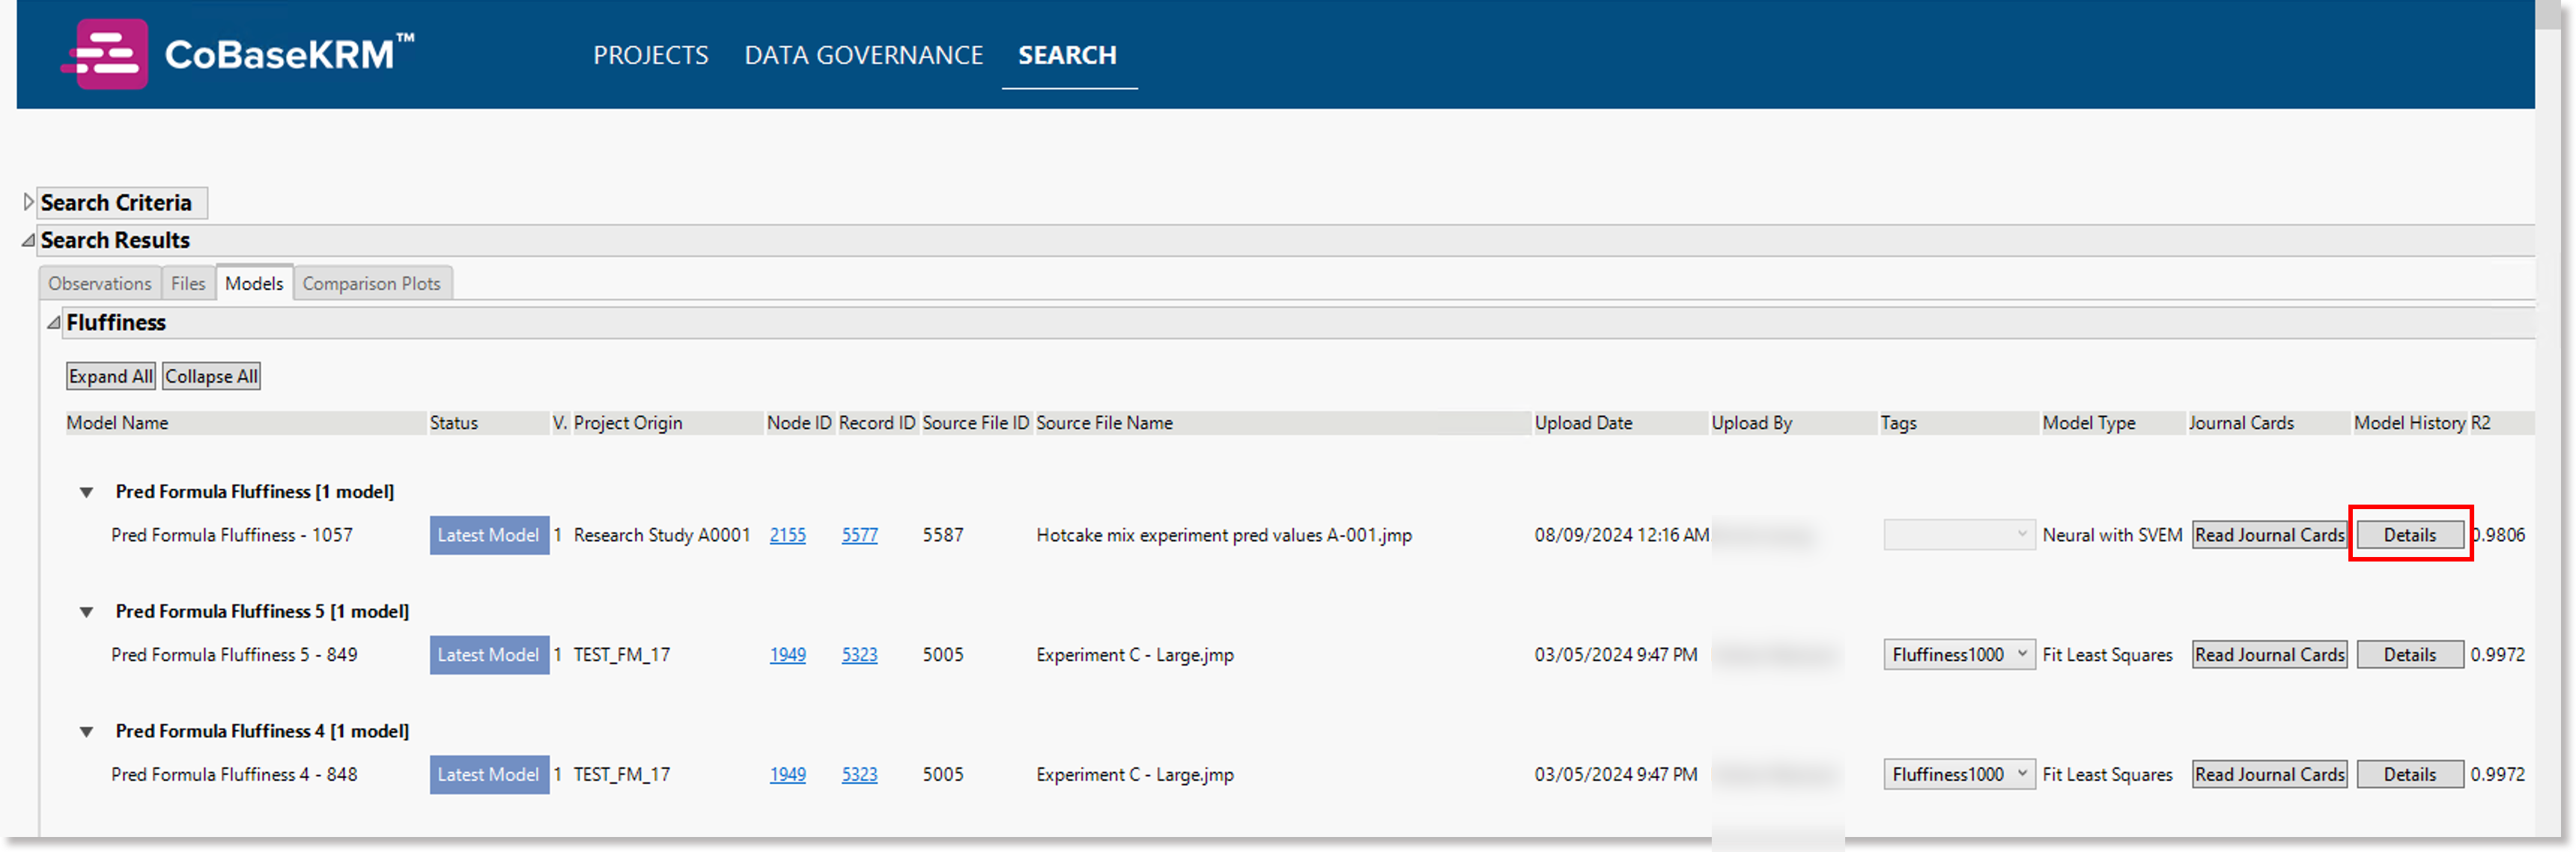
Models that match your specified search filters in the search results are displayed on the Models tab.
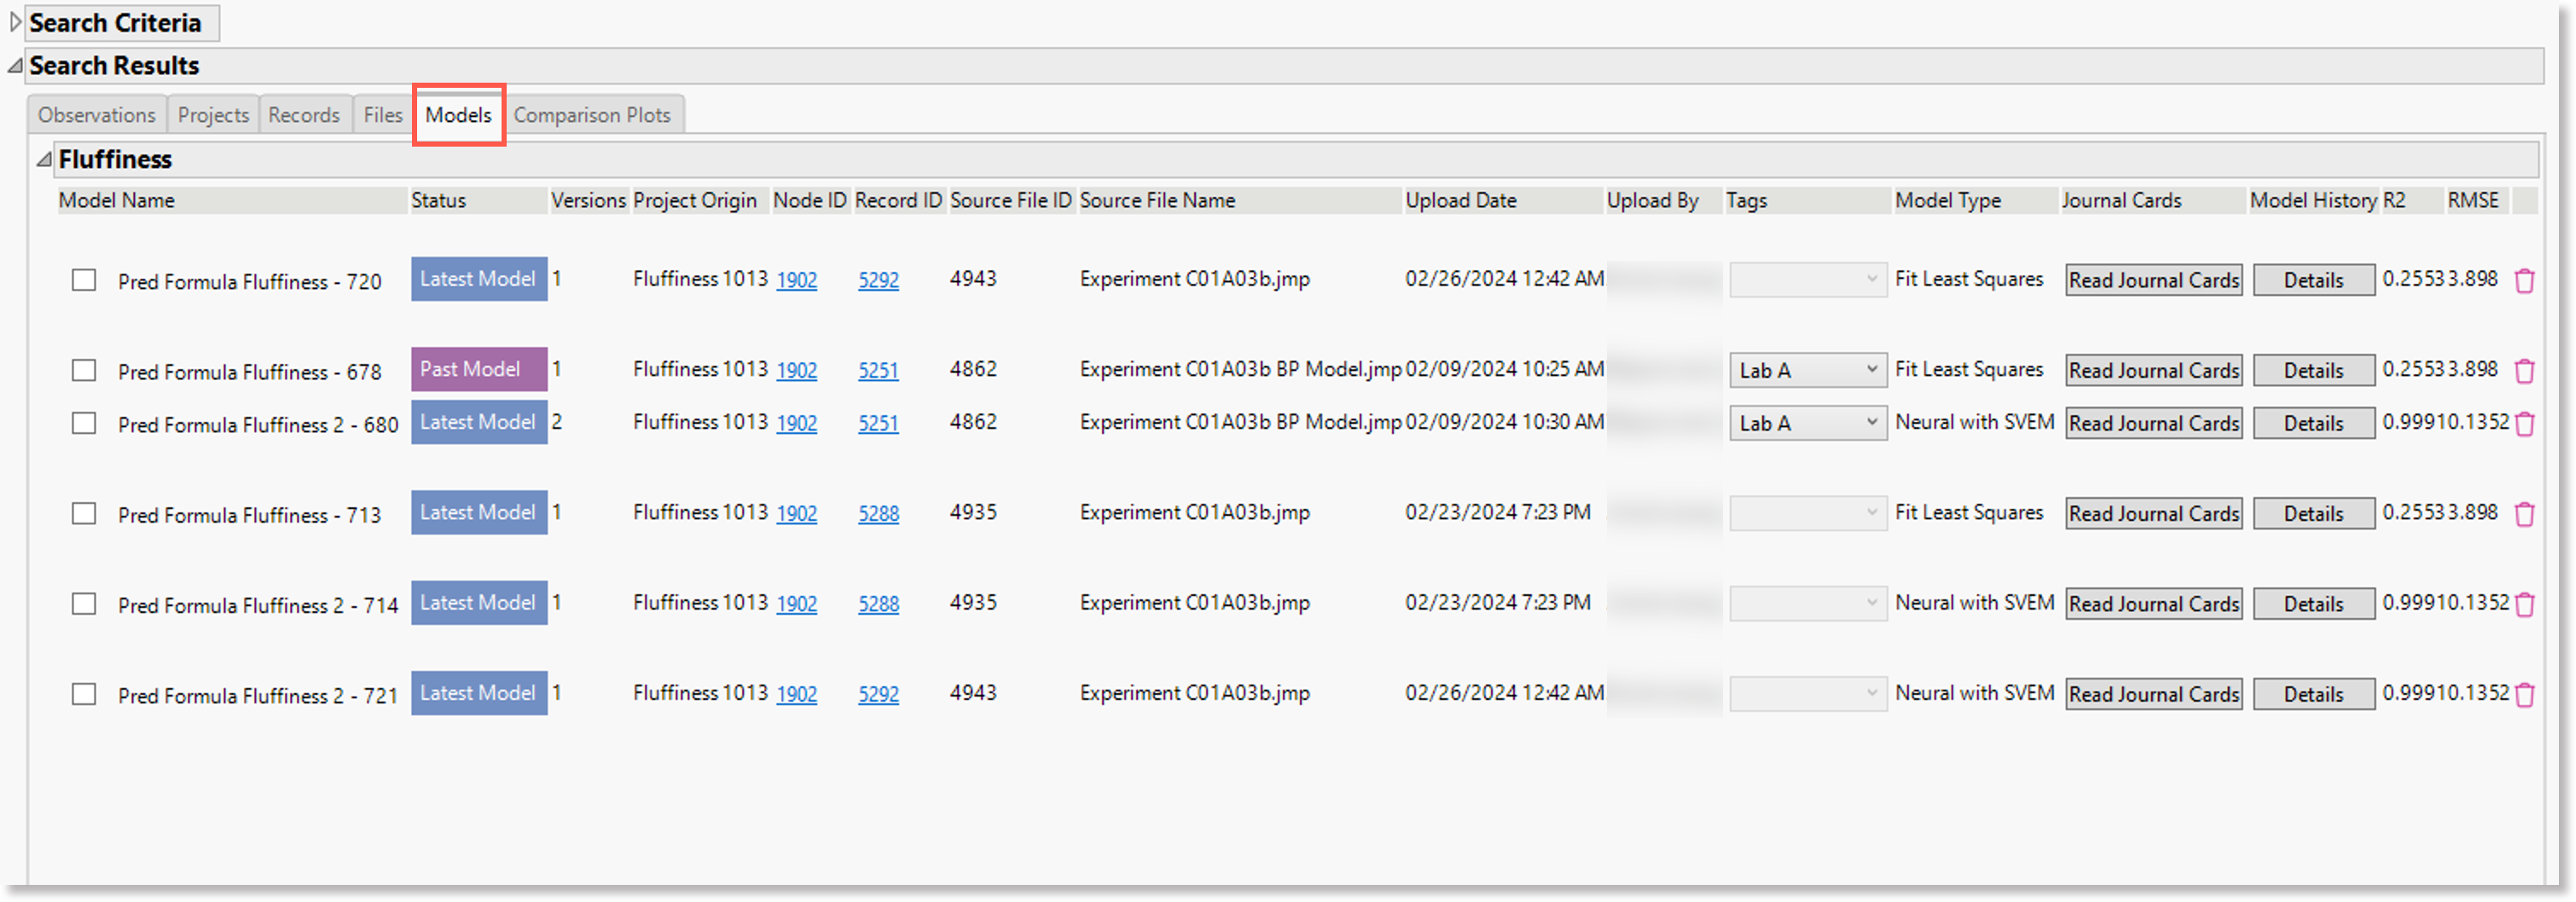
The following details are displayed for each model in the list:
-
Model name - model name and model ID
-
Status - the status indicating the version of the model. The latest, active version of a model is displayed with the "Latest" status. Any earlier, inactive versions of a model are displaye with the "Past" status.
-
V - the version number of the latest version of the file
-
Project Origin - the project that a file belongs to
-
Node ID - hyperlinked node ID number, which navigates to the corresponding node of the related project's network map in the Web client
-
Record ID - hyperlinked record ID number, which navigates to the corresponding record in the Web client
-
Source File ID - the source file ID number
-
Source File Name - the name of the source file
-
Uploaded Date - the date on which a data file was uploaded to the database
-
Uploaded By - the name of the user who performed the initial upload of a data file
-
Tags - the tag name that matches the specified tag filter of your search. If no tag has been assigned to a file, the field is empty.
-
Model Type - the model type
-
Journal Cards - displays a button that opens a separate dialog containing journal cards defined for the model
-
Model History - displays a Details button, which opens a separate dialog containing more details about the model history.
For more information about viewing details of a model's history, see the following subsection, View details of a model's history.
-
R2 - the actual R2 value for the model is displayed
-
RMSE - the actual RMSE value for the model is displayed
-
Remove (trash can icon) button - removes a model panel box from the search results
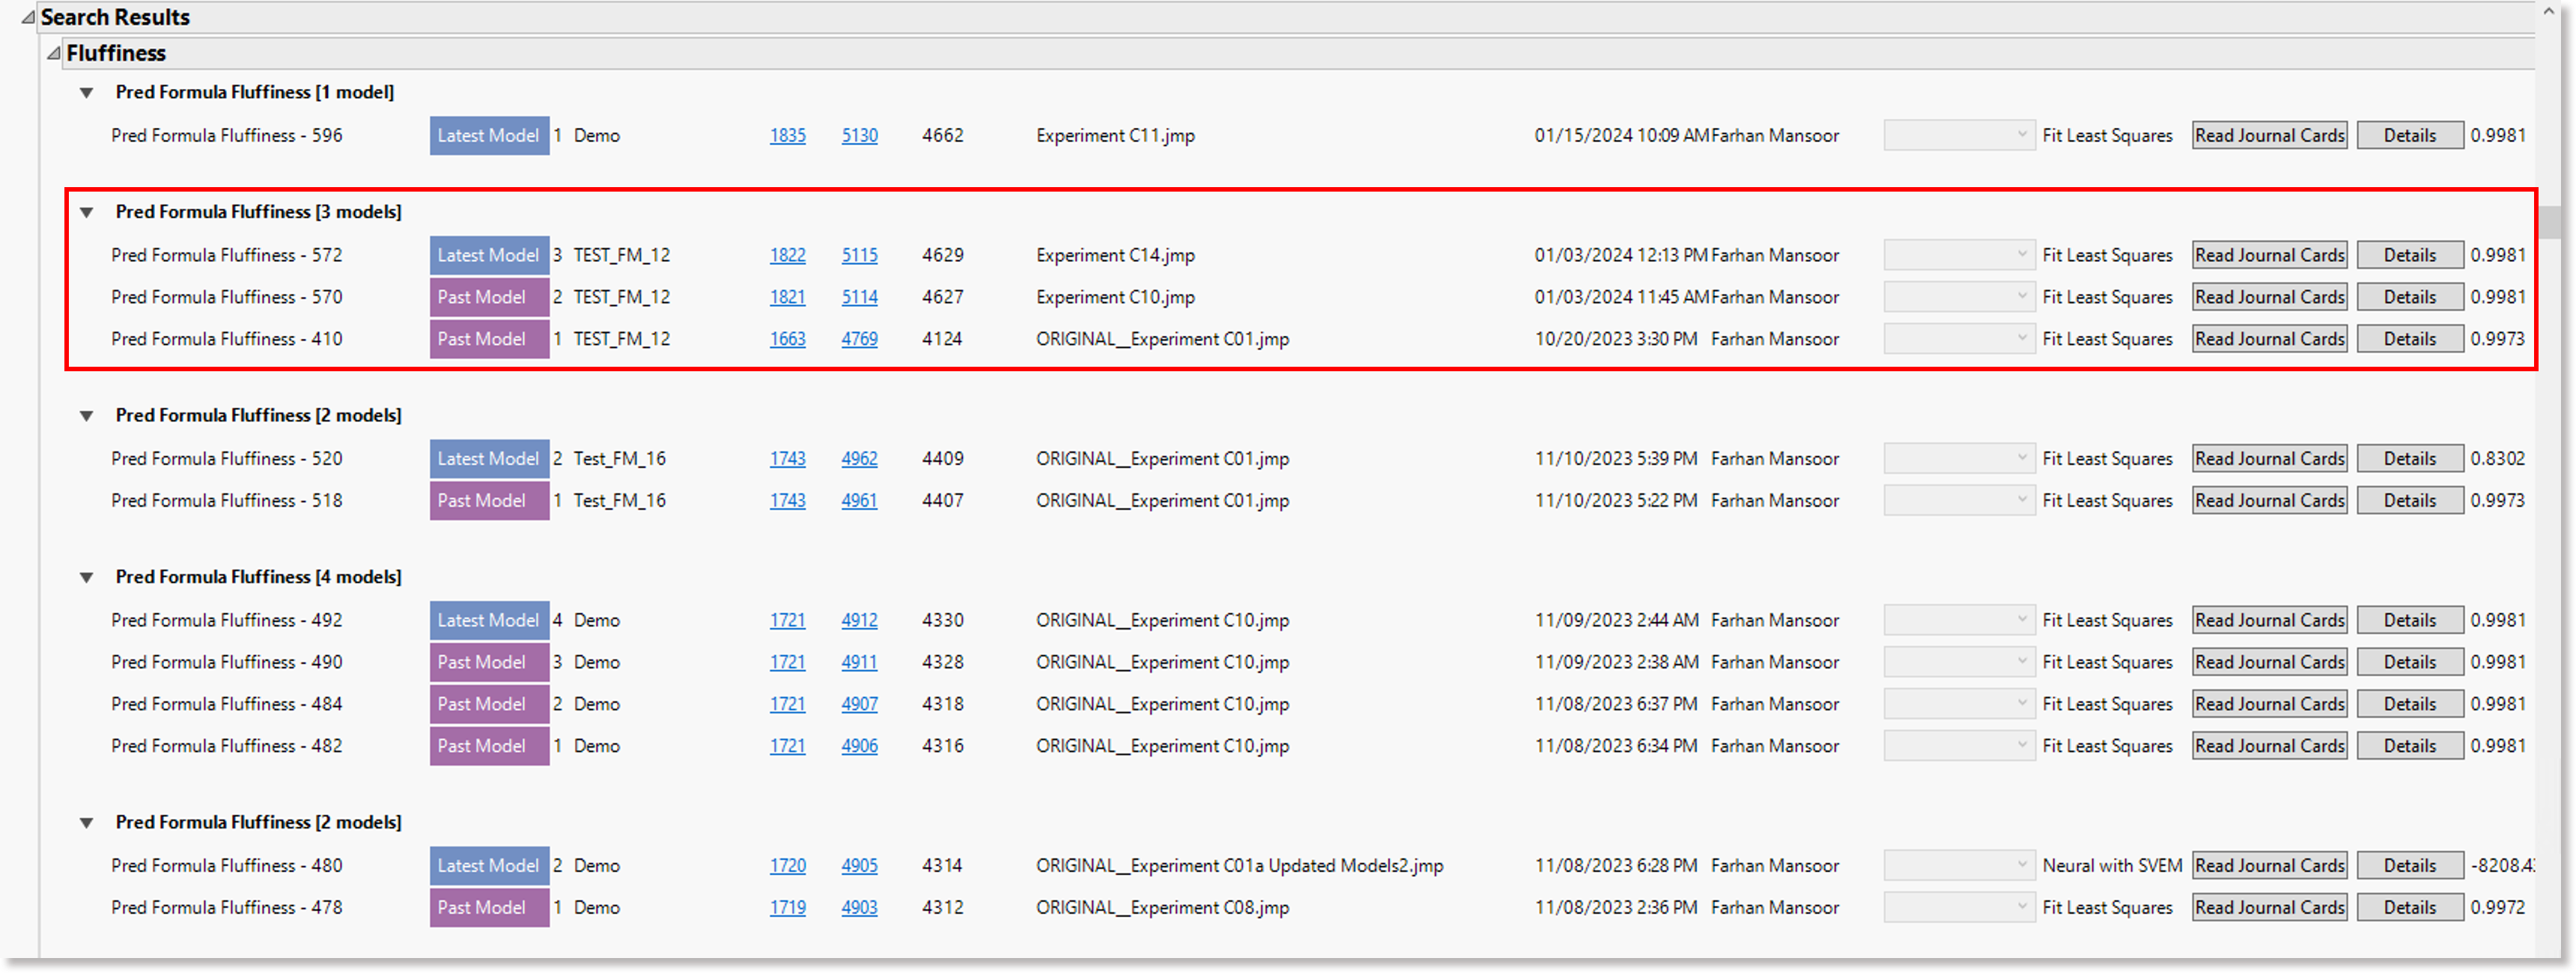
Display grouped versions of a model
If a model in search results has an active version as well as inactive existing versions, the versions are displayed as grouped together. Each model version is indicated as "Latest" or "Past" in the Status column.
Comparison plots for a model
Two types of comparison plots for analysis purposes are generated and organized by the following tabs, based on a set of search results:
-
Parameter Distribution - this tab displays a series of plots showing the distribution of data values by parameter.
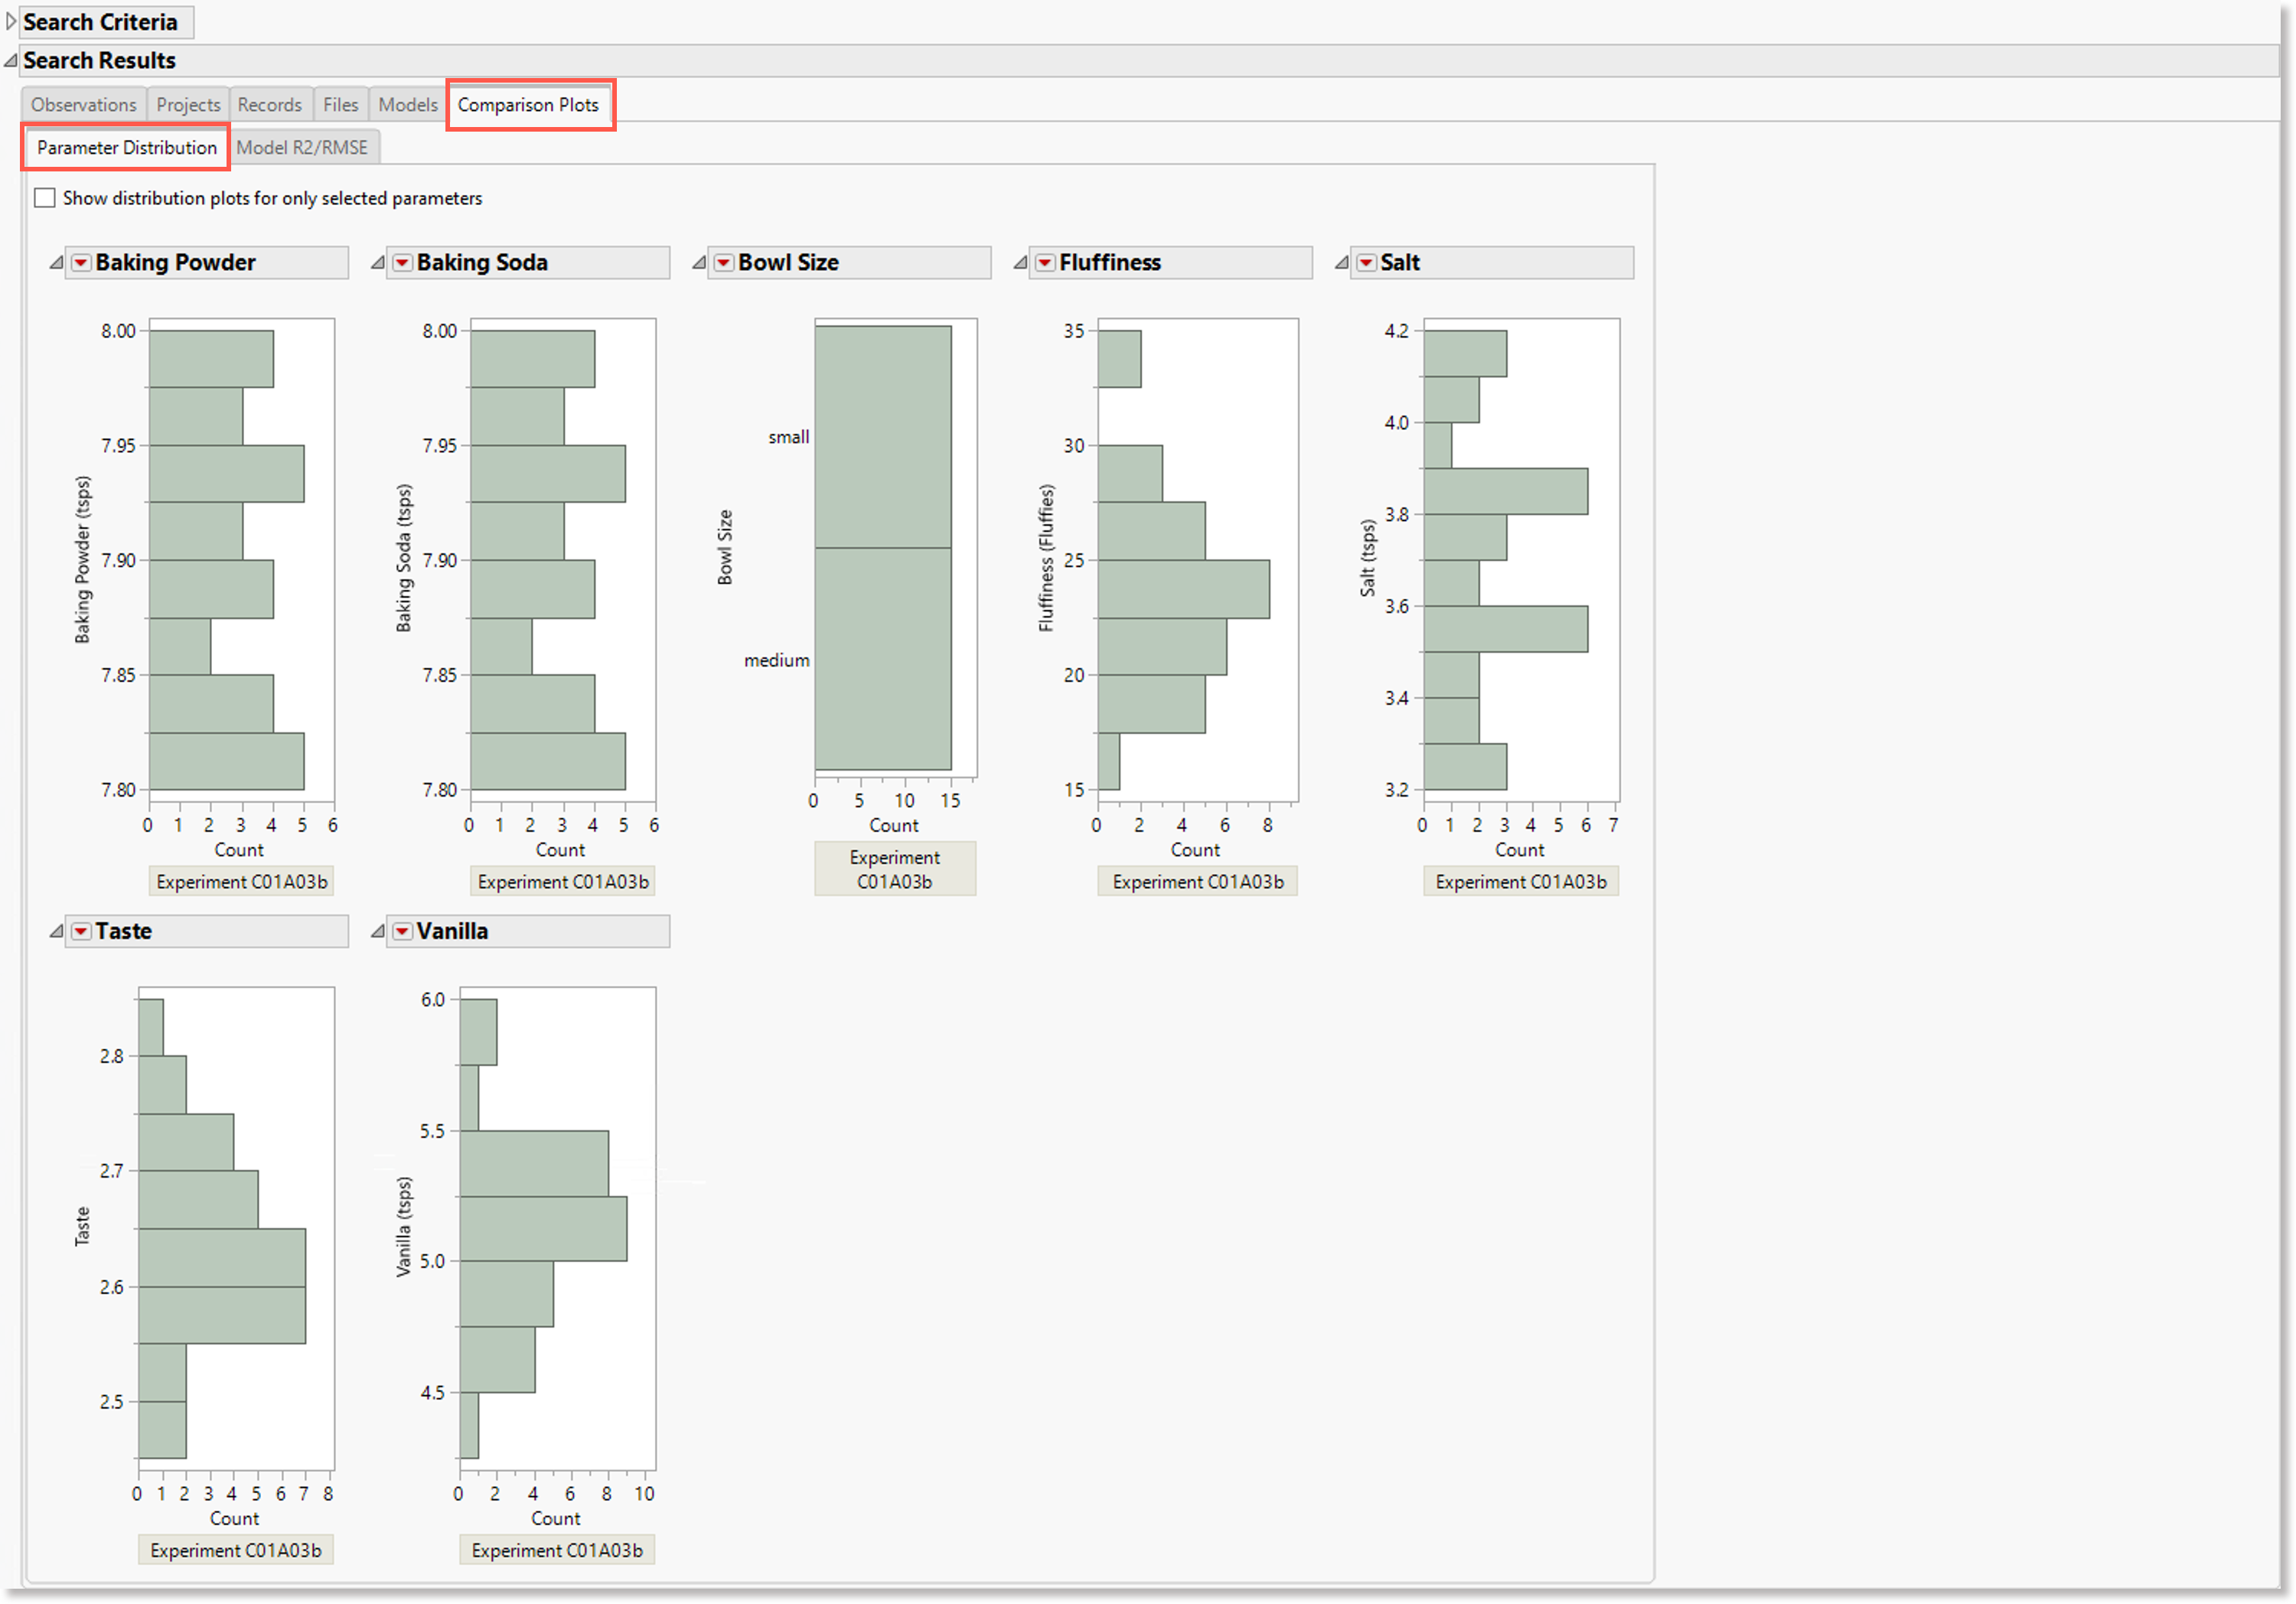
On each plot, the y-axis represents the parameter value and the x-axis represents the count of instances of the parameter value.
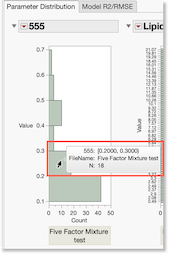
When you hover your cursor over a bar in a plot for a parameter, a tooltip is displayed with a summary of the following information:
-
Parameter name and two values representing ?
-
Name of the data file containing the parameter
-
N value, which is the count of instances of a given parameter value
-
-
Model R2/RMSE - this tab displays a series of plots showing R2/RMSE values for models. If no models are found in the search results, no plots are displayed.
When you hover your cursor over a data point in one of the plots, a tooltip id displayed, containing the row number, model name, and the corresponding R2/RMSE value.
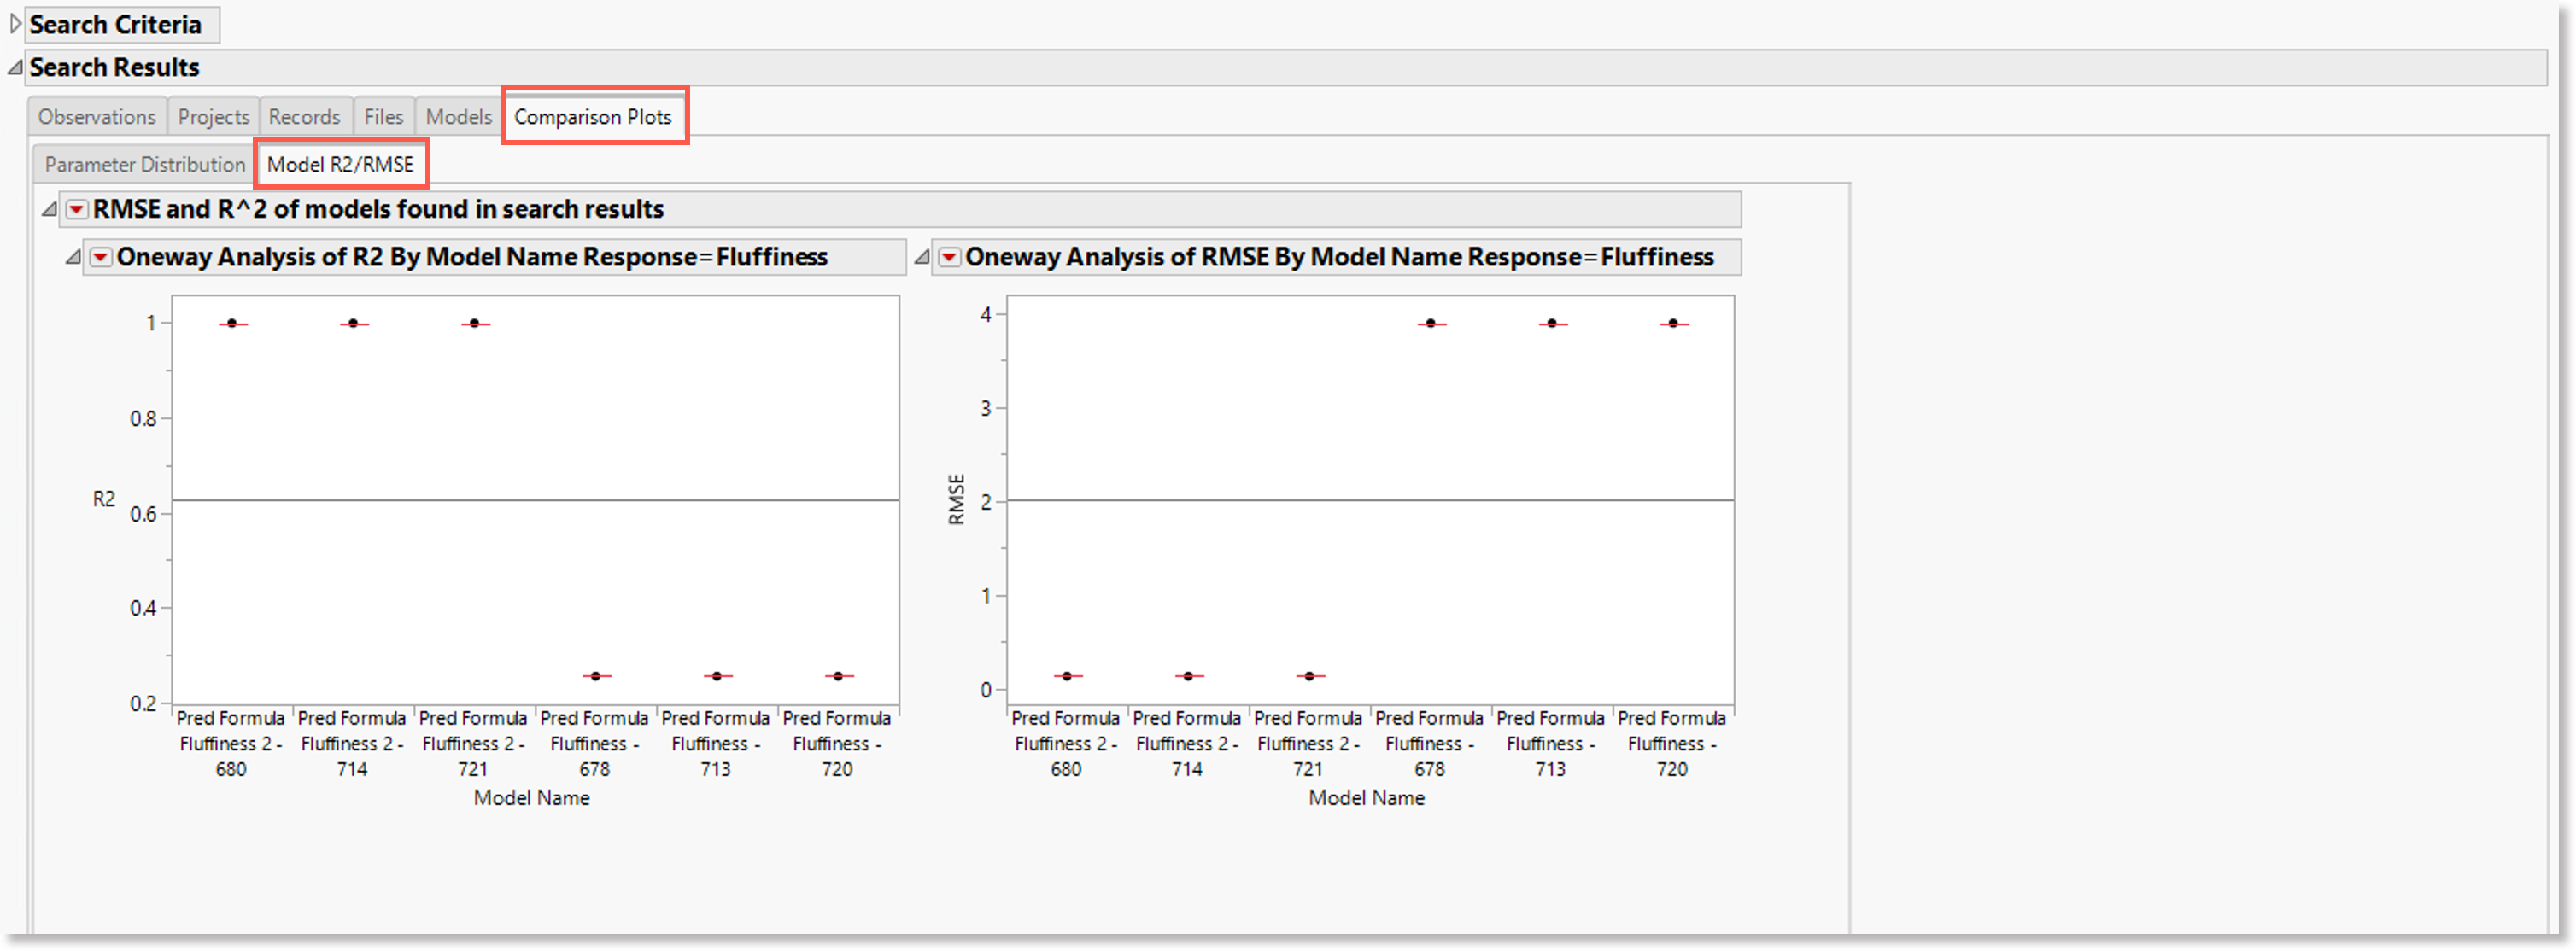
In the R2 and RMSE plots, the x-axis displays the model names in the search results and the y-axis displays the R2 values or RMSE values respectively.
View details of a model's history
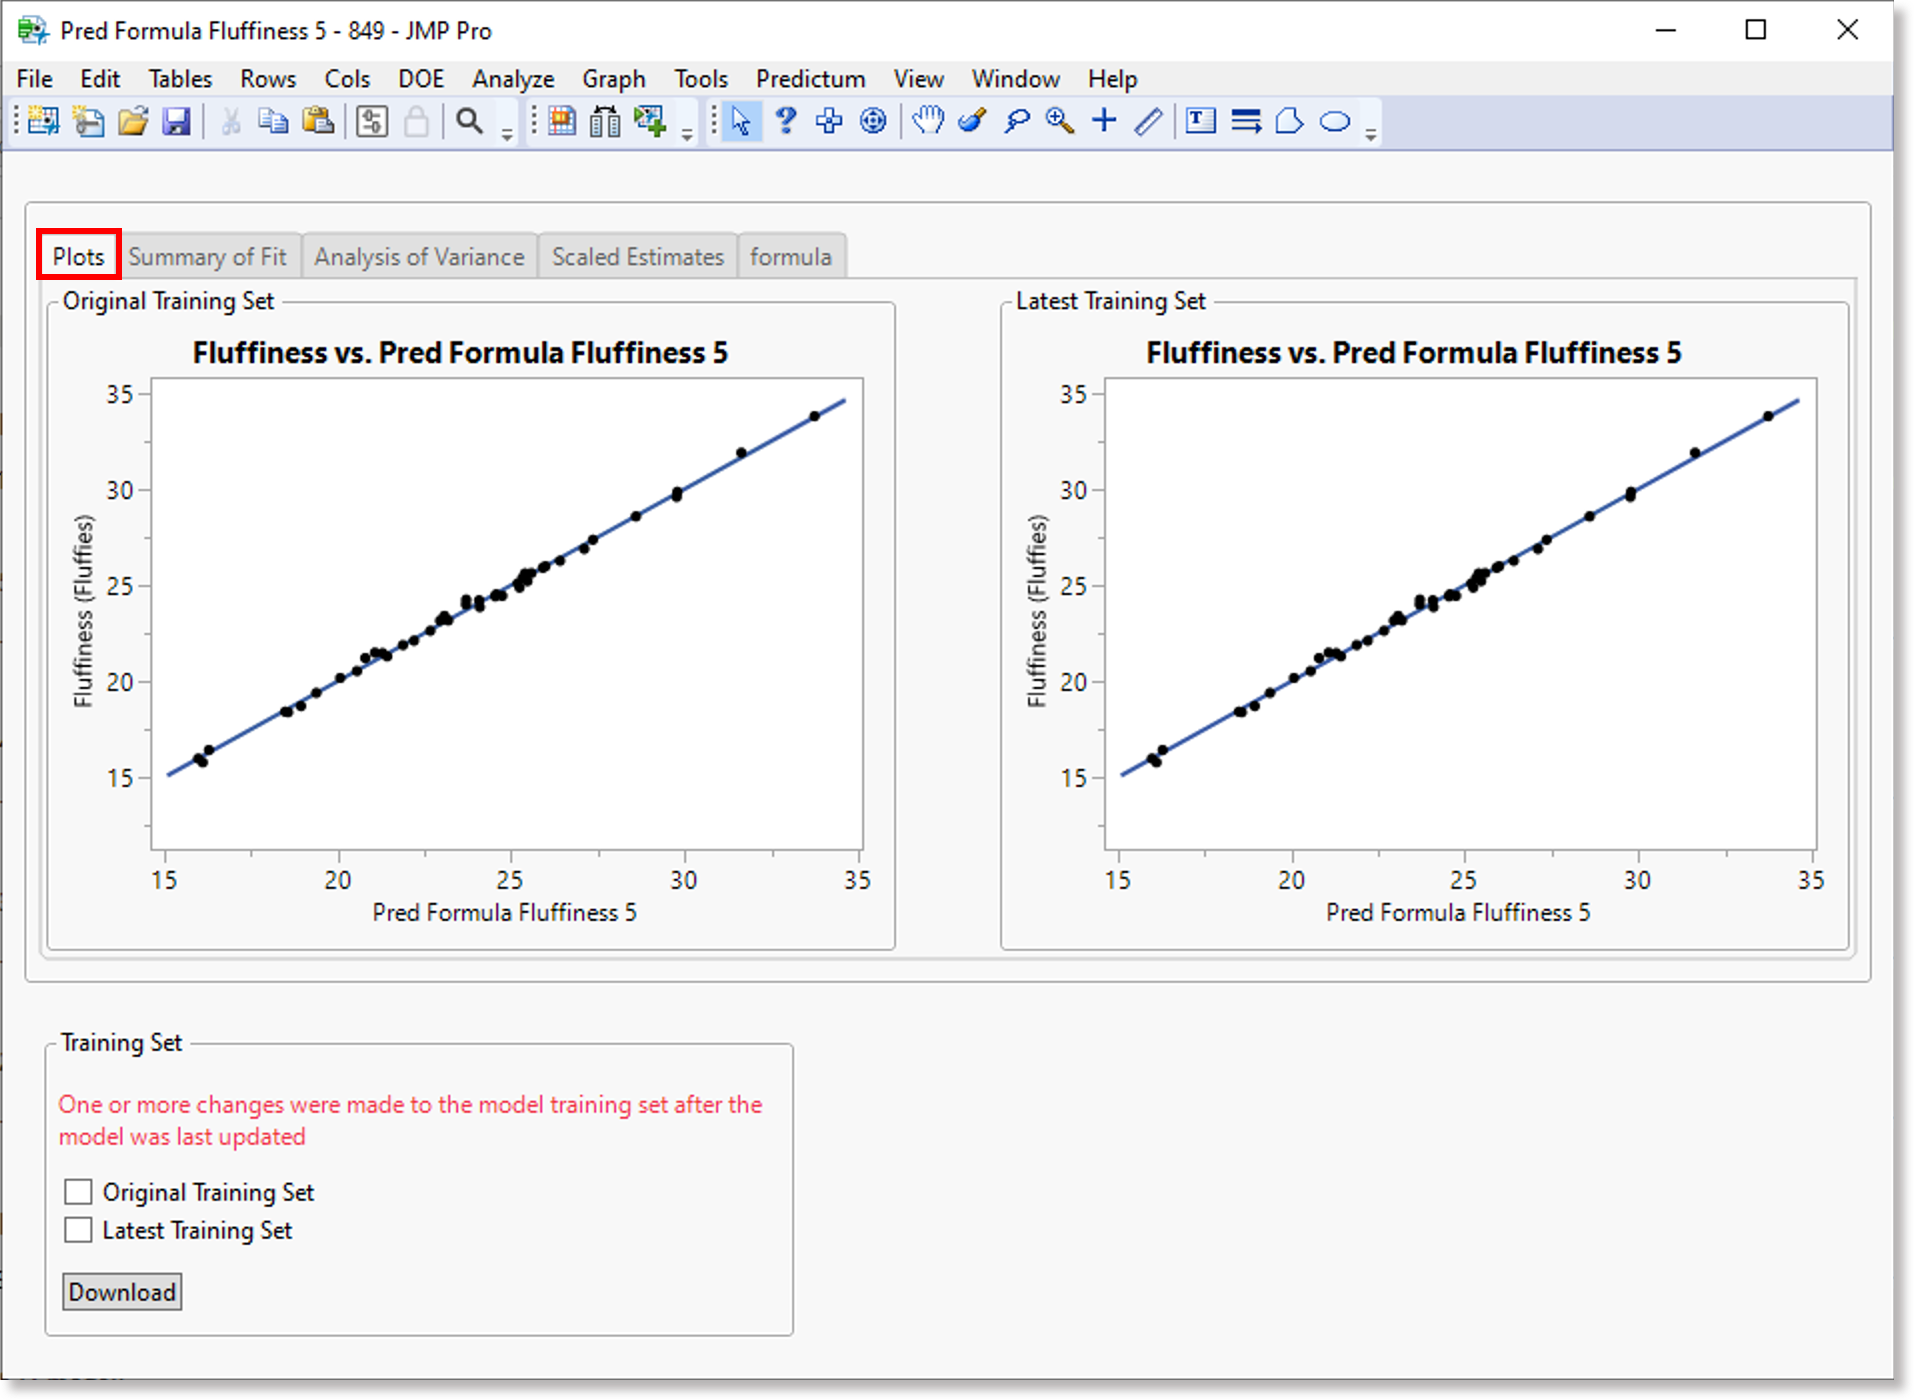
When you click the Details button under a model's history column in a set of search results, the JMP add-in opens a separate window of the model's history, which displays various statistical details on the following tabs:
-
the Plots tab displays an actual by predicted plot of response values for a given model
-
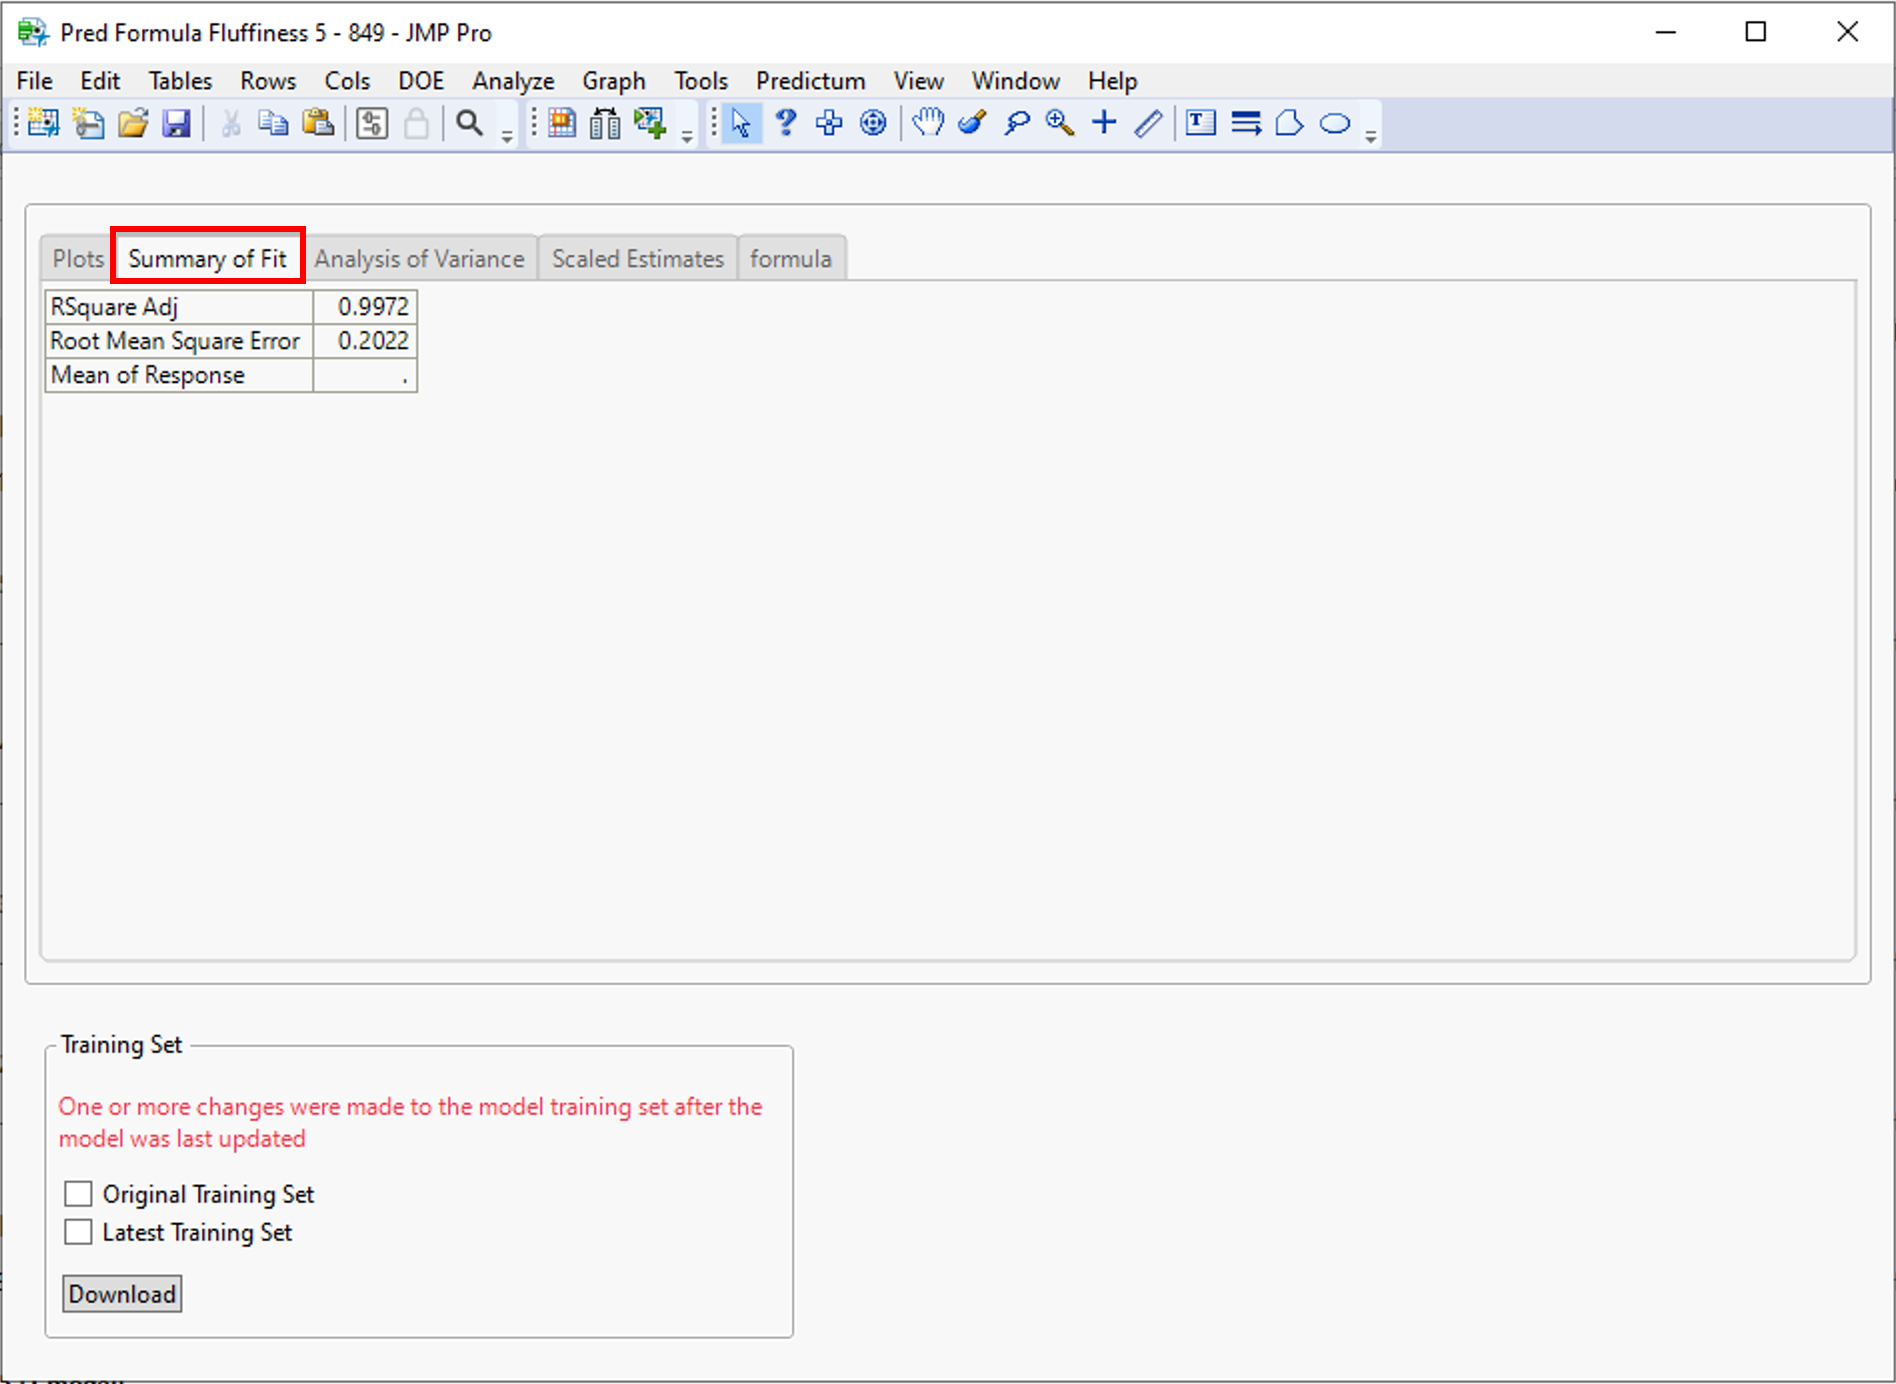
the Summary of Fit tab displays a summary of the R2 Adjusted value, the Root Mean Square Error value, and the Mean of Response value for given model
-
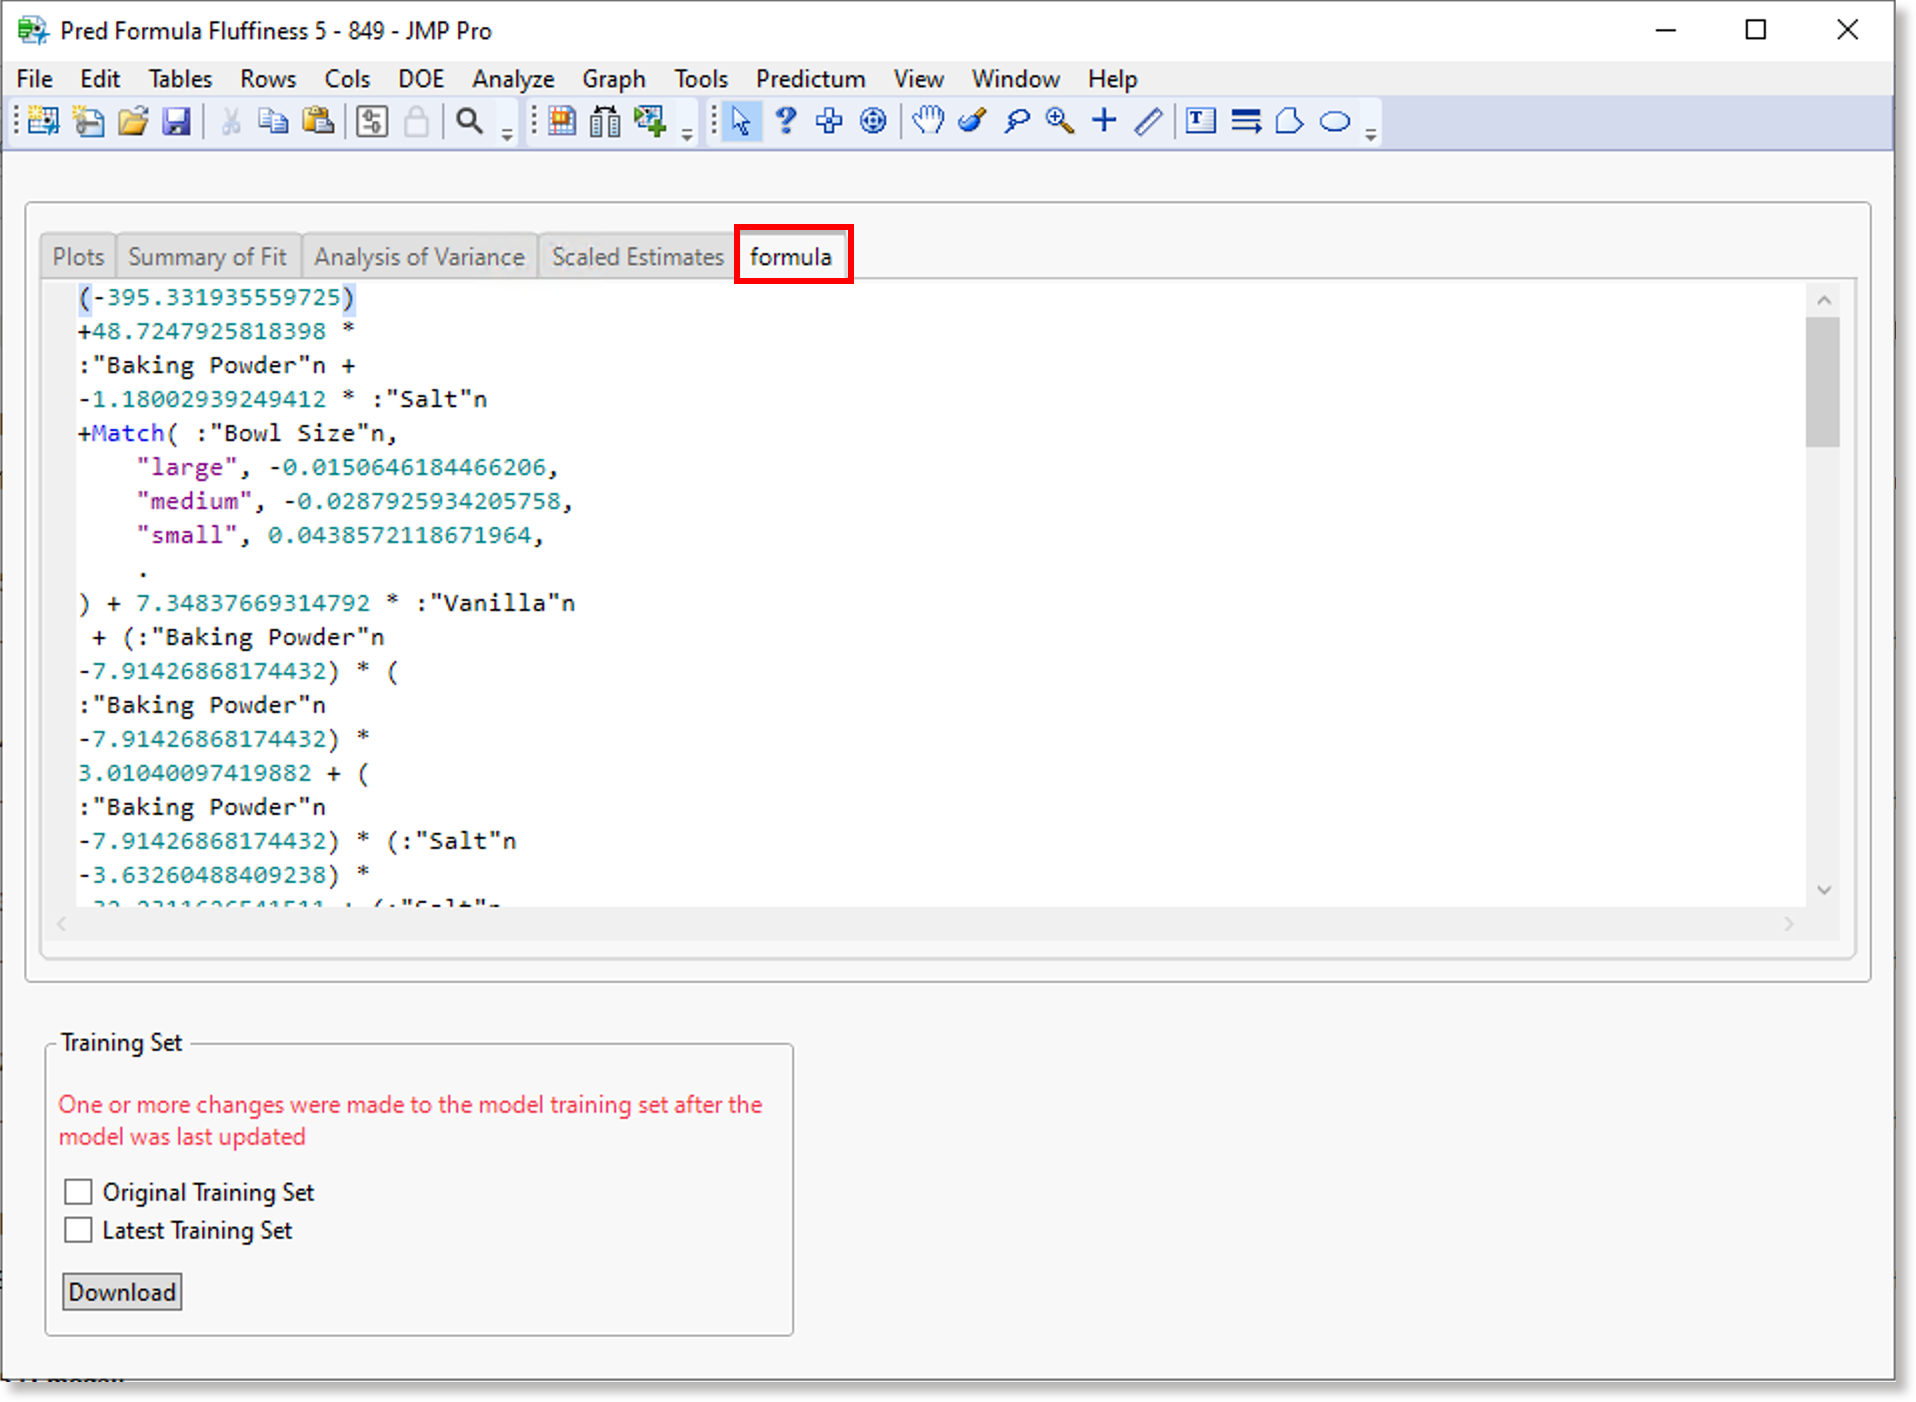
the Formula tab displays the prediction formula of a given model
Edit an existing model
The workflow for editing an existing model involves the following steps:
-
Follow the steps in the following section, Search for a model to search for a model that you want to edit.
-
Download the latest training set in a data table, edit the model as needed, and upload it once again to the database.
Search for a model
If you want to search for a model in the database, navigate to the Search view and set search filters to perform a search. For more details on performing a search in general, see the Search topic page.
Once the JMP add-in has completed the search and has displayed your search results, you can view the models, as follows:
-
Navigate to the Models tab in the Search Results outline box.
-
Click or tap the Details button beside the name of the model of interest.
The Model history dialog appears.
View details oF a model's history
You can view the details of a model's history on the following tabs in the model history window:
-
The Plots tab is displayed by default and features a plot of parameter values along the y-axis and predicted values generated by the model along the x-axis.
-
The Summary of Fit tab displays the R2 value and RMSE value of the model.
-
The Formula tab displays the formula for the model.
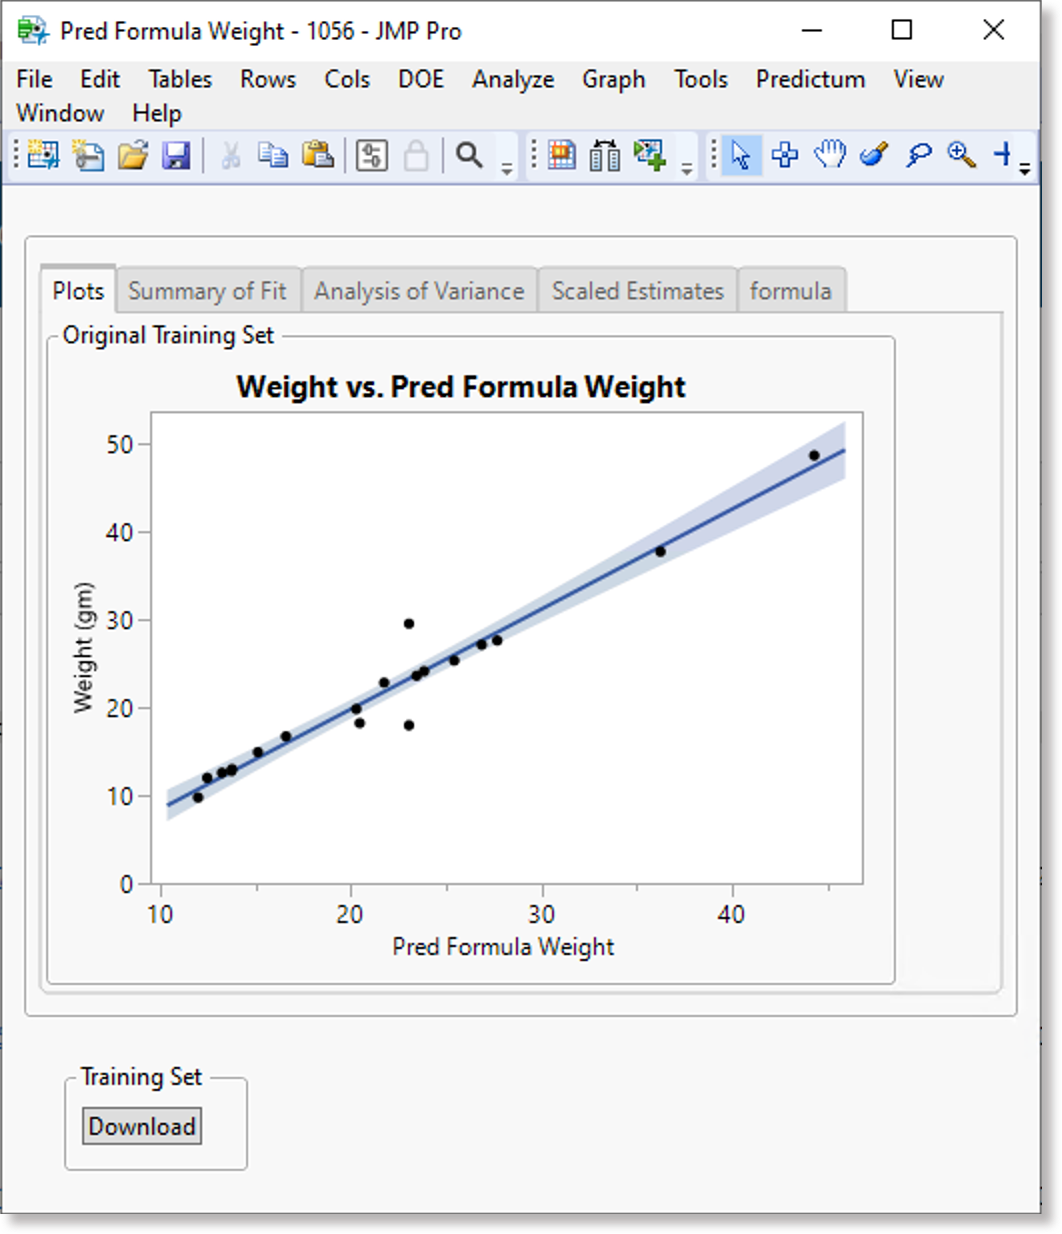
Download a training set for an existing model
The model history window lets you download the original training set, the latest training set, or both training sets for a model.
To download a training set:
- Select the checkbox for an original training set or latest training set (or both, if desired).
| Selected original training set | Selected latest training set | Selected original and latest training set |
|---|---|---|
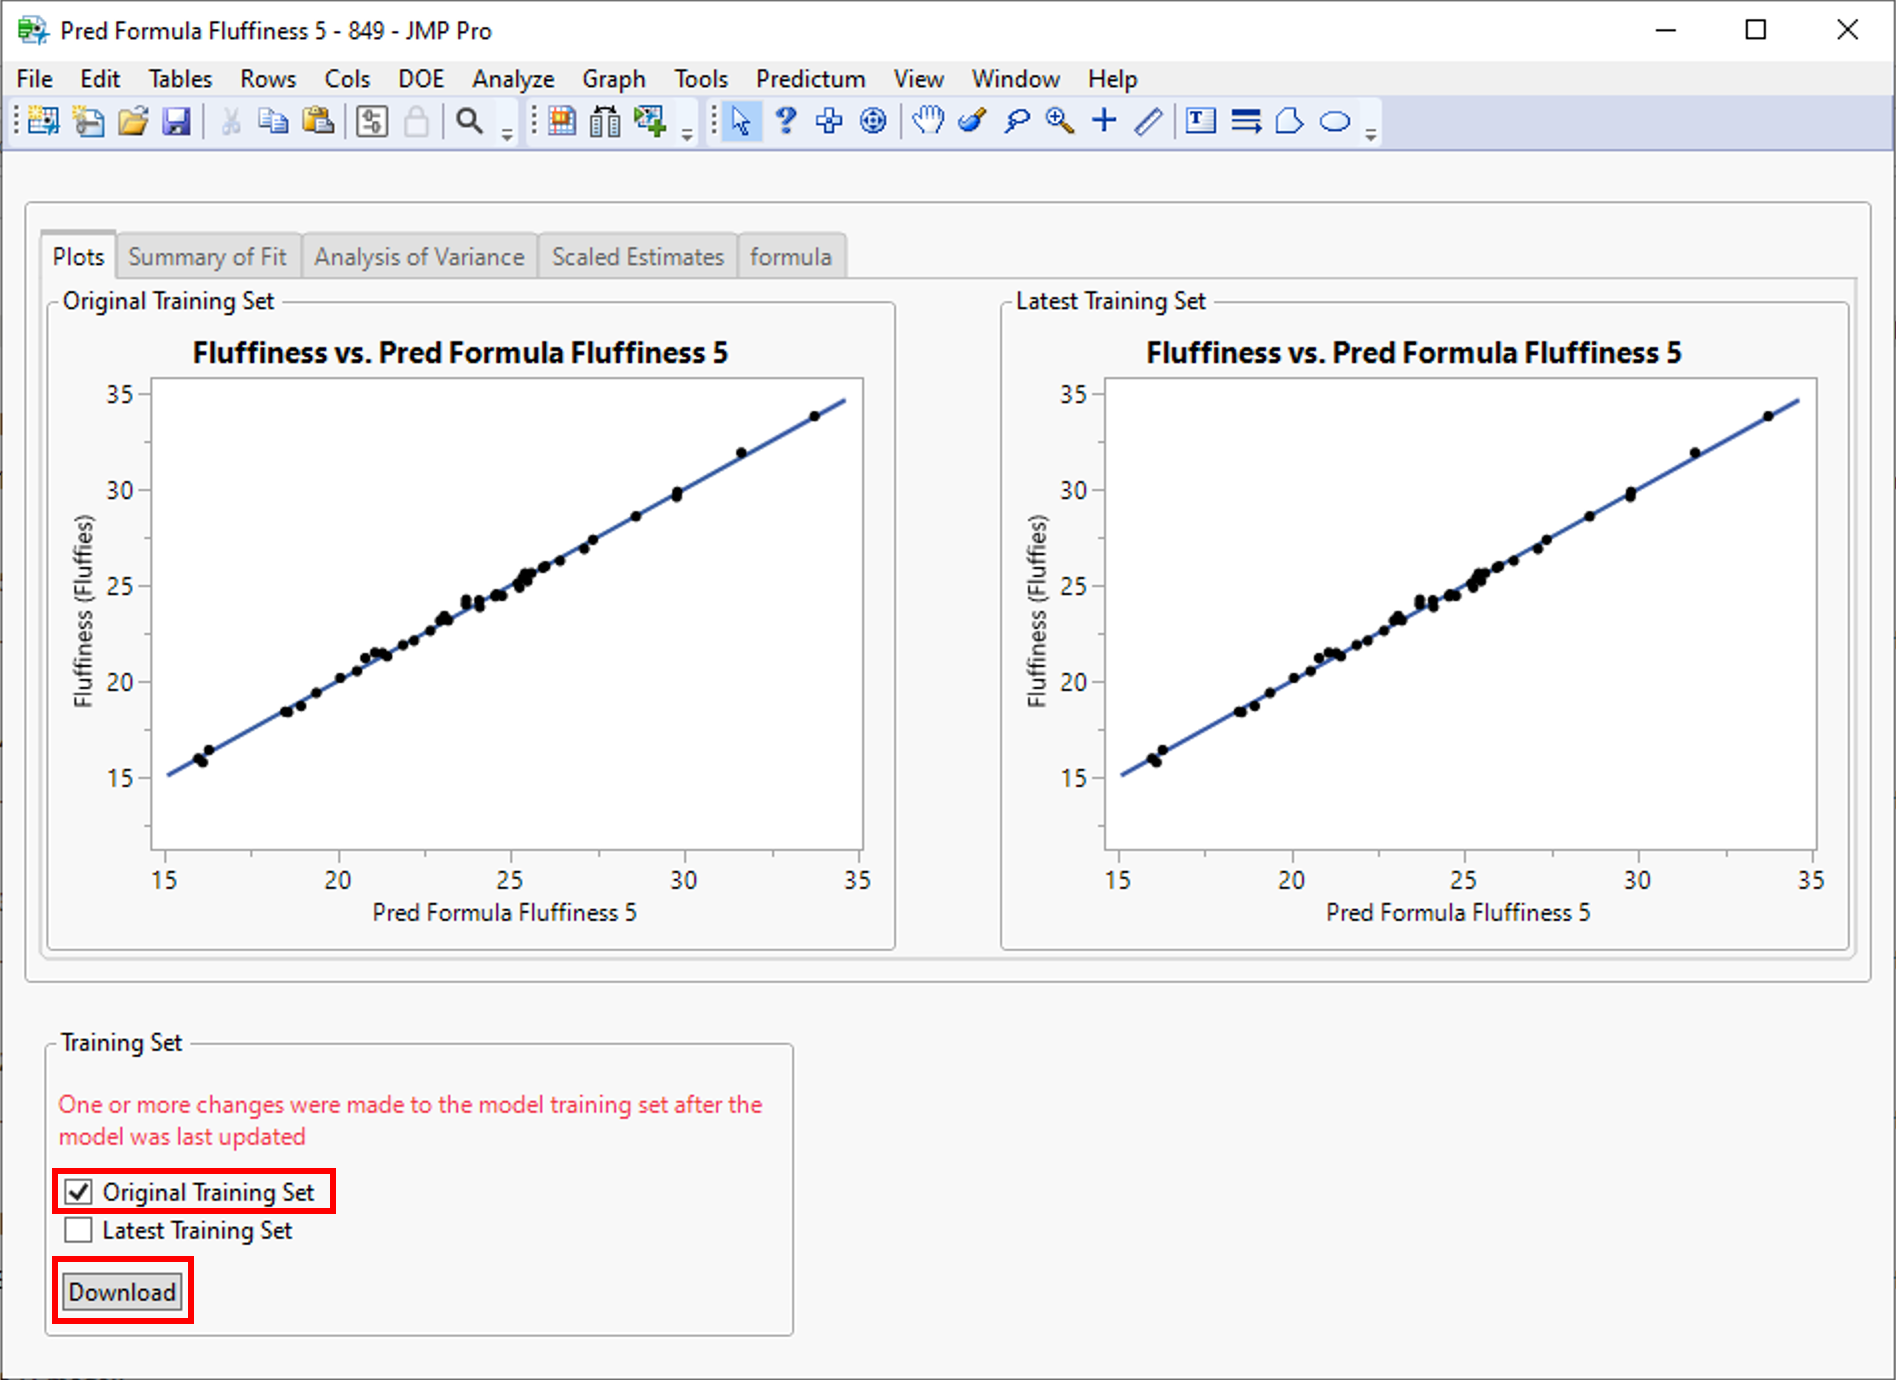 |
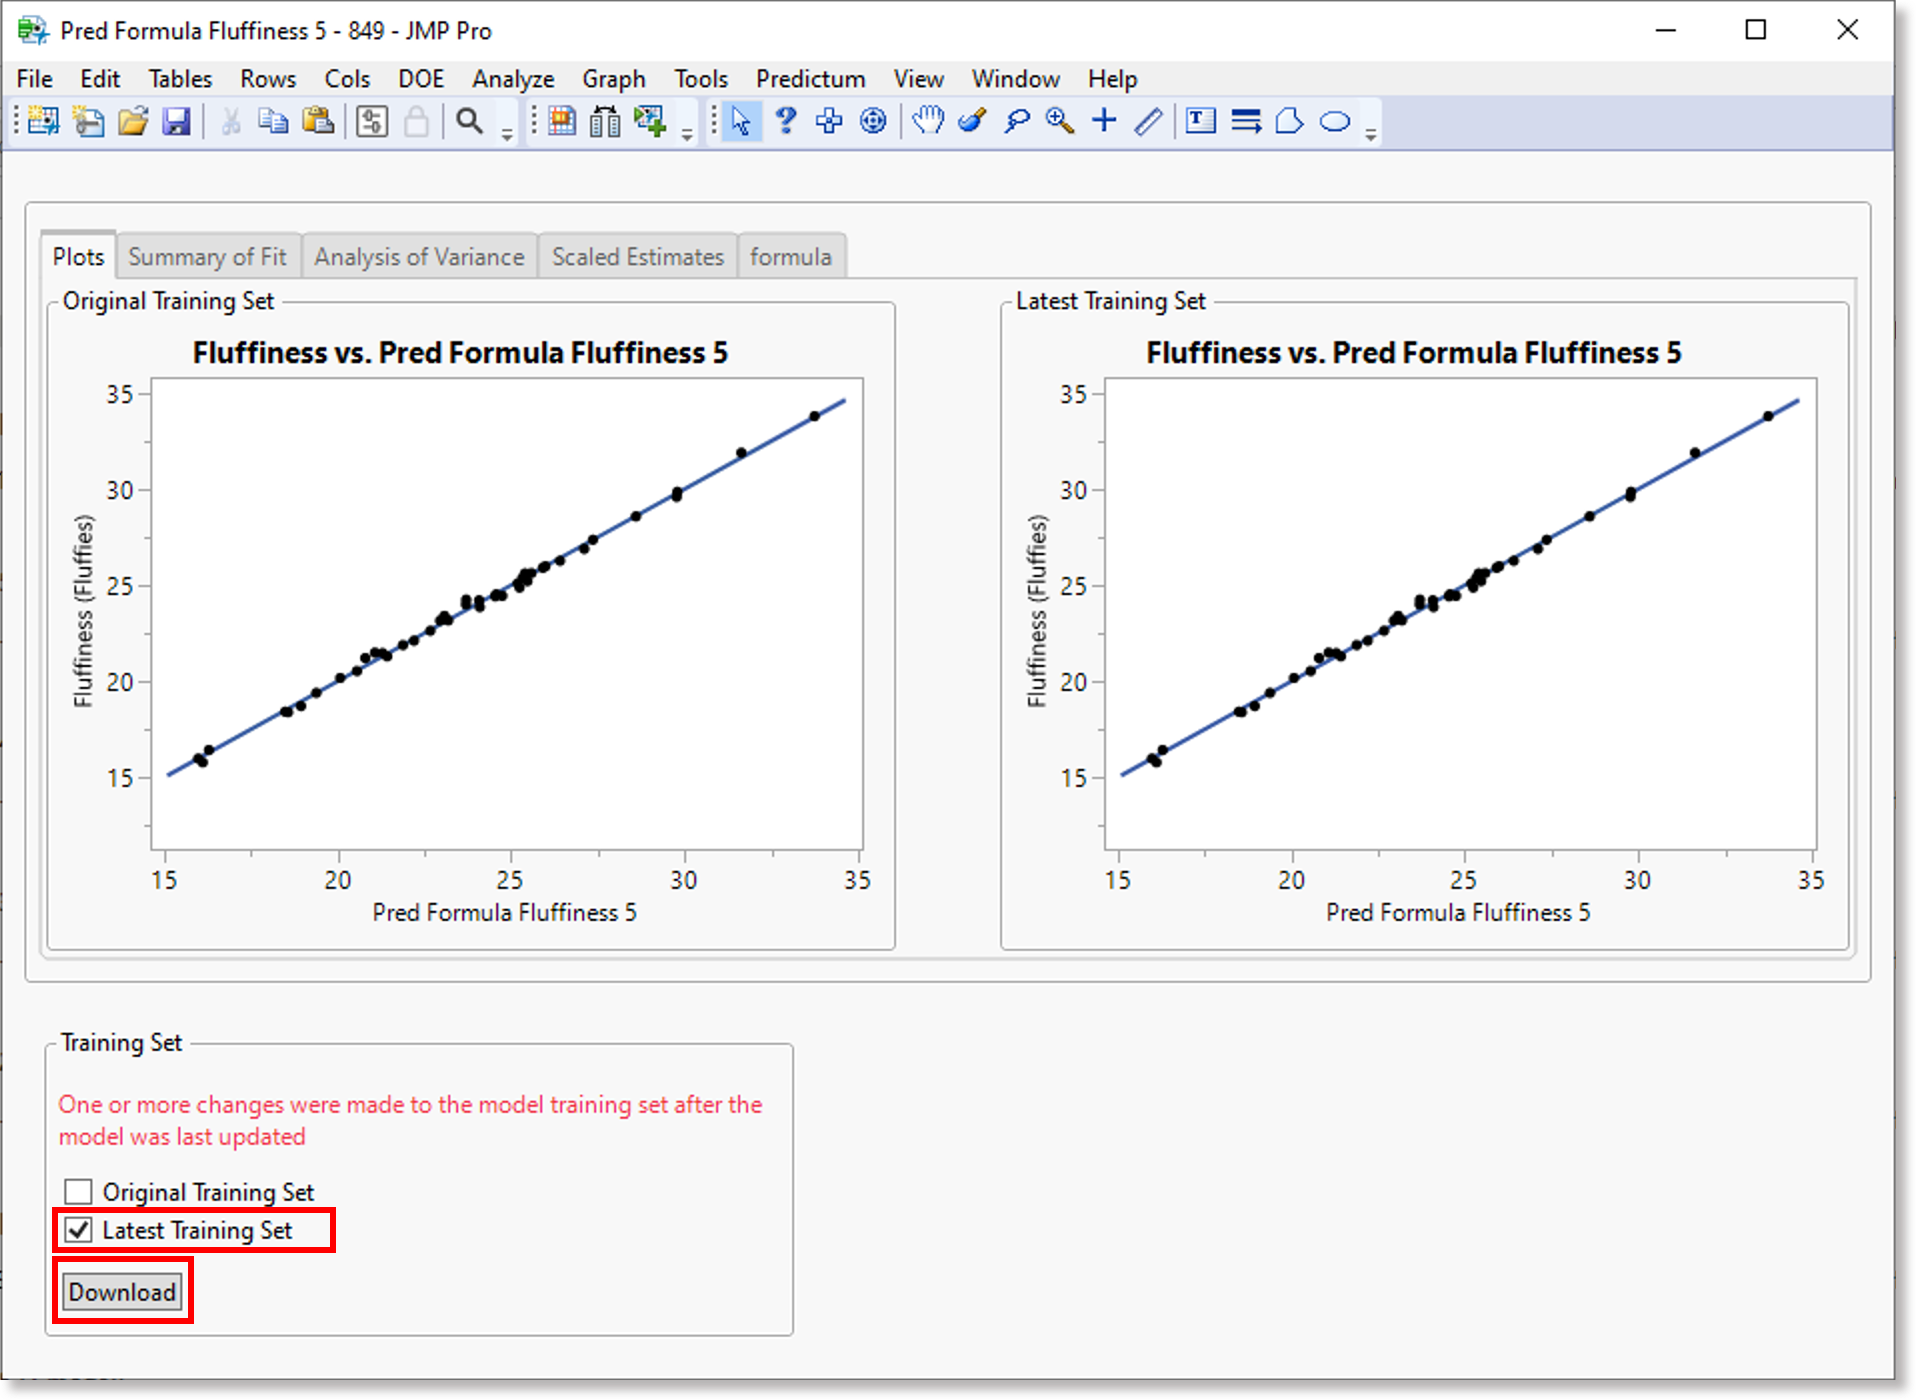 |
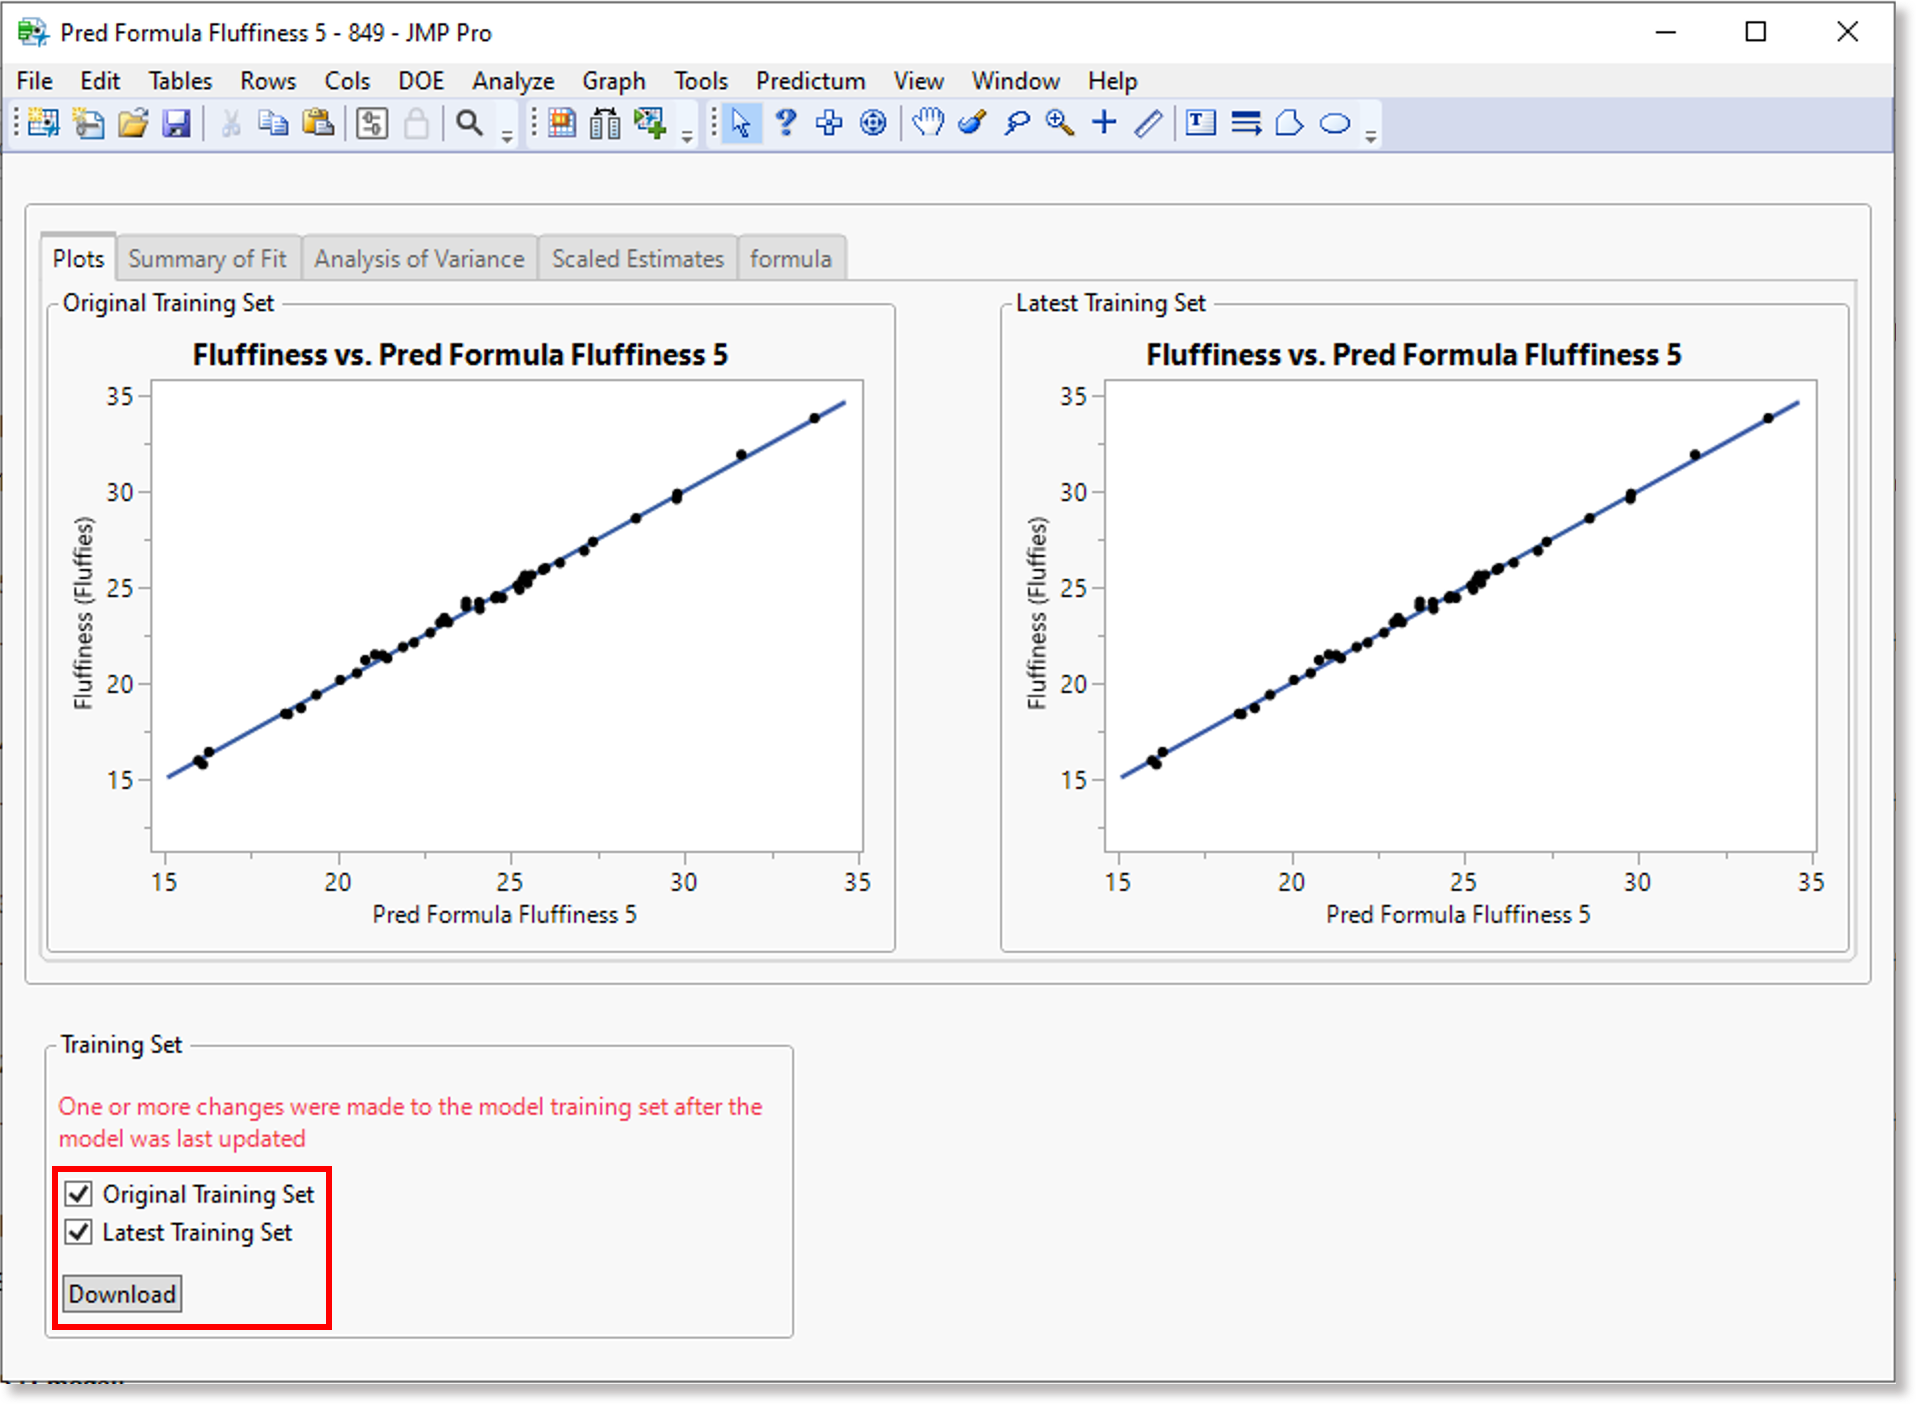 |
-
Click or tap the Download button.
Depending your selection(s), the JMP add-in opens the corresponding training set(s) in a data table in a separate window. Each downloaded data table has the corresponding training set name appended as a suffix in the file name.
To save each downloaded data table to a local directory or server, open the File menu > Save option.
Update an existing model
To update an existing model:
-
Perform a search for a model in the Search view.
-
Download a training set for model in a data table.
-
Make changes to the model in the data table.
-
Update the modified data table containing the model.
Note
It is not essential to save the file containing the updated model before proceeding to the next step, but you can save it to a local directory, if desired.
-
Navigate to the Projects view and click on the name of the related project.
-
Browse for and select the modified data table.
The Update Model view appears.
-
Click the Browse button to select the file containing the updated model.
-
Expand the panel box containing the modified model and select the Update option.
The Update option will track the modified model using version control and assign a unique model ID so that it becomes the latest version of the model.
-
Click or tap the Upload button.
Upload a modified version of a model using the Direct Upload utility
The Direct Upload utility lets you to perform a quick upload of changes to an existing model in the database. The utility saves you a few steps so that you don't have to open the JMP add-in and navigate into a project to perform the same task.
To use the Direct Upload utility:
-
Navigate to the Search view and perform a search for the data table that you want to make changes to.
-
Beside the file name in the search results, click or tap the Download button.
The data table opens in a separate window.
-
Make changes to the data table, as needed.
-
Open the Predictum menu > CoBaseKRM > Direct Upload utility option.
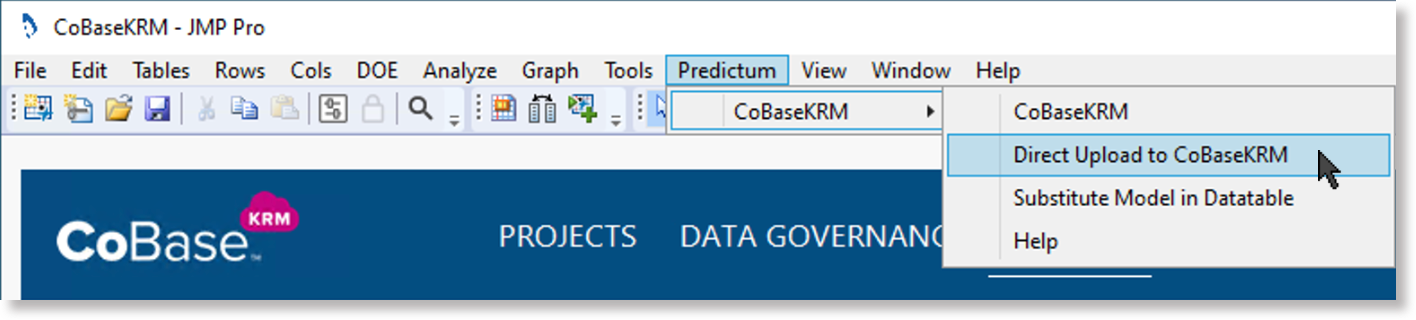
The Direct upload dialog appears. The file name of the data table is displayed as selected for upload.
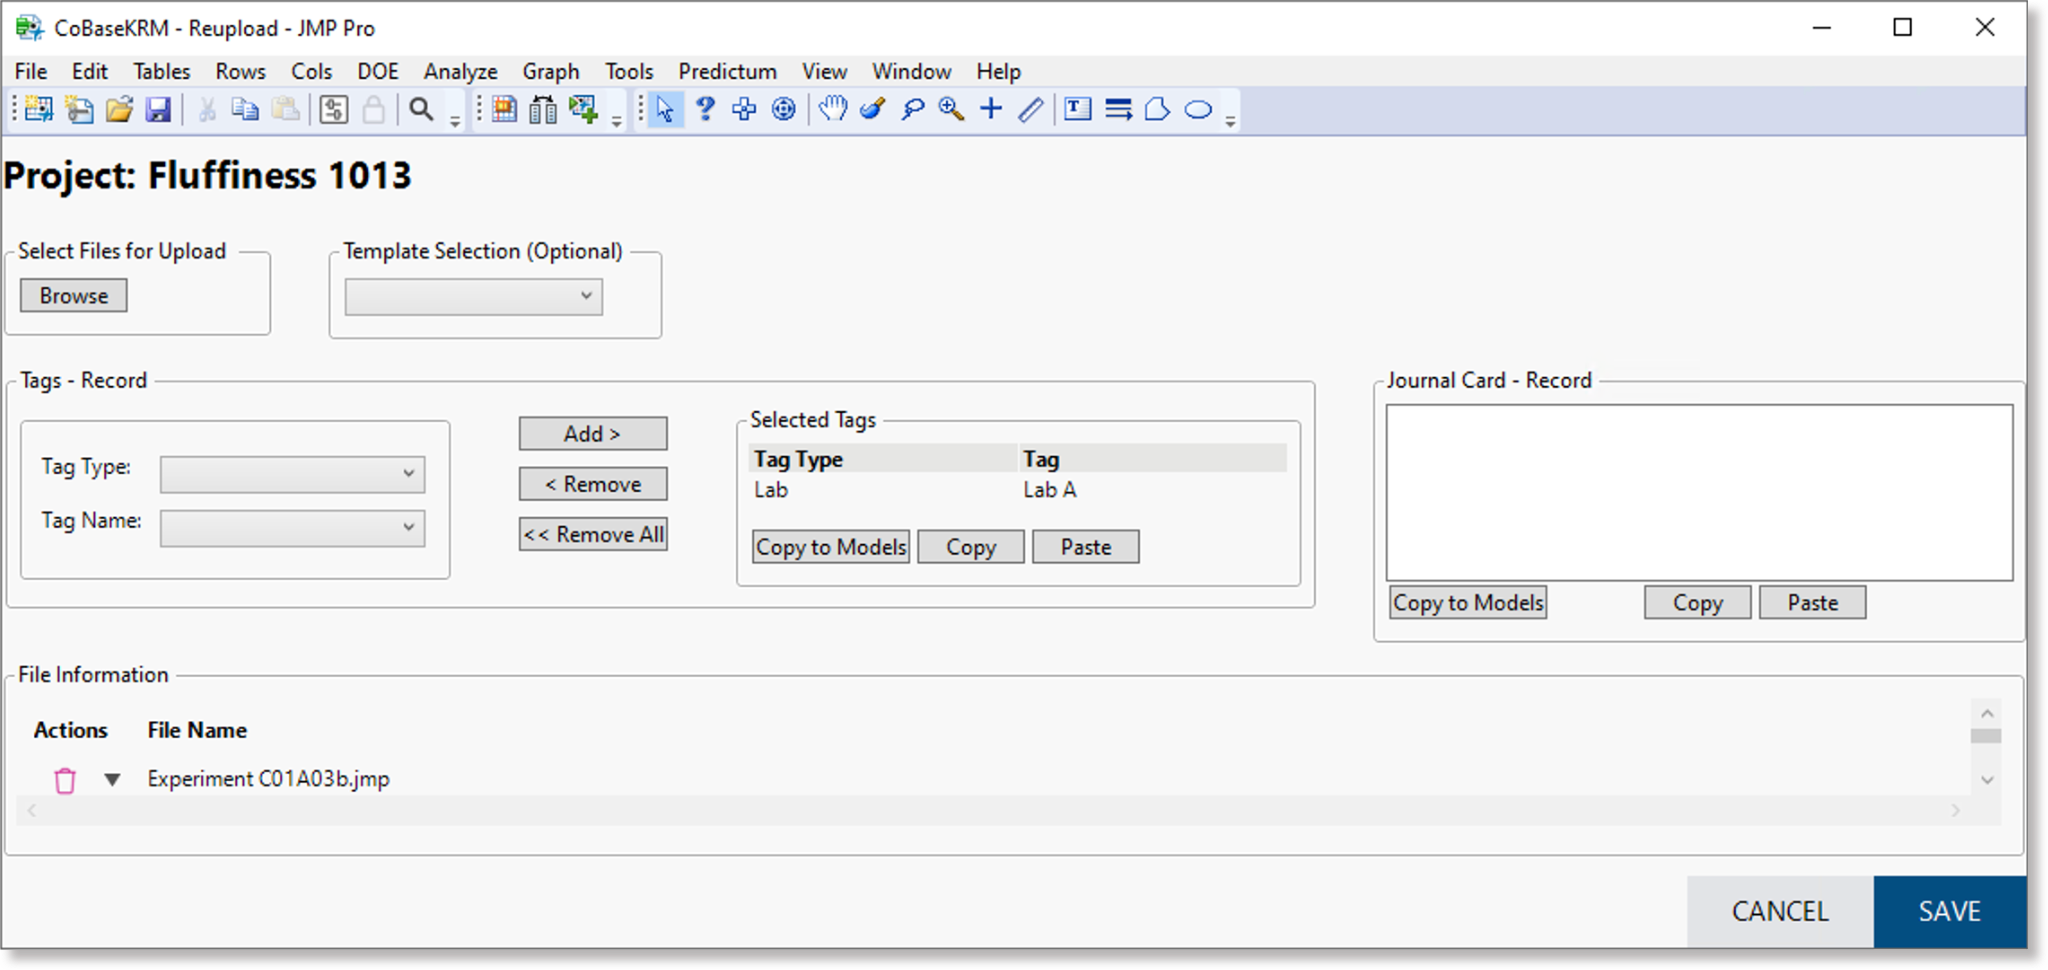
-
Click or tap Save.
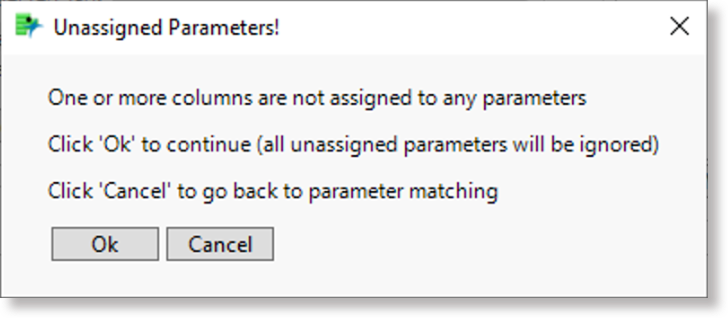
If you have any unassigned parameters in your data table, the Unassigned Parameters dialog appears.
-
To have CoBaseKRM ignore any unassigned parameters and continue with the direct upload, click or tap OK in the dialog.
The utility performs the direct upload and displays a confirmation message when it has been successfully completed.