Upload files using the JMP add-in
Permissions and access
Minimum role: Lab manager
CoBaseKRM lets you to upload JMP data tables to the database for projects, which you have created yourself or belong to as a member. JMP data tables are uploaded in the context of a related node, which represents a research or experimentation activity, within a project's network map.
CoBaseKRM supports uploading files of various formats to the database, including:
- JMP data tables, which are managed through version control
- Files in Excel and comma-separated values (CSV) formats, which are categorized as supplementary files for future searchability
- Image files of various formats (for example, JPG, PNG, SVG, etc.)
- Portable Document Format (PDF) files
The workflow for uploading files to the database involves the following tasks:
- Select a path and node of a project's network map to be associated to a selected data table
- Optional: Assign a template to a node for parameter matching
- Select a data table and/or other files
- Optional: Add a journal card to an upload record
- Optional: Add one or more tags to an upload record
- Choose an action to resolve unmatched parameter names in a selected data table
- Complete an upload
Start an upload workflow
To start an upload workflow:
-
Navigate the Projects view of the JMP add-in for CoBaseKRM.
-
Click the upload icon button to the right of the name of the project for which you want to upload files.
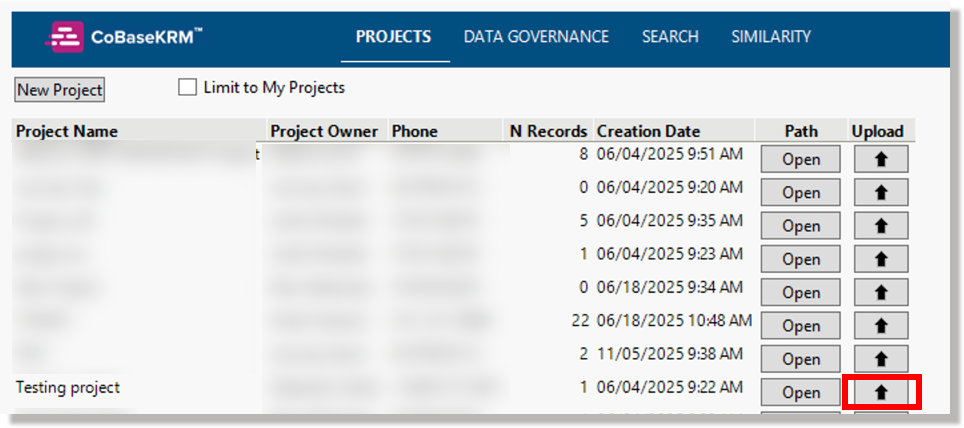
The Upload dialog appears.
Select a path and node of a project's network map
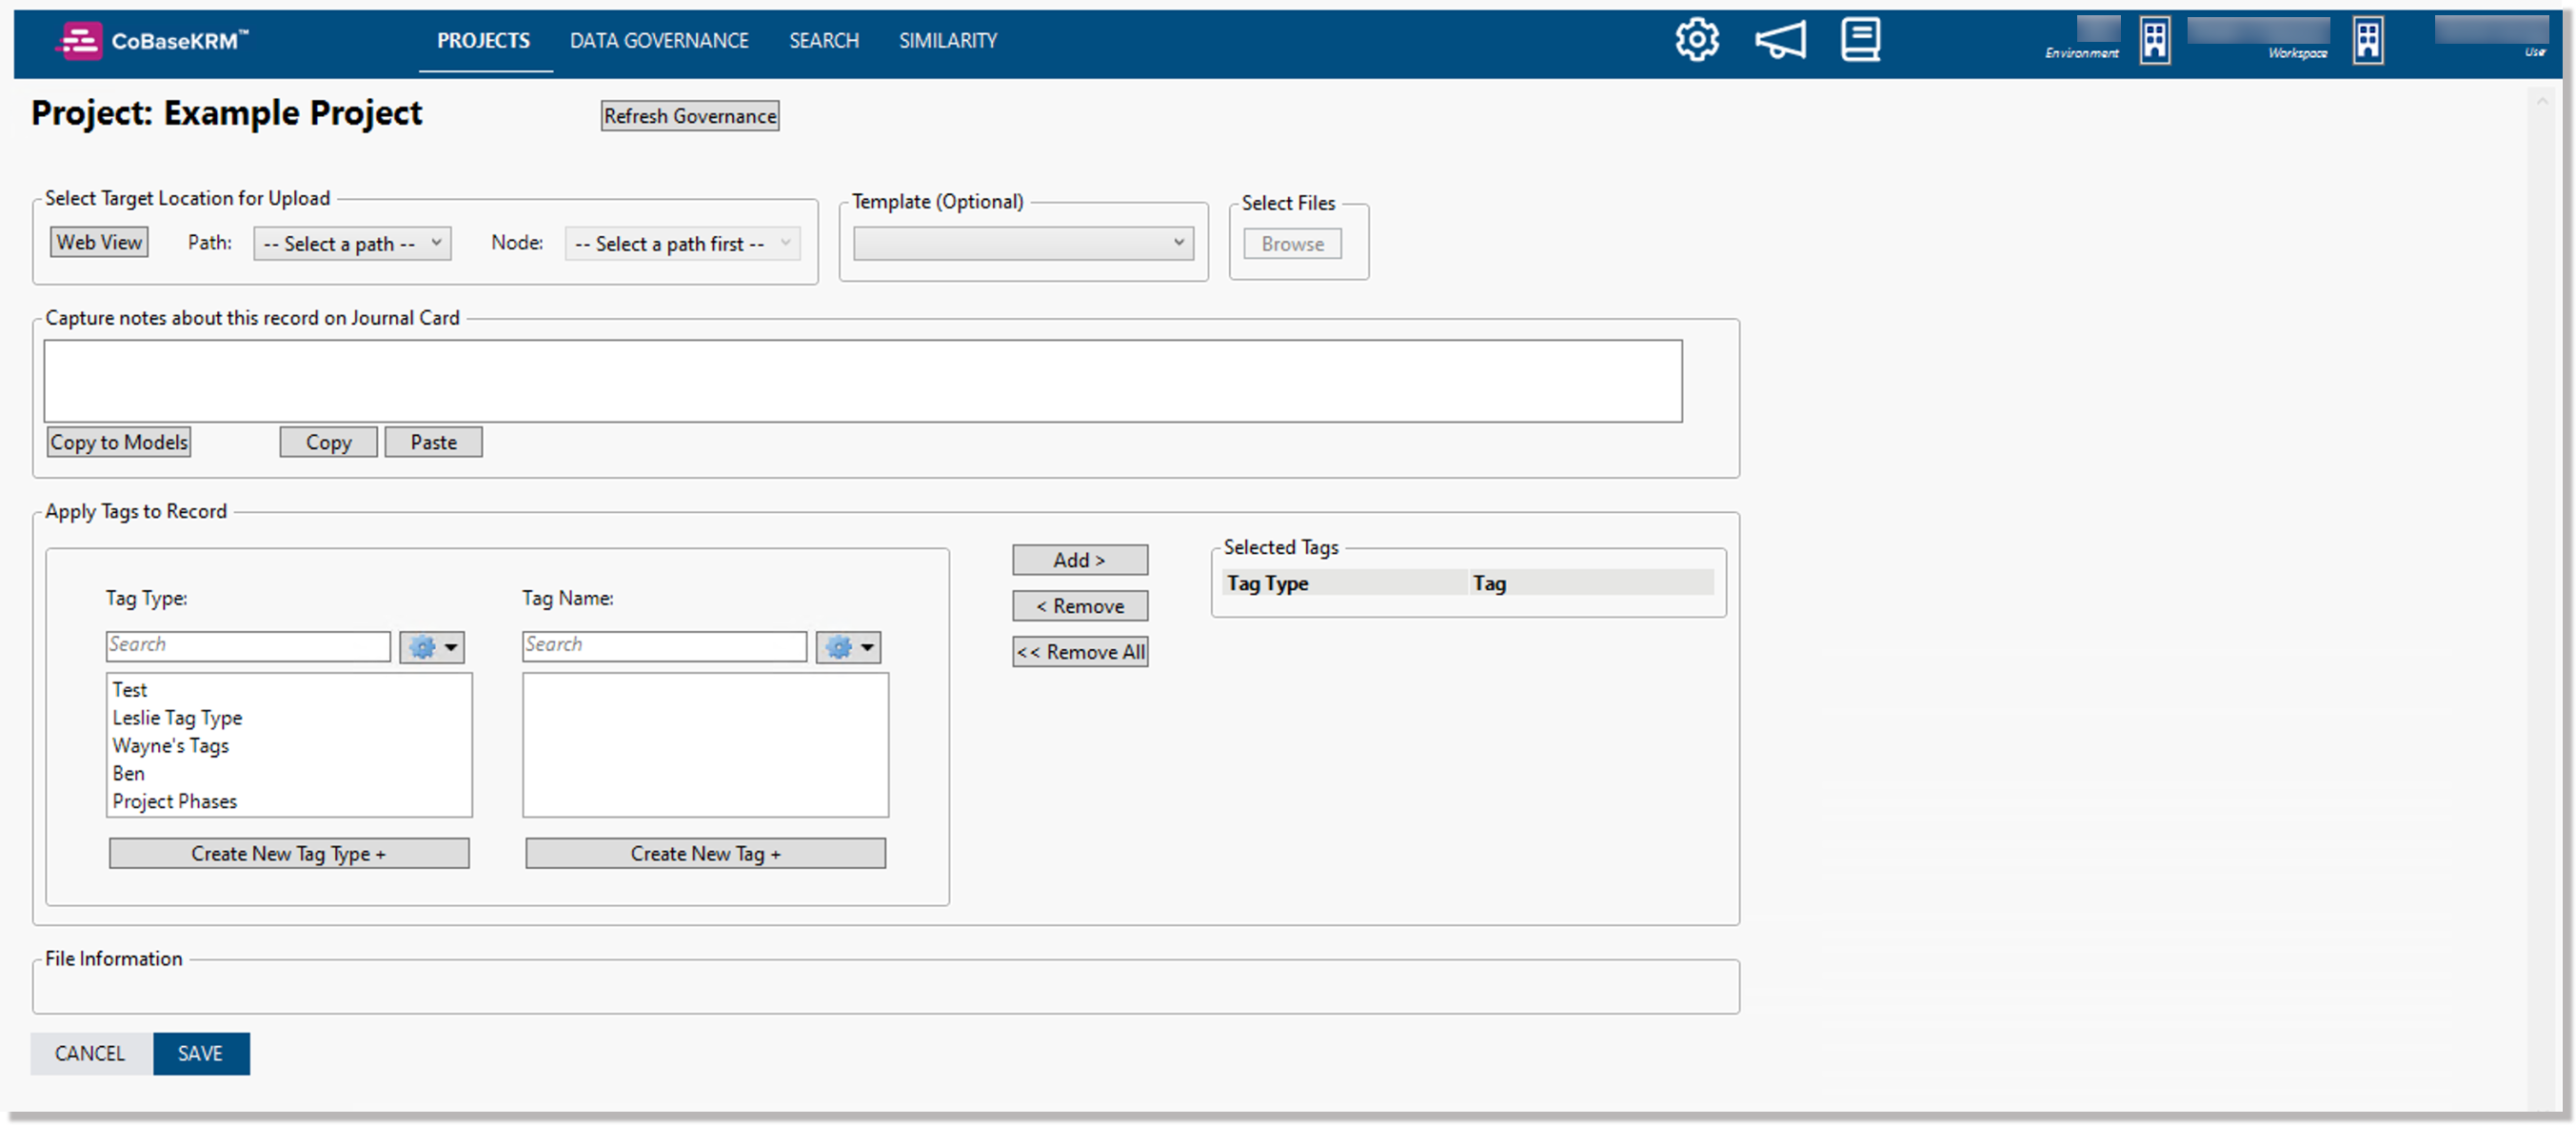
In the upload dialog, select a path and node of a project's network map:
-
In the Path field, select the name of an existing path.
The Node field becomes enabled and is populated with the names of nodes that belong to the selected path.
-
In the Node field, select the name of an existing node.
Note If you want to create a new node for the selected path:
-
Select the Create New Node option in the Node field.
The Create New Node dialog appears.
-
In the Path field, select an existing path name.
-
In the Node Category field, select a node category that the new node will belong to.
-
In the Parent/Adjacent Node field, select the name of the existing node that will precede the new node.
-
If you want to the new node to be a branch node that stems from the parent/adjacent node, turn on the Branch checkbox.
-
Click OK.
-
-
Assign a template to a node for parameter matching
Assigning a template for parameter matching within an upload workflow is optional. If you choose to assign an existing template to a node for an upload, it will be used to perform parameter matching on the parameter names in your selected data table. I
If a given project has been assigned a template, the template name will be populated automatically in the Node field. However, you can select a different template to be assigned to a node, if desired.
If you assign no template, parameter matching will be performed against all of the existing parameter names in the database.
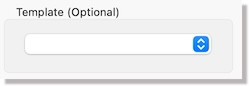
To assign a template to a node for an upload, click or tap the Template Selection field to display a drop-down list and select a template name.
Select a data table for upload
To select a data table for upload:
-
In the Select File field, click or tap the Browse button.
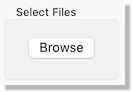
A pop-up window appears, where you select one or more files from a local directory.
-
Select a data table and click or tap Choose.
Note
A selected data table for upload is restricted to a maximum file size of 30 MB and a maximum number of 500 columns.
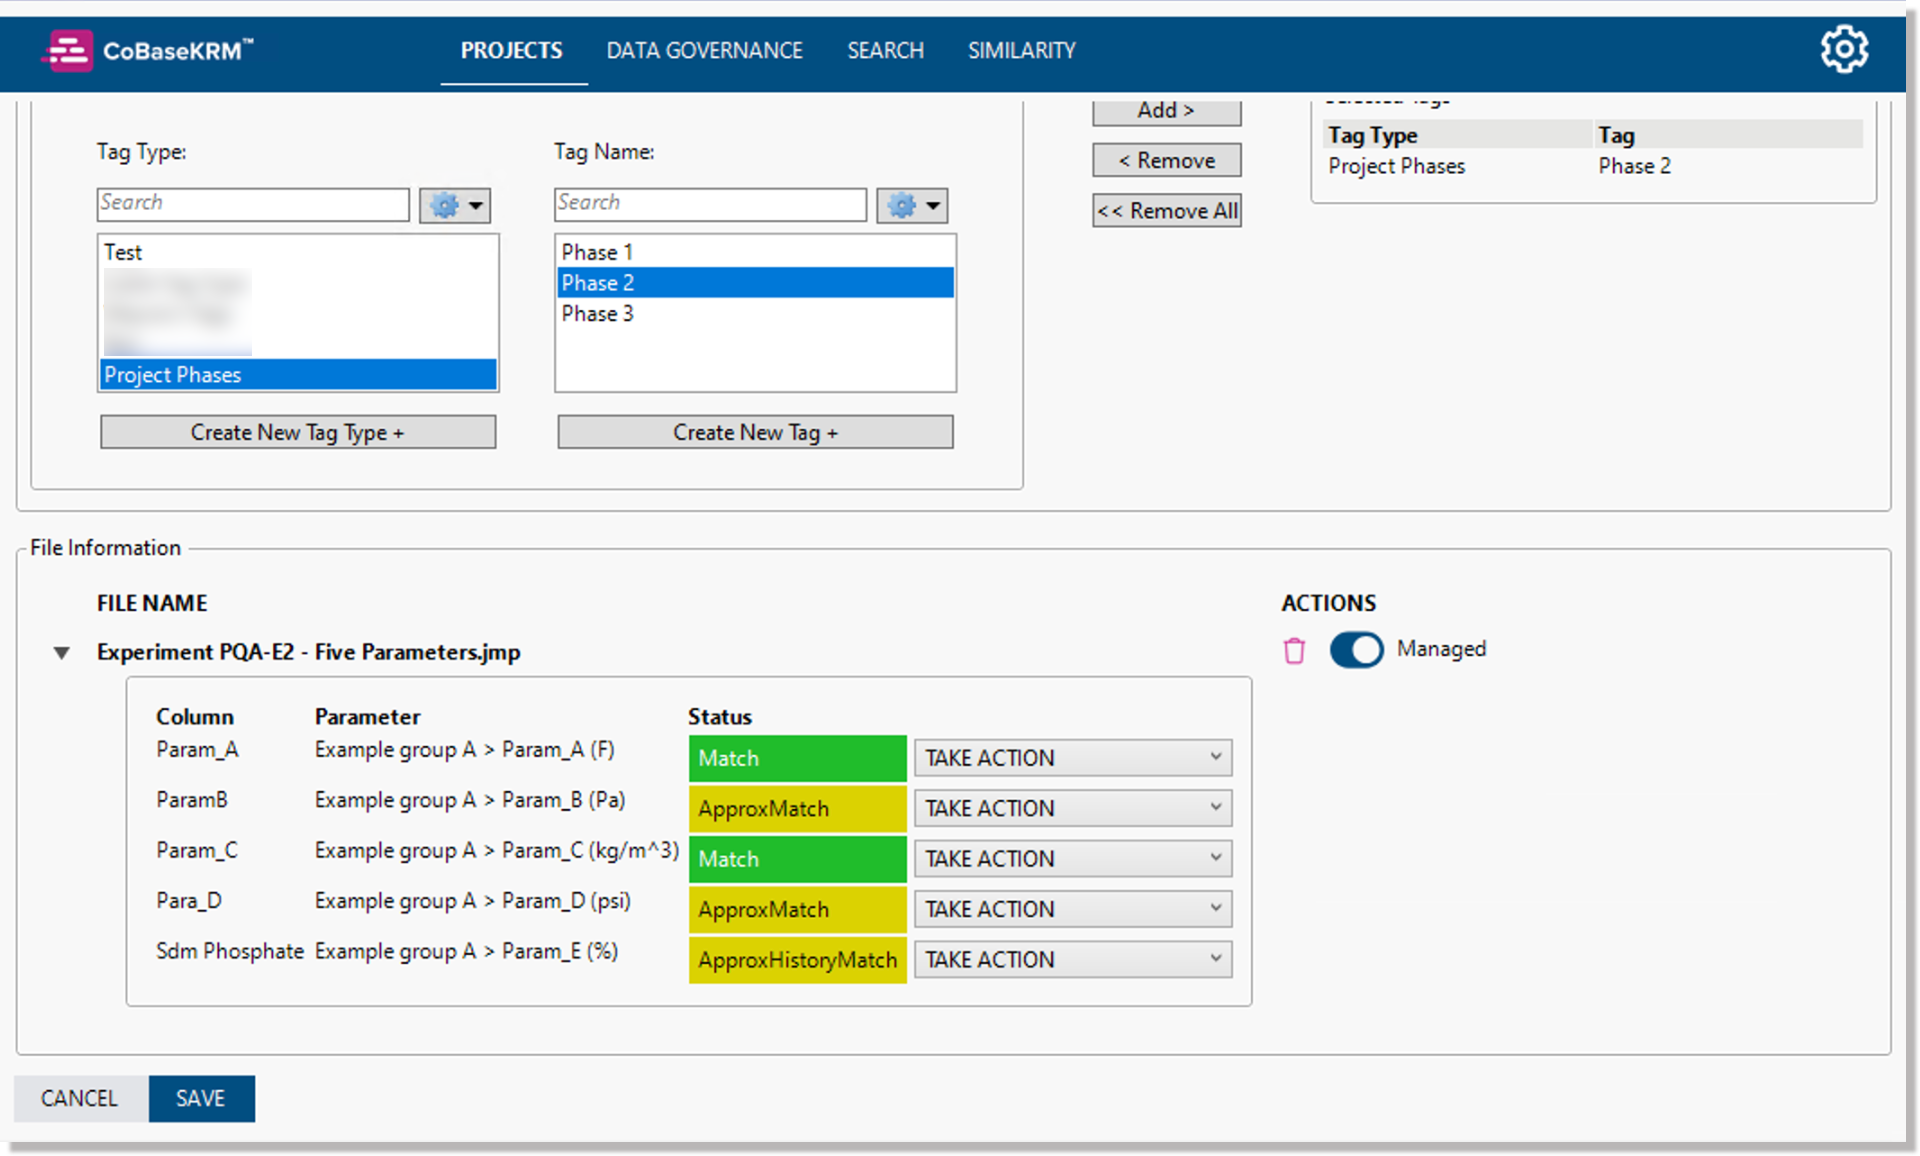
The selected data table is displayed in the File information panel box.
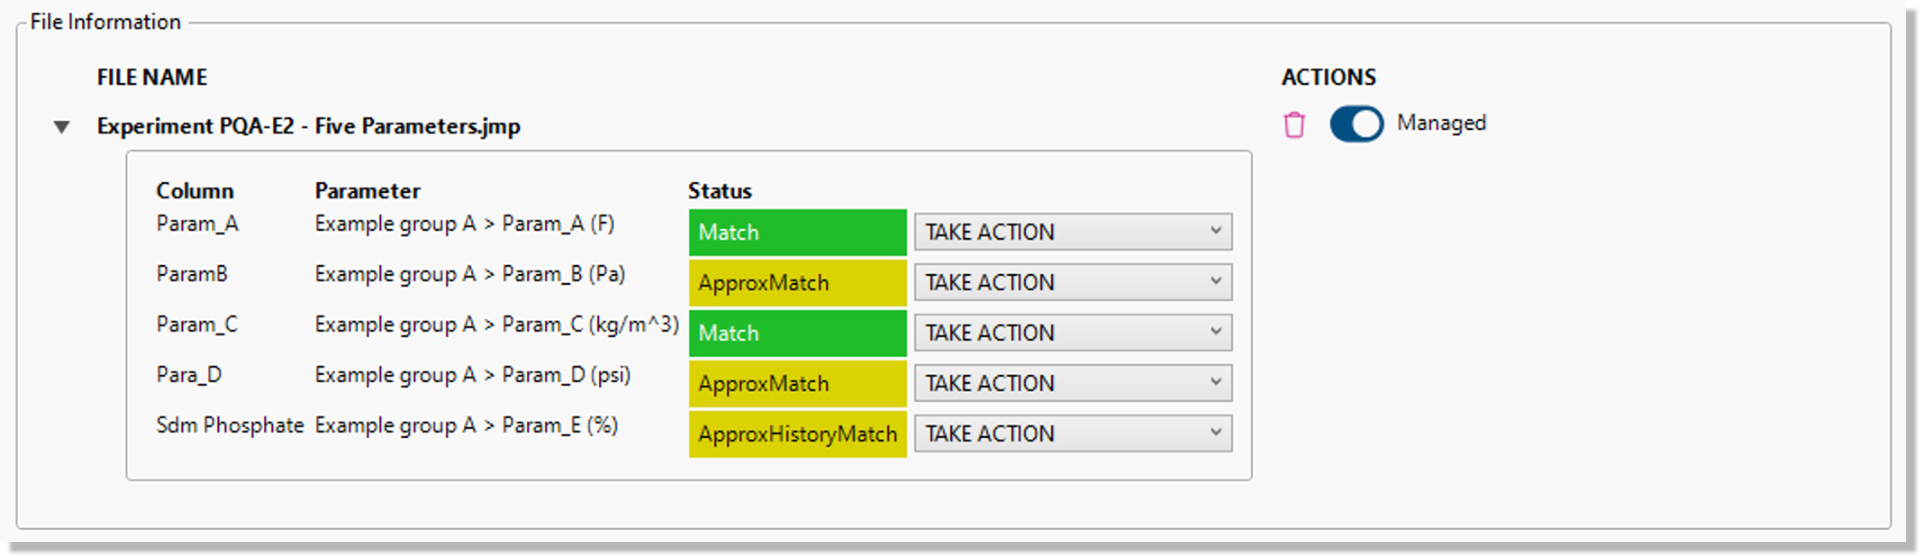
Under the Column heading, the column names of the selected data table are displayed.
Under the Parameter heading, the parameter names of an assigned template or from the database, their associated domain names, and defined units (if applicable) are displayed.
Under the Status column, the status values of each parameter name of a selected data table are displayed.
-
If you want to select additional files, which will be categorized as supplementary files relative to the selecgted data table for future searchability, repeat steps 2 and 3 until you have selected all of the files that you want to be included for upload.
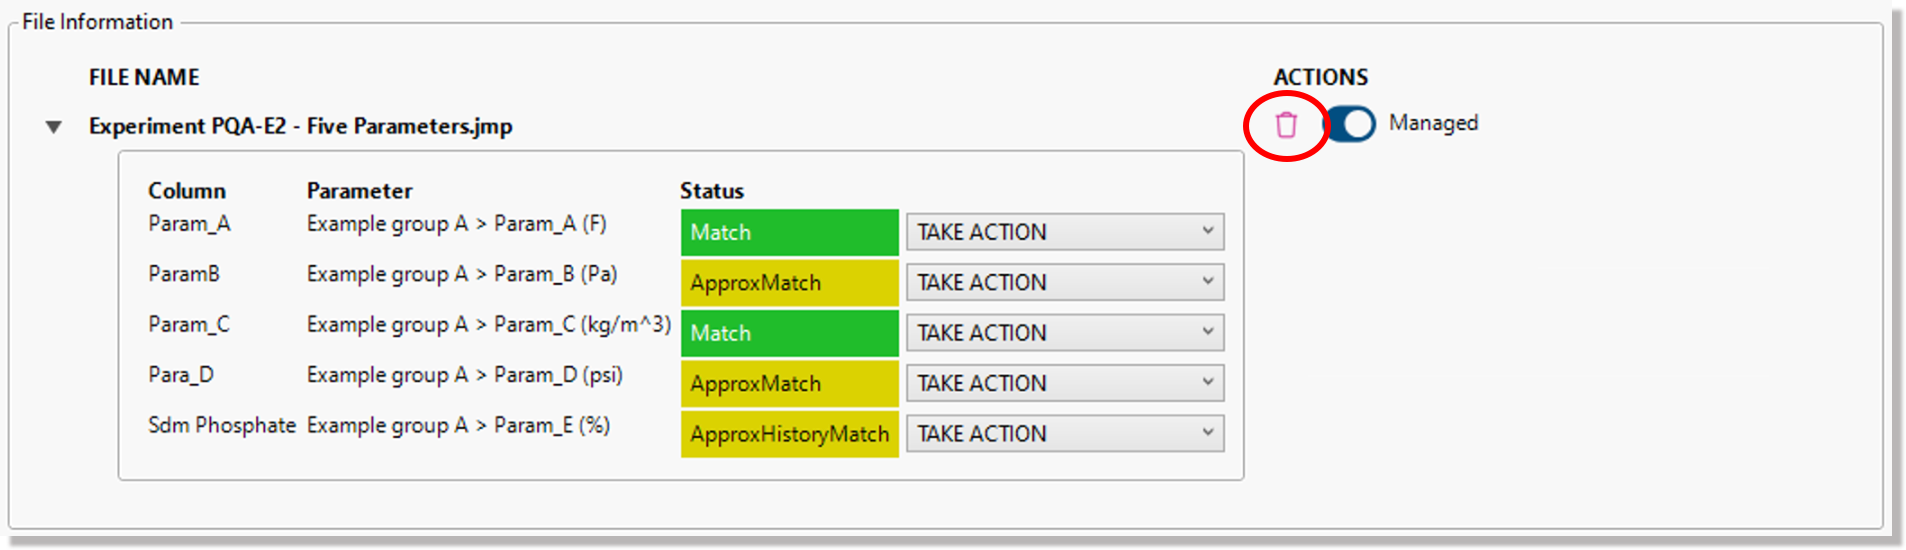
Note
If you need to remove any of the files from being selected for an upload, click or tap the remove icon to the right of the corresponding file name.
Assign tags to selected files and models for upload
You have the option of assigning one or more metadata tags to the files in the upload that will enable the files to be searchable in the future. If you want to assign one or more tags to the selected files for upload, select existing tags or create and select new tags using the Apply Tags to Record panel box.
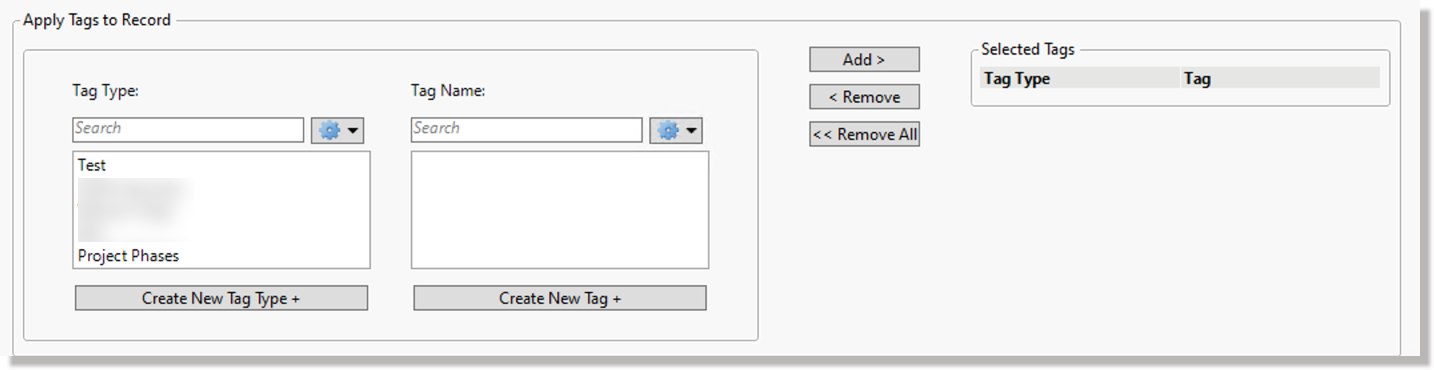
To assign one or more tags to the selected files in the upload dialog:
-
In the Tag Type field, select an existing tag type.
Note: If you want to create a new tag type:
-
Click the Create New Tag Type button below the Tag Type field.
The Tag Type dialog appears.
-
In the Tag Type Name field, type a unique name for the new tag type.
-
Optional: In the Tag Name field, type one or more unique tag names, using a comma to separate multiple names.
-
Click OK.
The add-in will use the selected tag type name to filter the existing tag nmmes in the Tag Name field.
-
-
In the Tag Name field, select one or more tag names and click the Add button.
Notes:
- If you want to select multiple tag names at a time, hold down the Shift key and click to select multiple tag names in the list before clicking the Add button.
- To remove a selected tag name from the Selected Tag Names panel box, highlight it in the list, and click Remove.
- To remove all of the selected tag names from the Selected Tag Names panel box in one action, click the Remove All button. -
If you want to assign the same set of selected tags to selected models for the upload, click the Copy to Models button.
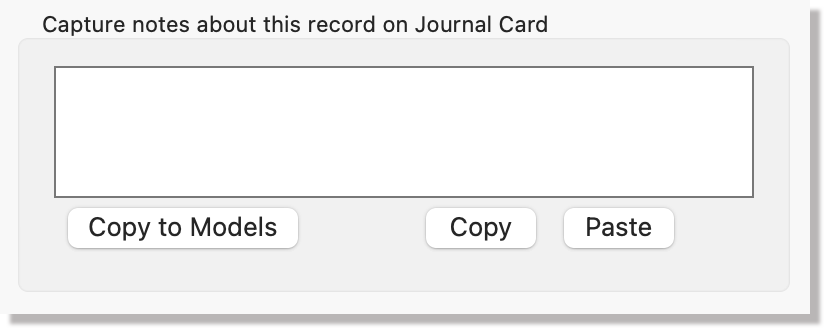
Assign a journal card to the selected files and models for upload
If you want to assign a journal card containing comments about the selected files for the upload, type your comments in the Capture notes about this record on Journal Card field.
Parameter matching
When you select a data table for upload, the JMP add-in for CoBaseKRM performs parameter matching automatically to check the parameter names in the data table against an assigned template to a given node or project or against the database, if no template is selected, so that all existing parameters names will be harmonized.
The statuses of the parameter names in a selected data table as a result of parameter matching are described below.
| Status | Description |
|---|---|
| Match | A parameter name in a selected data table matches an existing parameter name in the database and is acceptable for upload. |
| Approx match | A parameter name in a selected file approximately matches an existing parameter name in the database. The JMP add-in updates the parameter name in your selected data table to the existing parameter name. Beside the status, the original parameter name is displayed for comparison. Note: If the JMP add-in has matched a parameter name incorrectly, you can select an action to match to a different parameter name, or create a new parameter using the original parameter name. See the following section for supported actions and their descriptions. |
| History match | A parameter name in a selected data table matches an existing parameter name from your upload history for a node. Note: If the JMP add-in has matched the given parameter name incorrectly, you can select an action to match to a different parameter name, or create a new parameter using the original parameter name. See the following section for supported actions and their descriptions. |
| History Approx Match | A parameter name in a selected data table approximately matches based on the upload history for a node. Note: If the JMP add-in has matched the given parameter name incorrectly, you can select an action to match to a different parameter name, or create a new parameter using the original parameter name. See the following section for supported actions and their descriptions. |
| No Match | A parameter name in a selected data table doesn't match any existing parameter names in the database. See the following section for supported actions and their descriptions. |
Actions for unmatched parameter names
This task is only required for any unmatched parameter names in your selected files. In the choose an action to either match with an existing parameter name in the database or have the JMP add-in ignore an unmatching parameter.
For each status other than "Match" for a parameter, you can choose one of the actions, if needed, in the Take Action field.

| Unmatched status and description | Choices of actions |
|---|---|
| Approx Match A given parameter name in a selected data table approximately matches an existing parameter name. Note: This parameter name will be harmonized, as indicated, and will not preven an upload from being completed. But you can choose to perform a choice of action, if you wish. |
Match to existing parameter - This action updates the original parameter name to the closest match of an existing parameter name, according to an existing parameter name in the selected node template. Add new parameter to template - This action creates a new parameter object from the original parameter name. The newly created parameter name will be added to the node template. Ignore Parameter - This action disables the given parameter name and bypasses its column of data values from being uploaded to the database. The "ignored" column is preserved in the original data table. |
| History Match A given parameter name in a selected data table has been matched to an existing parameter name from a node's historical upload records. Note: This parameter name will be harmonized, as indicated, and will not preven an upload from being completed. But you can choose to perform a choice of action, if you wish. |
Match to existing parameter - This action updates the original parameter name to the closest match of an existing parameter name, according to an existing parameter name in the selected node template. Add new parameter to template - This action creates a new parameter object from the original parameter name. The newly created parameter name will be added to the node template. Ignore Parameter - This action disables the given parameter name and bypasses its column of data values from being uploaded to the database. The "ignored" column is preserved in the original data table. |
| No Match A given parameter name in a selected data table does not match any existing parameter name. Note: You will need to choose an action for this unmatched parameter name to achieve a "Match" status for an upload to be completed successfully. |
Match to existing parameter - This action updates the original parameter name to the closest match of an existing parameter name, according to an existing parameter name in the selected node template. Add new parameter to template - This action creates a new parameter object from the original parameter name. The newly created parameter name will be added to the node template. Ignore Parameter - This action disables the given parameter name and bypasses its column of data values from being uploaded to the database. The "ignored" column is preserved in the original data table. |
Once you have resolved unmatched parameter names so that their statuses are updated to Match, the selected data file and any other supplementary files are ready to be uploaded to the database.
Prepare models for upload
If any of your selected files include models to be uploaded, each model is displayed in an accordion panel containing a summary of model details.

When you click or tap the expand icon (right arrow head) to the left of a model name, the panel box is expanded to display options for how you want the add-in to handle the given model.
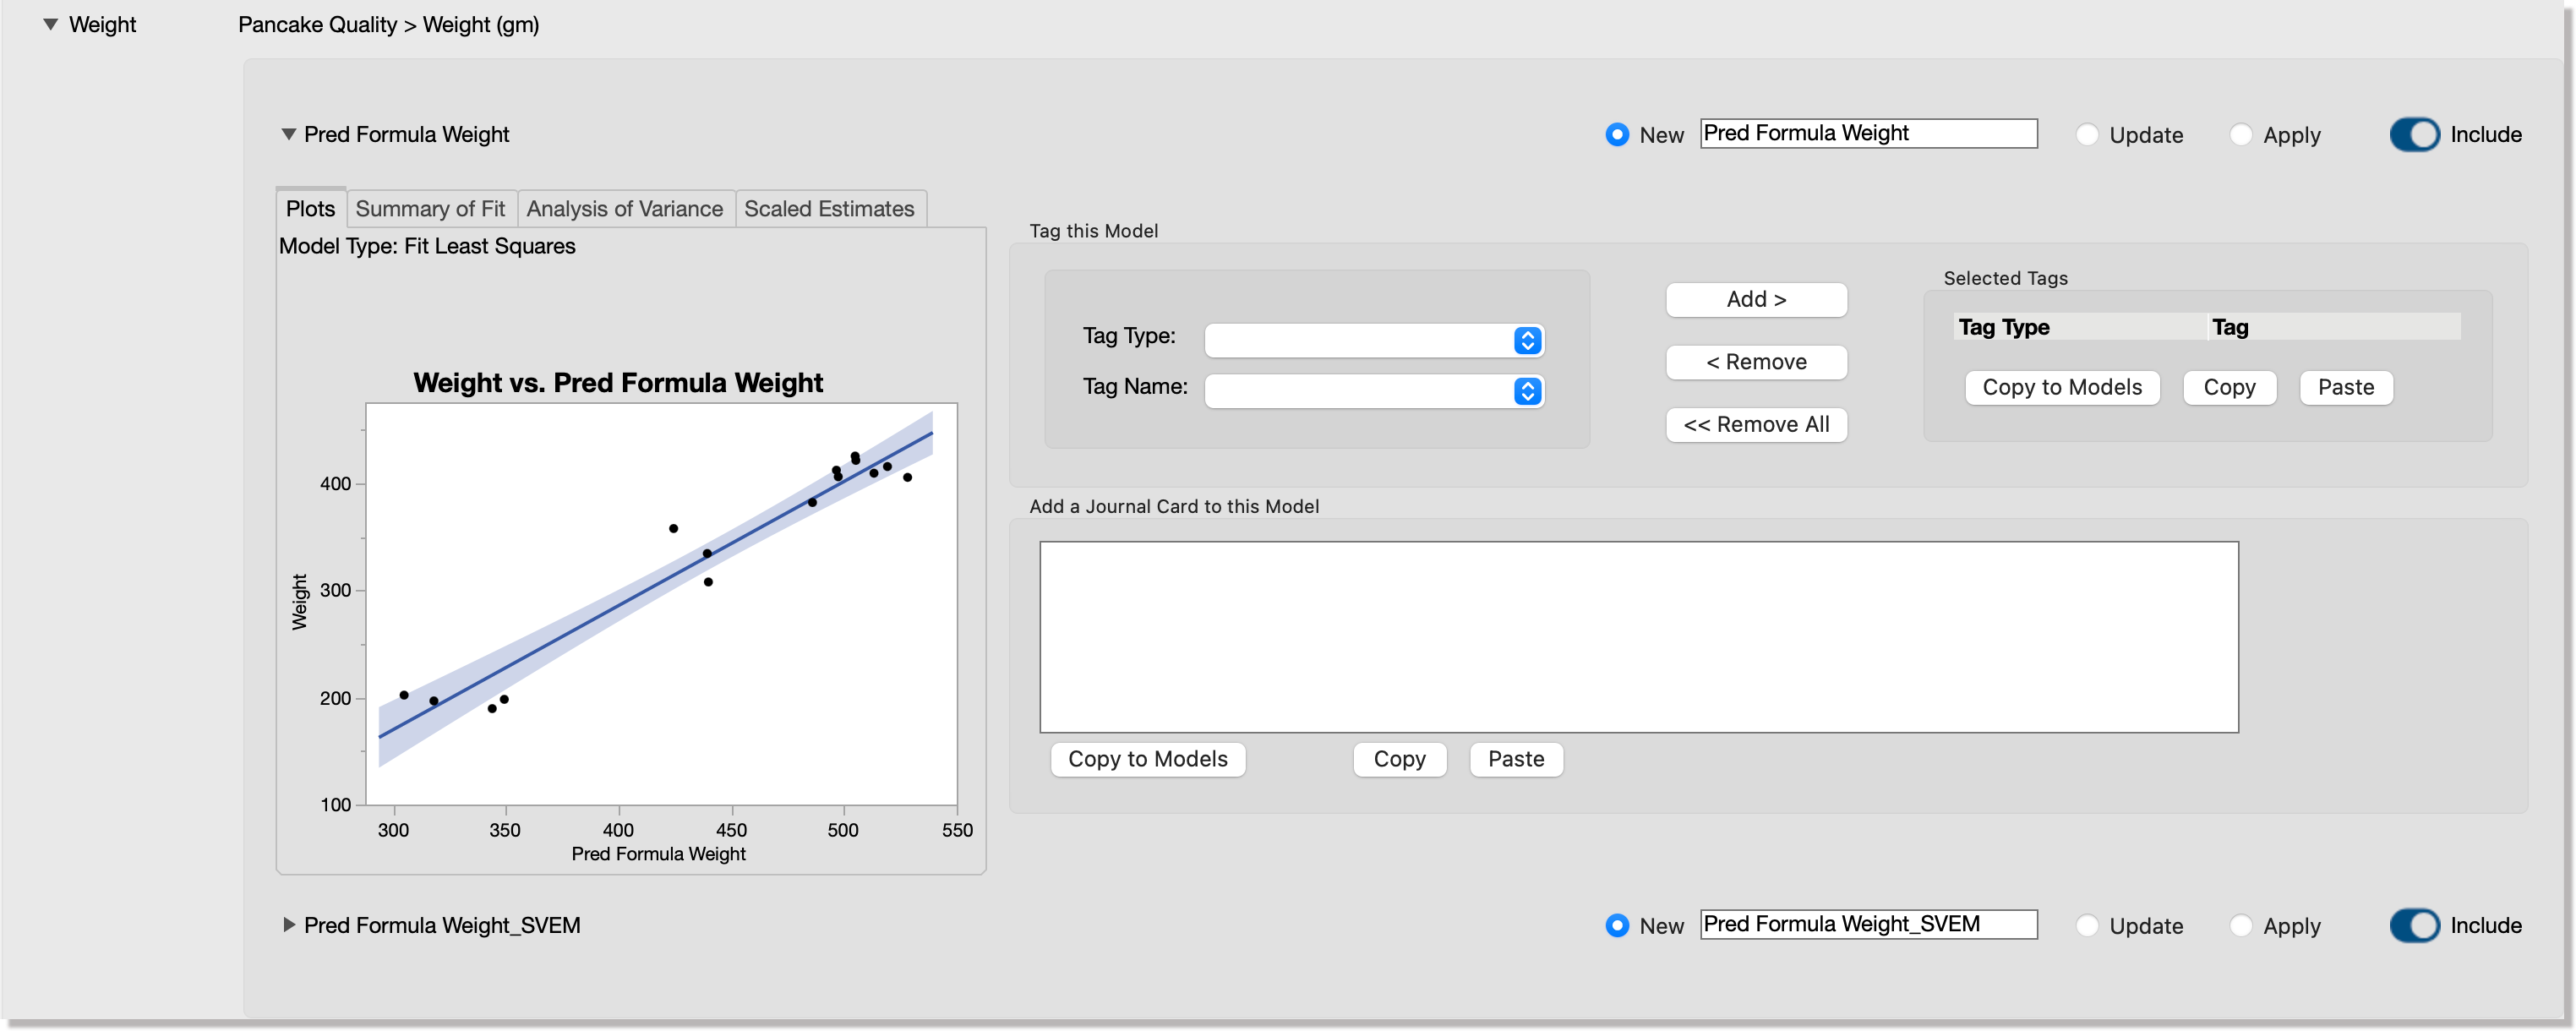
-
New - the given model is considered new and is assigned a model ID and an initial version number of 1.
-
Update - the add-in looks for the same model name in the database, upversions the model version number, and designates this version as the latest version of the model.
-
Apply - the add-in applies the given model to the current data set
-
Include toggle button - by default, this feature is turned on so that the given model is included in an upload and is version controlled. If you turn it off, the model is excluded from an upload and from being version controlled.
The panel box for a model also displays tabs of the following summary information:
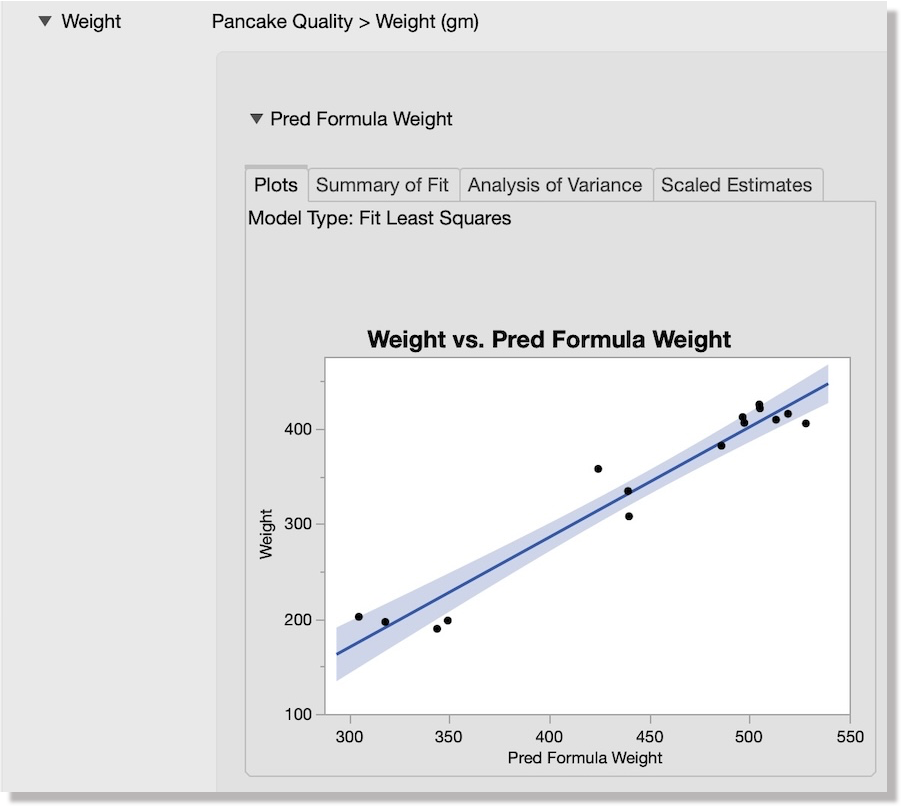
-
The Plots tab displays a "parameter vs model" plot to visualize how close a fit the data values are to the model.
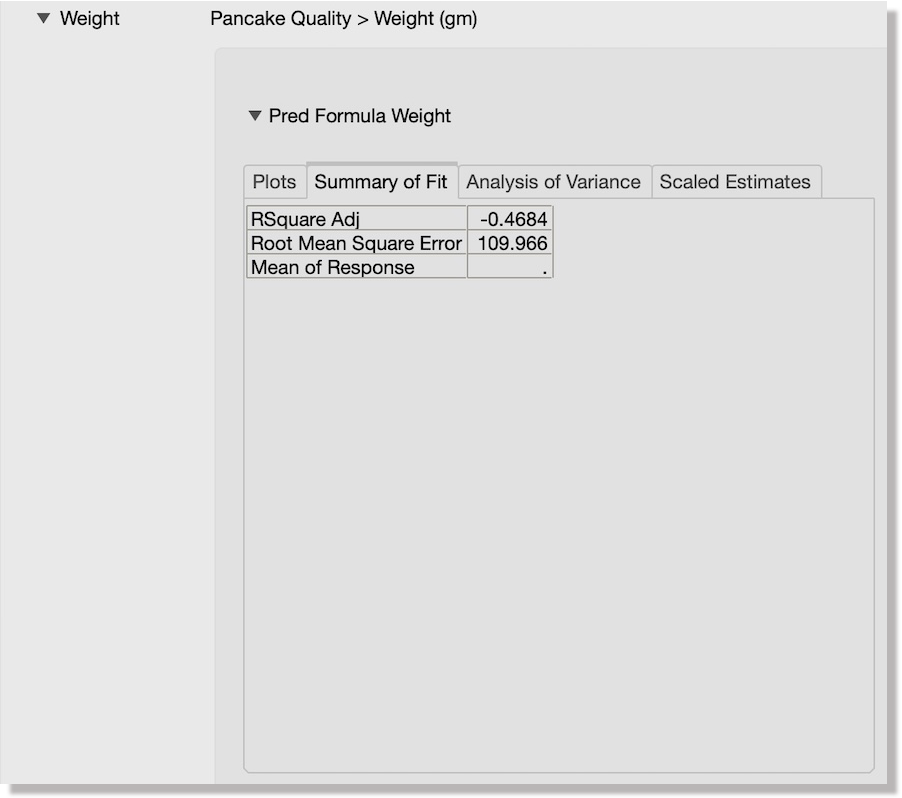
-
The Summary of Fit tab displays a summary table of the R-squared adjusted value, the Root Mean Square Error value, and the Mean of Response value.
You can also assign one or more tags and/or a journal specifically to a model by using the corresponding panel boxes for the model.

Version control for a selected data table
When you select a data table to be uploaded, it is displayed with the Managed toggle button turned on by default in the File Information panel box.
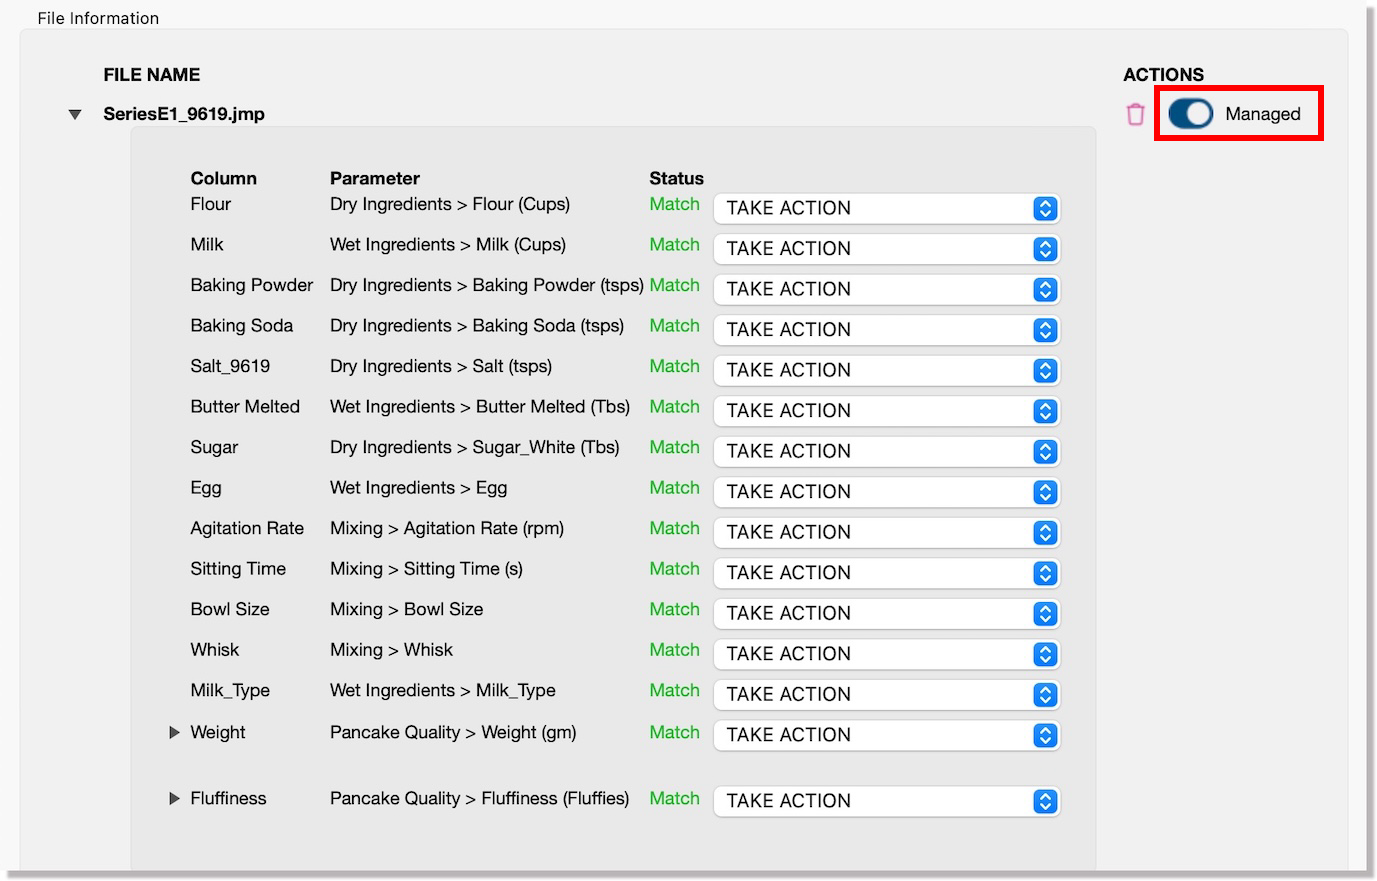
When the Managed toggle button is turned on for a data table, the add-in will version control a given data table, where it preserves the original data table and maintains subsequent versions of the data table as modifications are made. Each modified version of a data table is saved in the database with a status of Reconstructed, which is indicated if it is returned in a set of search results in the Search view.
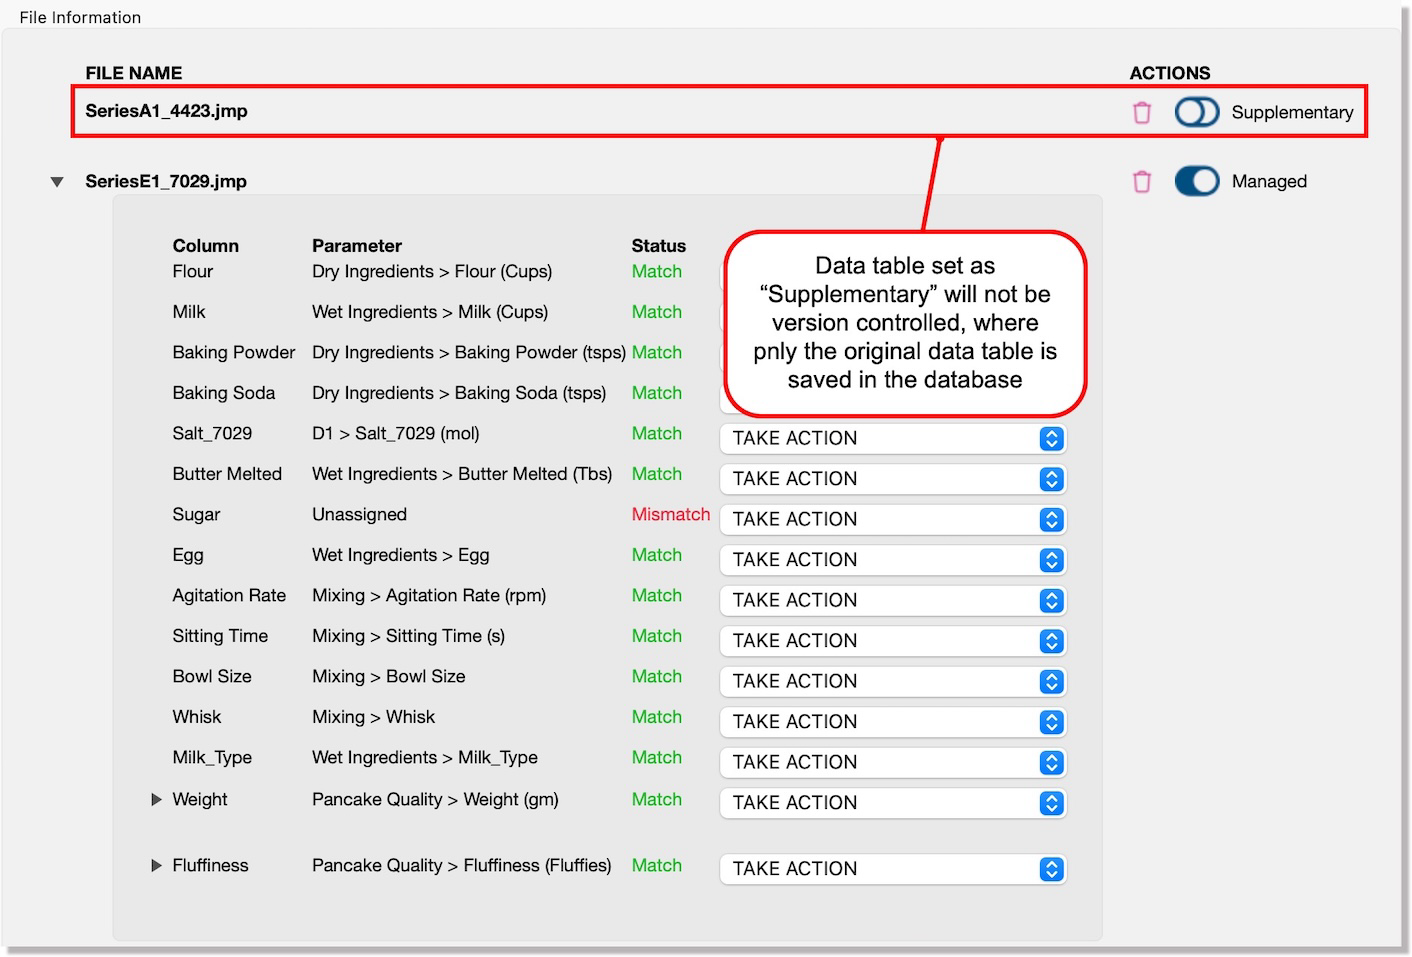
When the Managed toggle button is turned off to indicate the Supplementary status for a given data table, the add-in specifies it as a supplementary file, which means the data table will not be version controlled. Only the original version of the supplementary data table will be maintained in the database.
Complete an upload of files
When your parameters have been evaluated by the parameter matching process and each of your matching parameter names has a status of Match, check your work in the upload dialog to see if you need to define any metadata tags and a journal cardfor relevant context and to enable discoverability. For example:
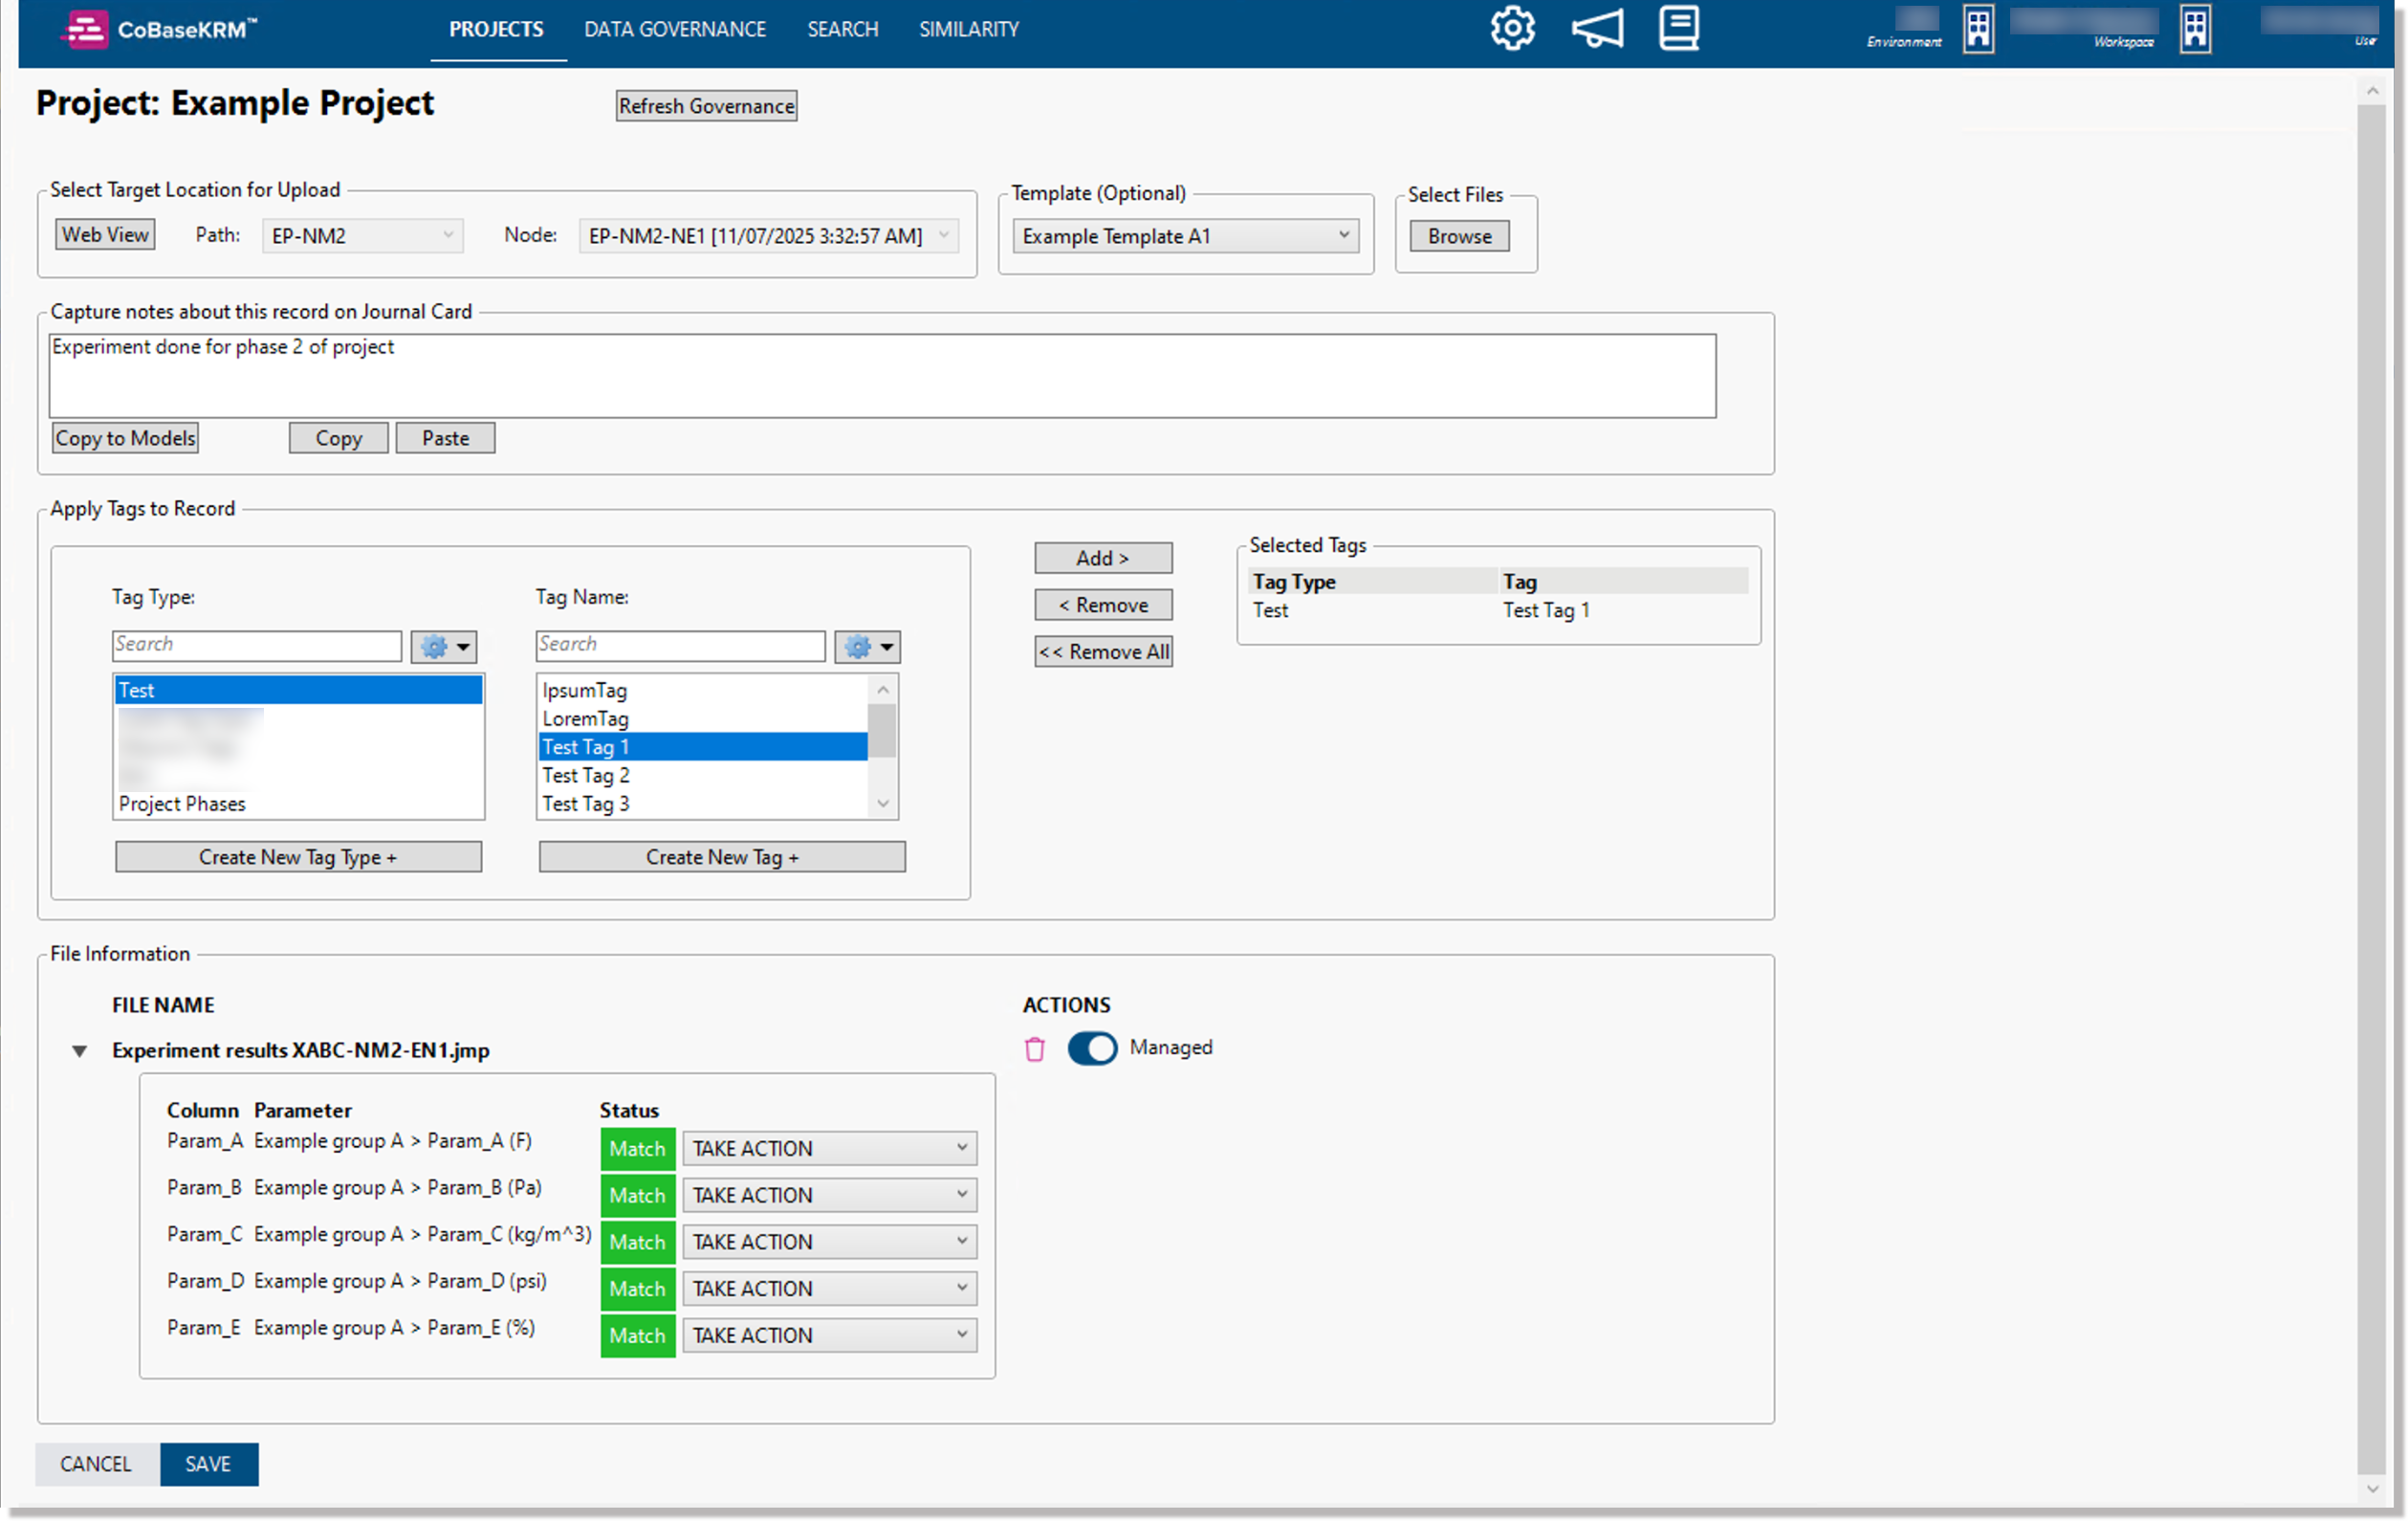
Then, click or tap the Save button at the bottom of the upload dialog to complete the upload of files to the database.
A progress dialog appears, showing the activity of the uploaded data table and other metadata being uploaded to the database. Once the upload has been completed successfully, a confirmation message is displayed.