Workspace management
Permissions and access
Minimum role: Lab manager
Client type: web client
The Workspaces group of settings enable you to define and manage one or more workspaces for supporting and managing various divisions of your organization, such as departments, teams, facilities, etc. CoBaseKRM configures a default workspace when you set up an administrator account. As you add users to a workspace, the workspace name to which they are assigned will be displayed on the main navigation bar when they are logged in to CoBaseKRM.
To navigate to the workspaces management settings, click or tap the Settings icon in the main navigation bar and select User Management Access
Note
You can only view and change the workspace settings for the workspace in which you are currently working. To view and change settings for a different workspace, click or tap the Workspace field in the main navigation bar, and select the name of the workspace to which you want to navigate.
Workspace general settings
The general settings for a workspace are maintained on the General view and currently support the ability to change a workspace name.
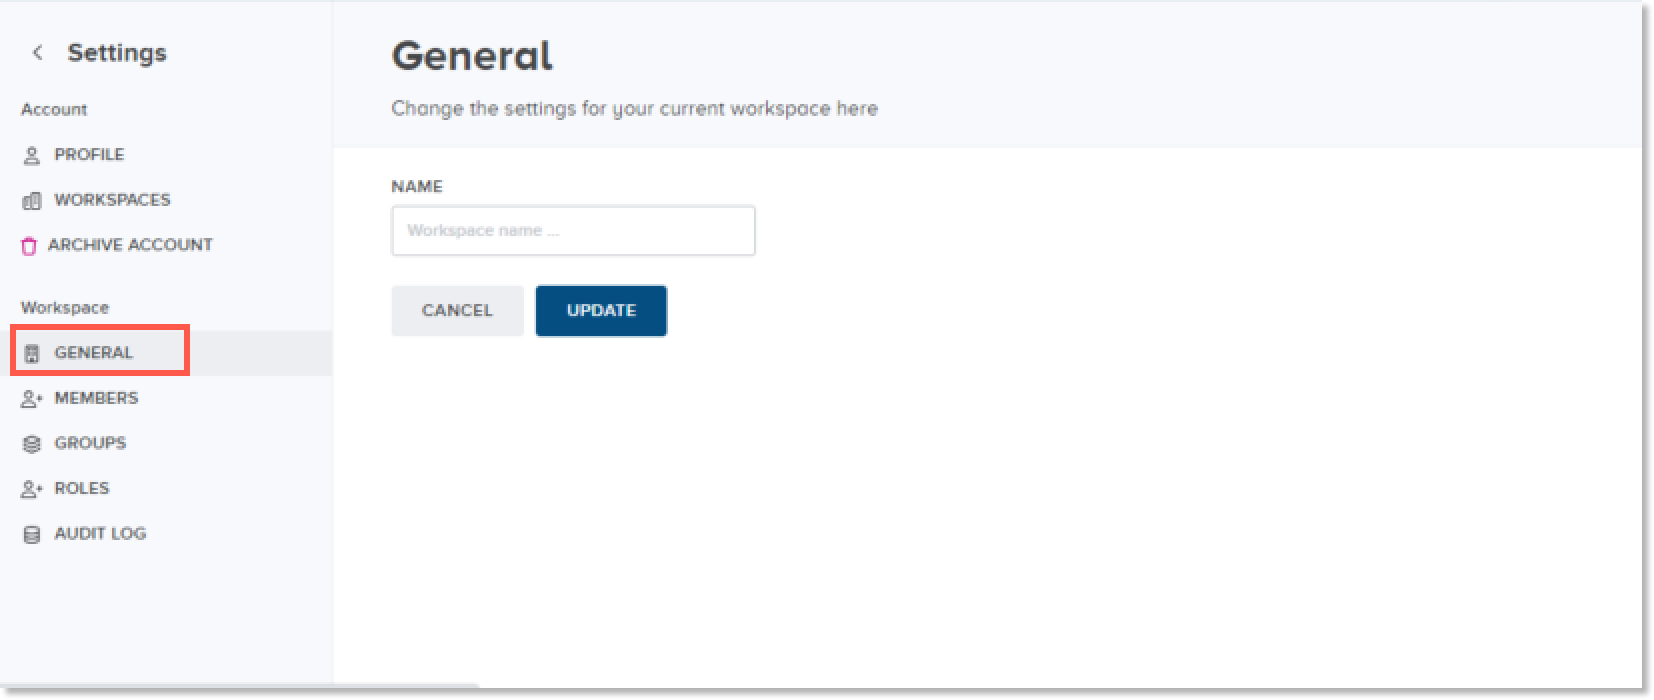
Change the name of a workspace
To change the name of a workspace on the General view for a workspace, type the new name of the workspace in the Workspace Name field and click or tap Update.
CoBaseKRM will update the display of the workspace name throughout the application to reflect the change.
Workspace members
The Members view for a workspace enables you to assign users as members of a workspace.
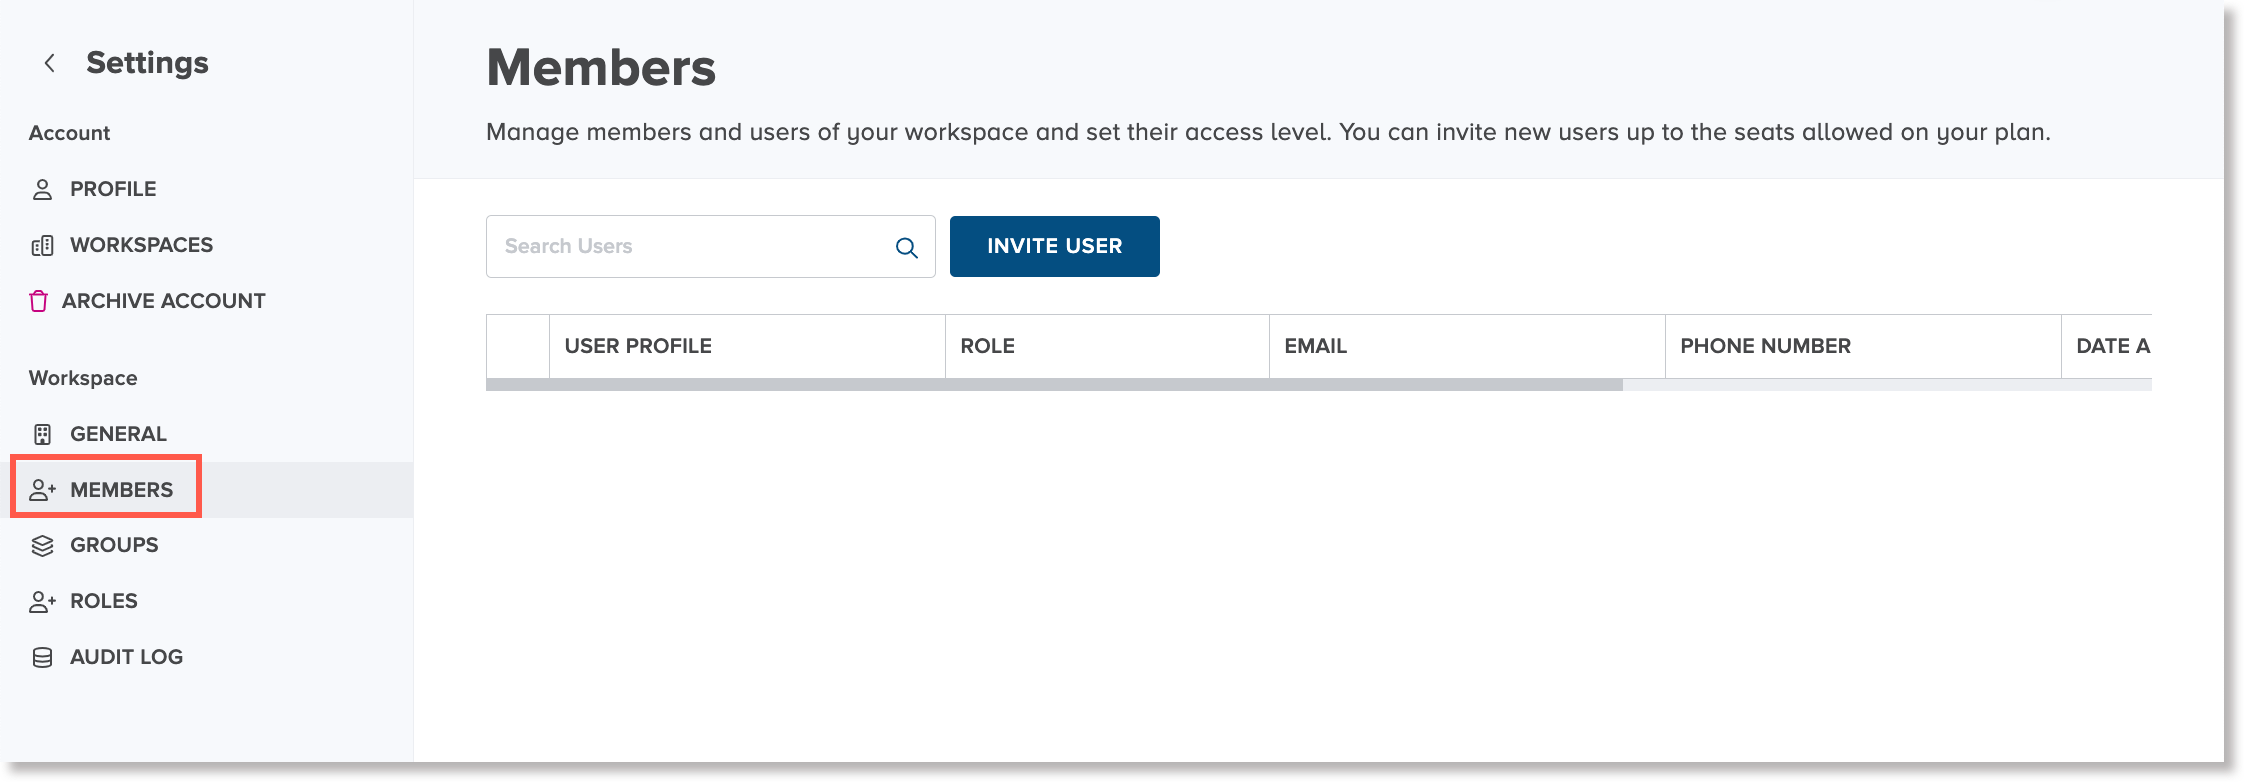
The information about the members of a workspace are displayed in the following columns.
| Column Name | Description |
|---|---|
| User Profile | The username of a member |
| Role | The role assigned to the member's user account |
| The email address of the member | |
| Phone Number | The phone number of the member |
| Date Added | The date on which the member was added to the workspace |
| Groups | The groups to which the member belongs within the workspace |
| Status | The current status of the member |
Assign users to a workspace
When you assign users to a workspace, they become a member and are granted permissions according to their assigned role. Invitees can be team members within your organization or external collaborators.
To invite a user to be a workspace member:
-
On the Workspace > Members view, press the Invite Users button.
The Invite Users to Workspace dialog appears.
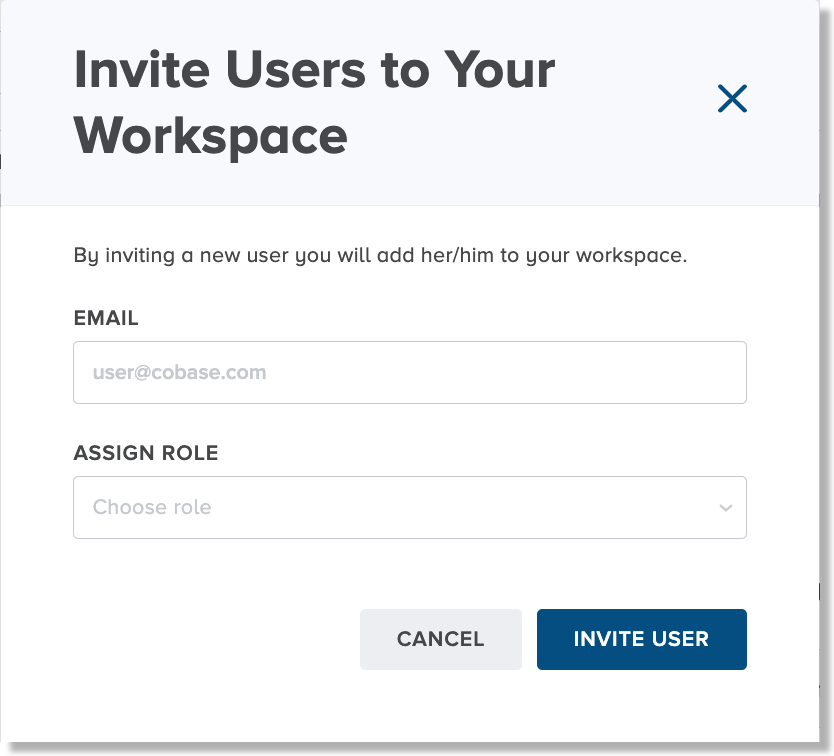
-
In the Email field, type the email address of the user who will receive the invitation to join the workspace.
-
In the Assign Role field, select a role from the drop-down list to be assigned to the invited user.
-
Press the Invite User button.
The user for whom you specified the email address will receive an invitation to create a user account and become a member of the workspace.
Unassign users from a workspace
If you want to unassign a member from a workspace to remove the navigation and functional capabilities that the member has access to, use the Unassign Member feature.
To unassign a member from a workspace:
- On the Members view, press the menu icon to the left of the member to be unassigned, and select Remove User from the menu.