Model management view in the web client
Permissions and access
Minimum role: Researcher
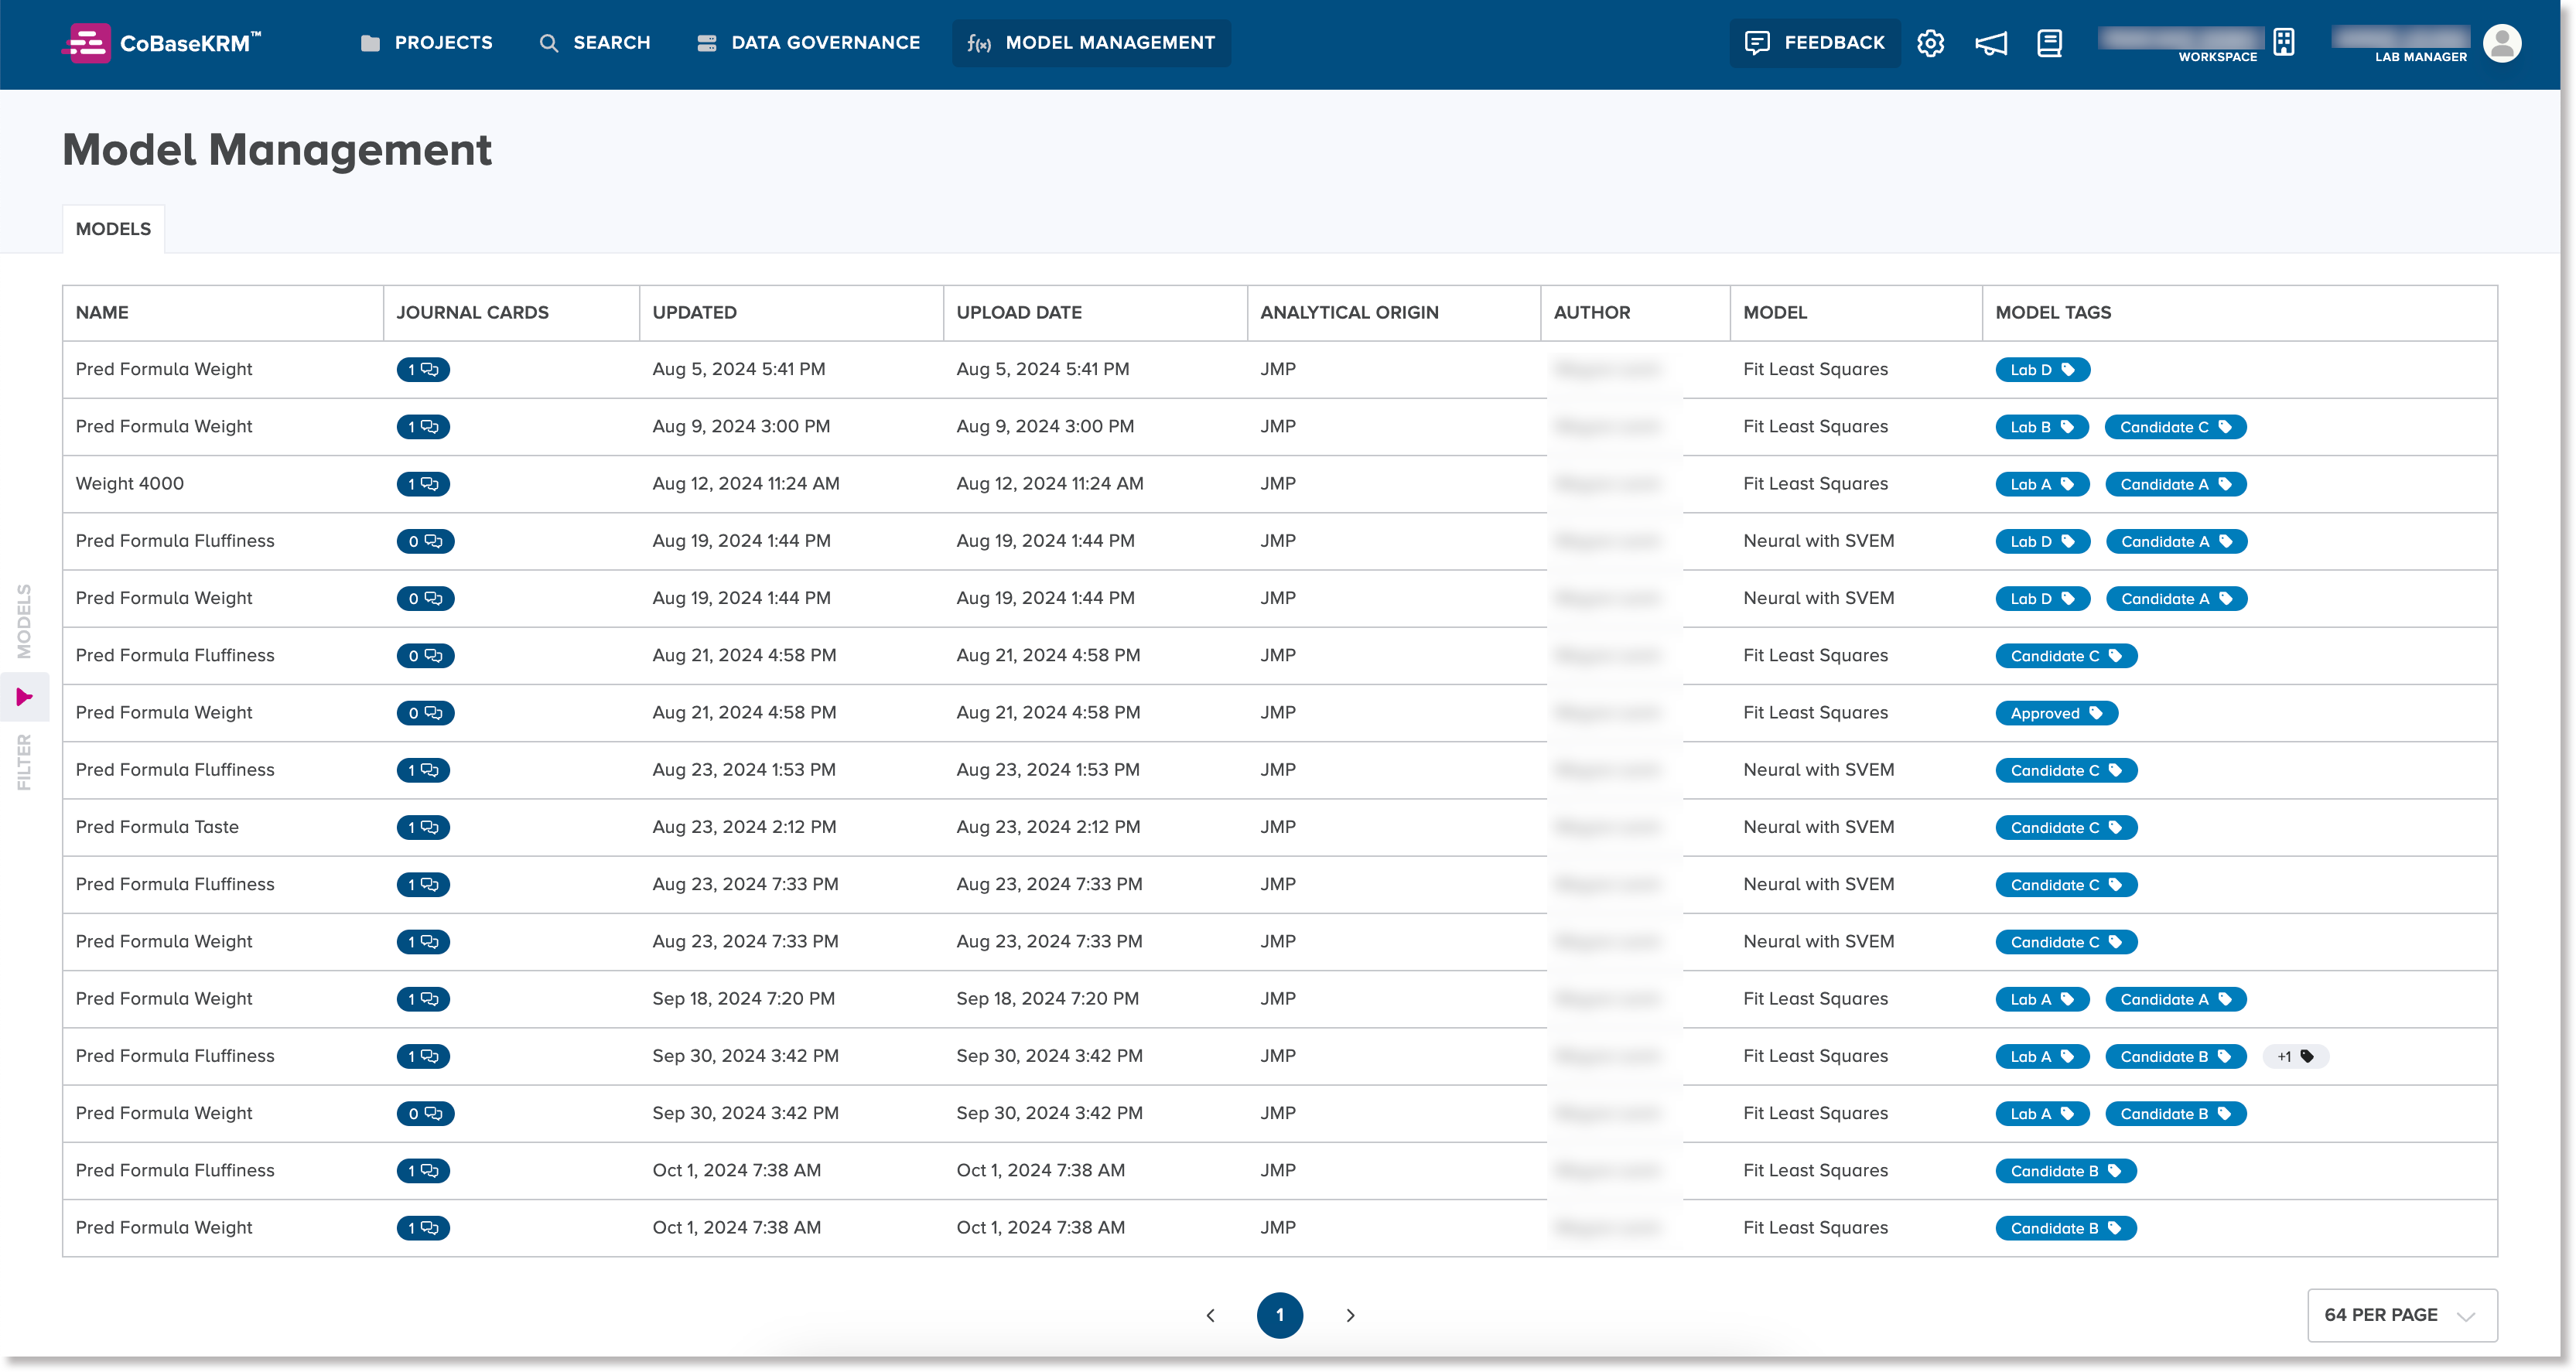
The Model management view in the web client displays a full list of existing models that have been uploaded to the database.
Note
The Model management view is for the details of models only. If you want to edit or download any models, use the JMP add-in for CoBaseKRM.
The following columns of details are displayed for each model in the Model Management view:
-
Model name
-
total number of journal cards defined for a model
-
Last modfied date of a model
-
Date on which a model was uploaded to the database
-
Source and formula type of a model
-
Username of the user who uploaded the model to the database
-
Model method
-
Assigned model tags
Display a summary of metadata details for a model
For each existing model in the list, you can click on a model name and a right panel appears, showing a summary of details of a model. To close the right panel, click or tap either the Close button in the bottom right or the close (x) icon at the top right.
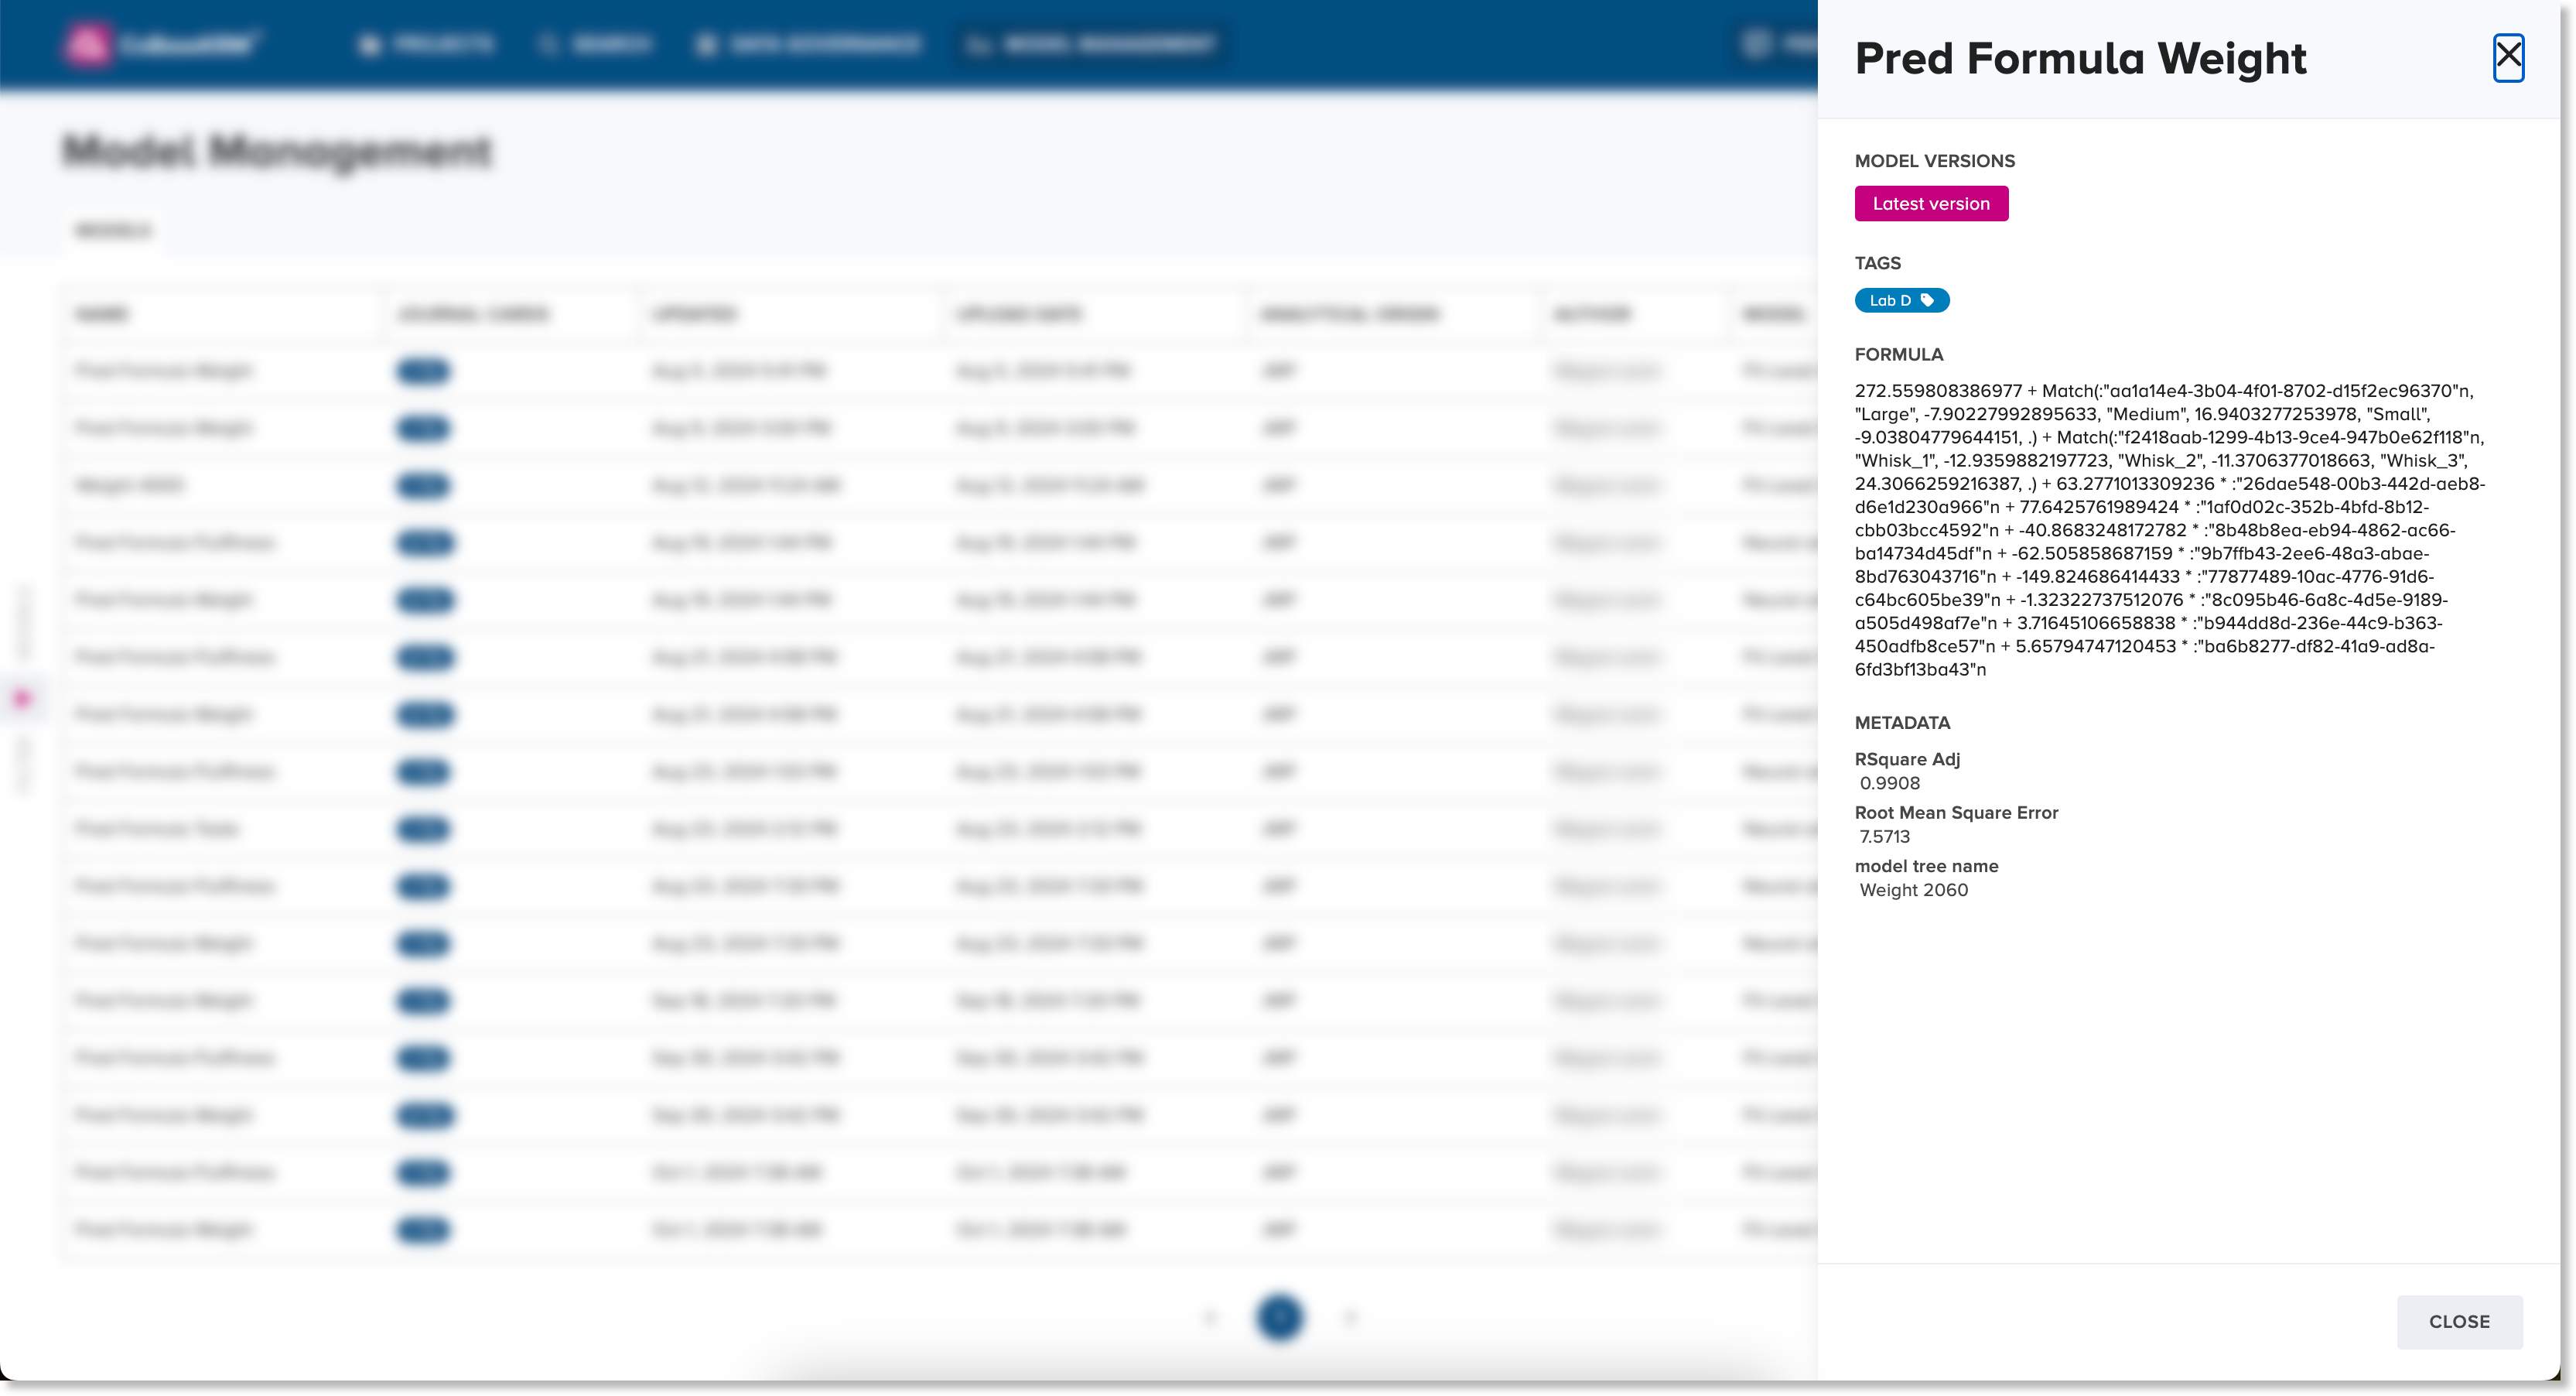
The right panel displaye the following metadata for a model:
-
Model version - if the version of the model that you are viewing is the latest one, it is indicated here.
-
Model formula
-
R2 Square Adj - the value of the adjusted R2
-
Root Mean Square Error - the value of the standard deviation of the prediction errors
Filter the list of models
The Model Management view features a left panel of filters, which is hidden by default. To display the left panel, click or tap the disclose (right arrow) icon at the left border of the Model management view.
![]()
In the left panel, you can choose from the following objects to be defined as display filters to narrow the list of models shown.
For each object name shown, click or tap the chevron down icon to expand the corresponding panel to show a list of object names or IDs. To narrow an object list for easier selection, use the search field above each list object names or IDs.
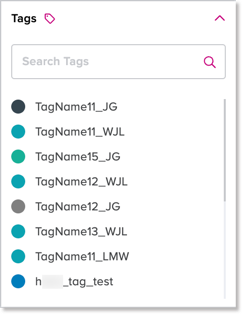
-
Tags panel box - expand the panel box and select the checkbox of a tag name from the list to define a tag filter
-
Users panel box - expand the panel box and select the checkbox of a username from the list to define a username filter

-
Records panel box - expand the panel box and select the checkbox of a record ID from the list to define a record filter

-
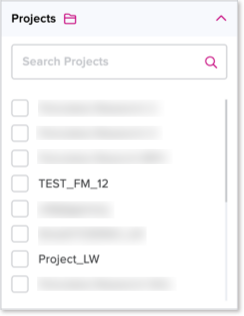
Projects panel box - expand the panel box and select the checkbox of a project name from the list to define a project name filter
-
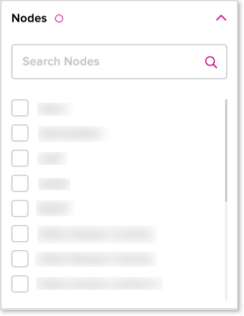
Nodes panel box - expand the panel box and select the checkbox of a node name from the list to define a node filter
-
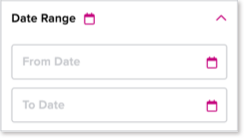
Date range panel box - to define a date range for an upload date, expand the panel box, click the From date field to select earliest date of the range from a calendar chooser and/or click the To date field to select the latest date of the range from a calendar chooser, as needed
-
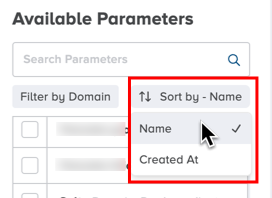
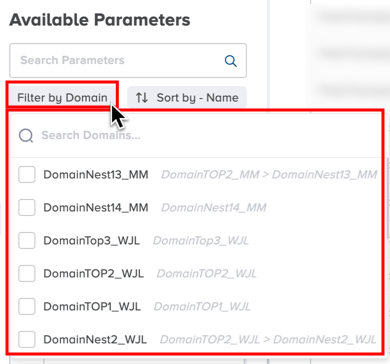
Available parameters list - expand the panel box and select the checkbox of a parameter name from the list to define a parameter filter.

To narrow or sort the list of parameters for easier viewing and selection, you can use the following features:
-
Use the search parameters field to type in some characters to show similar or matching parameter names in the list.
-
Click or tap the Filter by domain button to display a list of domain names by which to narrow the list of parameter names.
-
To sort the list of parameter names either alphabetically or by a parameter's created date, click the Sort by button and select the corresponding option.