Search
Permissions and access
Minimum role: Lab manager
The Search view lets you search for data tables, other file types, and models using general search terms.
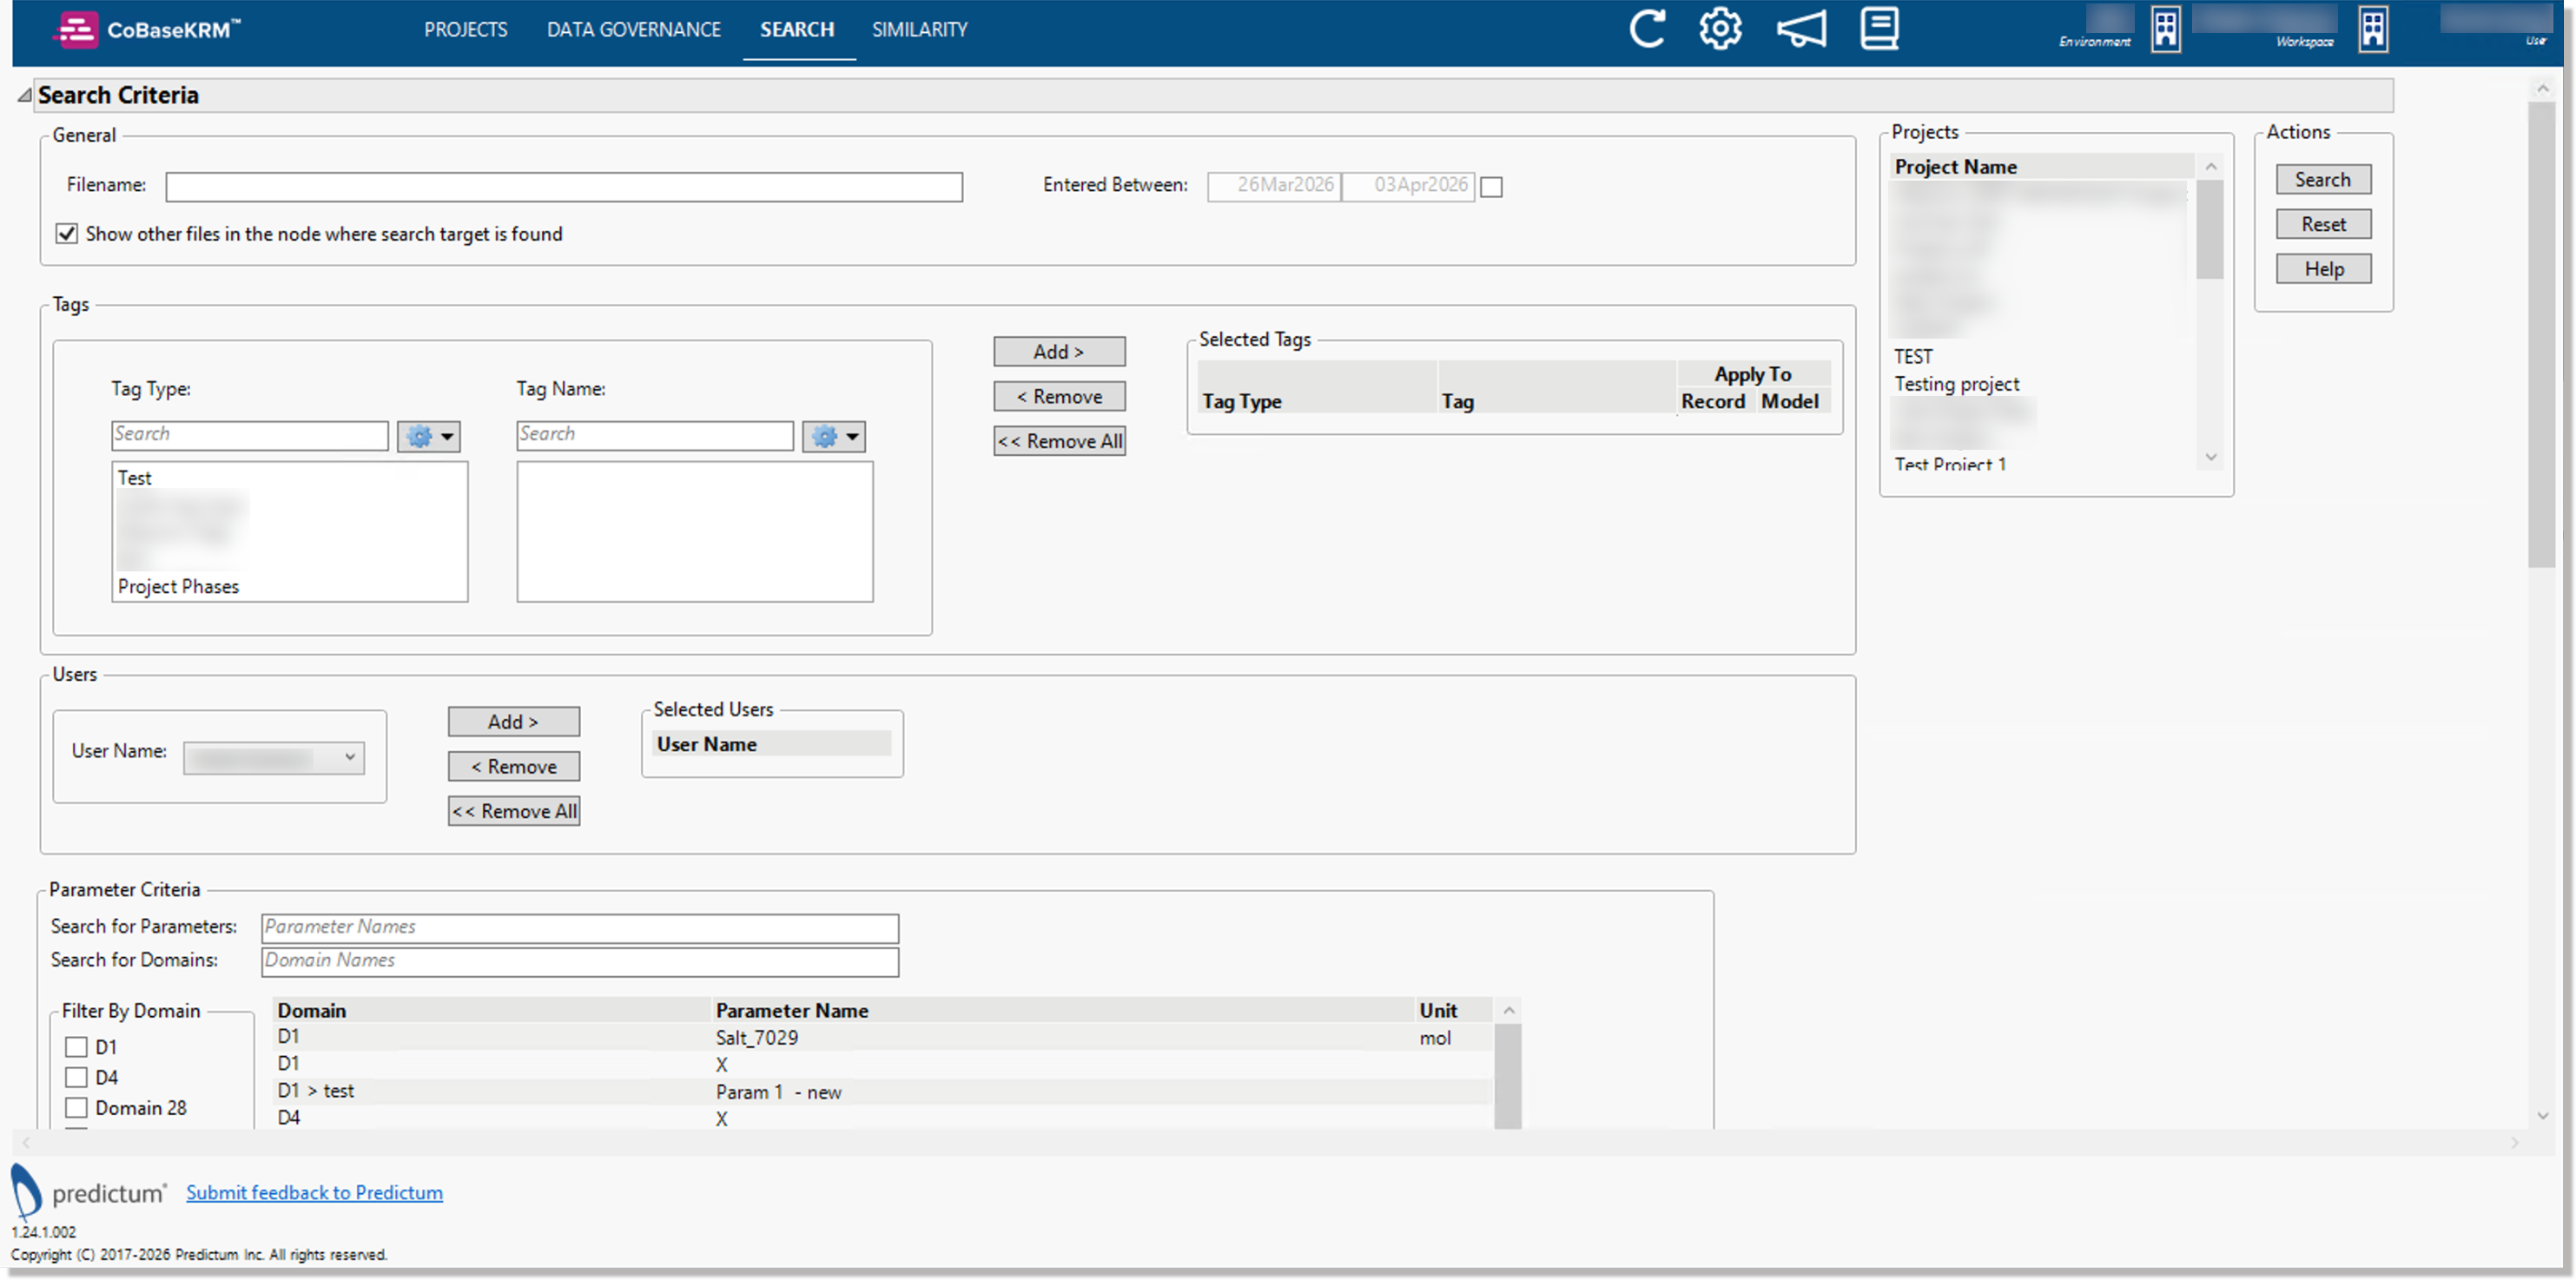
Types of search filters
Several types of search filters are supported for searching object names and details, as described in the following subsections.
Note
You are required to define a minimum of one parameter filter to perform a search. Specified parameter filters are the primary objects by which a search is performed.
General filters
In the General panel box, you can specify general search criteria by which to perform a search, such as file name and/or a created by date or date range.

To narrow your search by general criteria for files, define one or more filters in the General panel box:
-
Filename - define a partial or entire string value for the name of a file name
Notes:
-
The Filename field is case sensitive, therefore the system will return only exact matches to the specified case of the input value.
-
Searching by file extensions specified in the Filename field is not supported.
-
The system reads the input value starting from the last characters of a file name in processing the search filter.
-
-
Entered between - to define a date range filter with a start date and/or an end date to search by the created date of files, turn on the checkbox.
-
Show other files in the node where search target is found checkbox - if you want related files belonging to the same project node to be shown along with each target match in the search results, turn on this checkbox.
Notes:
-
The field is case sensitive, therefore the system will return only exact matches to the specified case of the filter value.
-
Searching by file extensions based a filter value in the Filename field is not supported.
-
The system will use the filter value to begin its search by the last characters of a file name.
-
-
Entered between - turn on the checkbox and define a date range as a filter, by a start date and/or an end date.
-
Show other files in the node where search target is found checkbox - turn on this option if you want the add-in to search for and return supplementary files that have been uploaded with data tables, which are returned in search results
Tag filters to search for files and models
In the Tags panel box, you can define record tag filters to search for related data files. You can also define model tag filters to search for models.
Note
Model tag filters are supported only in the JMP add-in for CoBaseKRM.
You have three options on how to apply one or more tag filters in a search:
- search records using record tags only
- search models using model tags only
- search both records and models using record tags and model tags
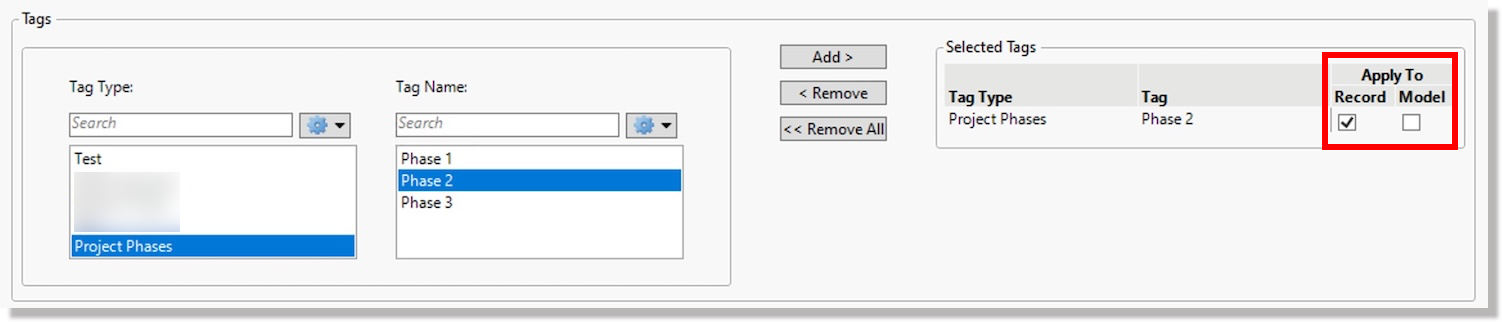
When you select a tag as a filter, its File checkbox is turned on by default to search for and return file names that have the assigned tag.
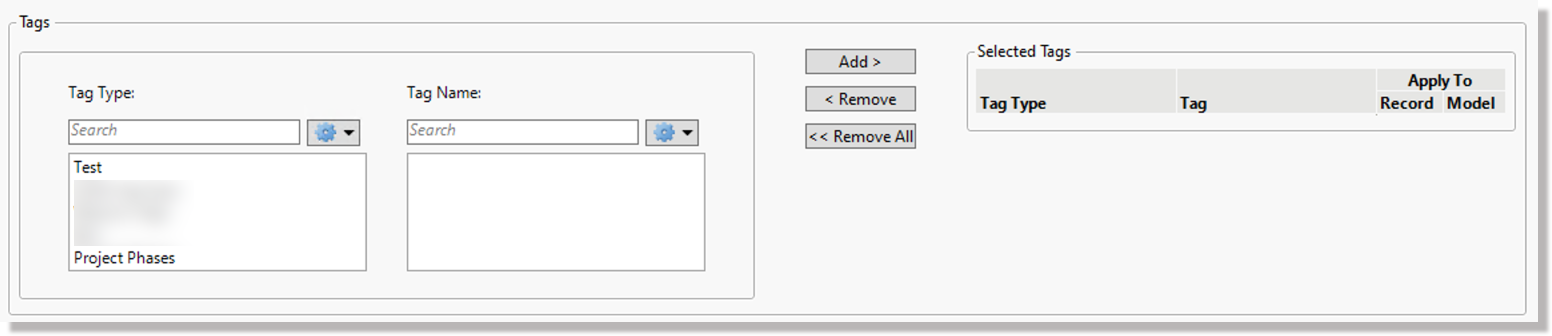
In the Tags panel box, you can define tag filters to search for files and models by assigned tag names.
Note
To edit a model, you need to define a model tag filter to search for the model, then from the search results, you download and edit the model before you upload the modified model to the database. For more details, see the Download and edit a model section below.
When you select a tag as a filter, the File checkbox is turned on to search for file names that have the assigned tag name.
You also have the option of turning on the Model checkbox to search for models that have the assigned tag name.
To define tag filters:
-
On the Search view and in the Tags panel box, select a tag type from Tag Type list field.
The add-in filters the list of tags that is presented in the Tag Name list field.
-
In the Tag Name list field, select a tag name and click or tap the Add button to add it to the list of selected tag names.
As you select tag names, they are displayed in the Selected Tags panel box.
Tips:
-
To remove a tag name from the Selected Tags panel box, highlight it in the list of selected tag names and click or tap the Remove button.
-
To remove all of the selected tag names from the Selected Tags panel box, click or tap the Remove All button.
-
Parameter filters
In the Parameter Criteria panel box, you are required define a minimum of one parameter filter by which to perform a search.
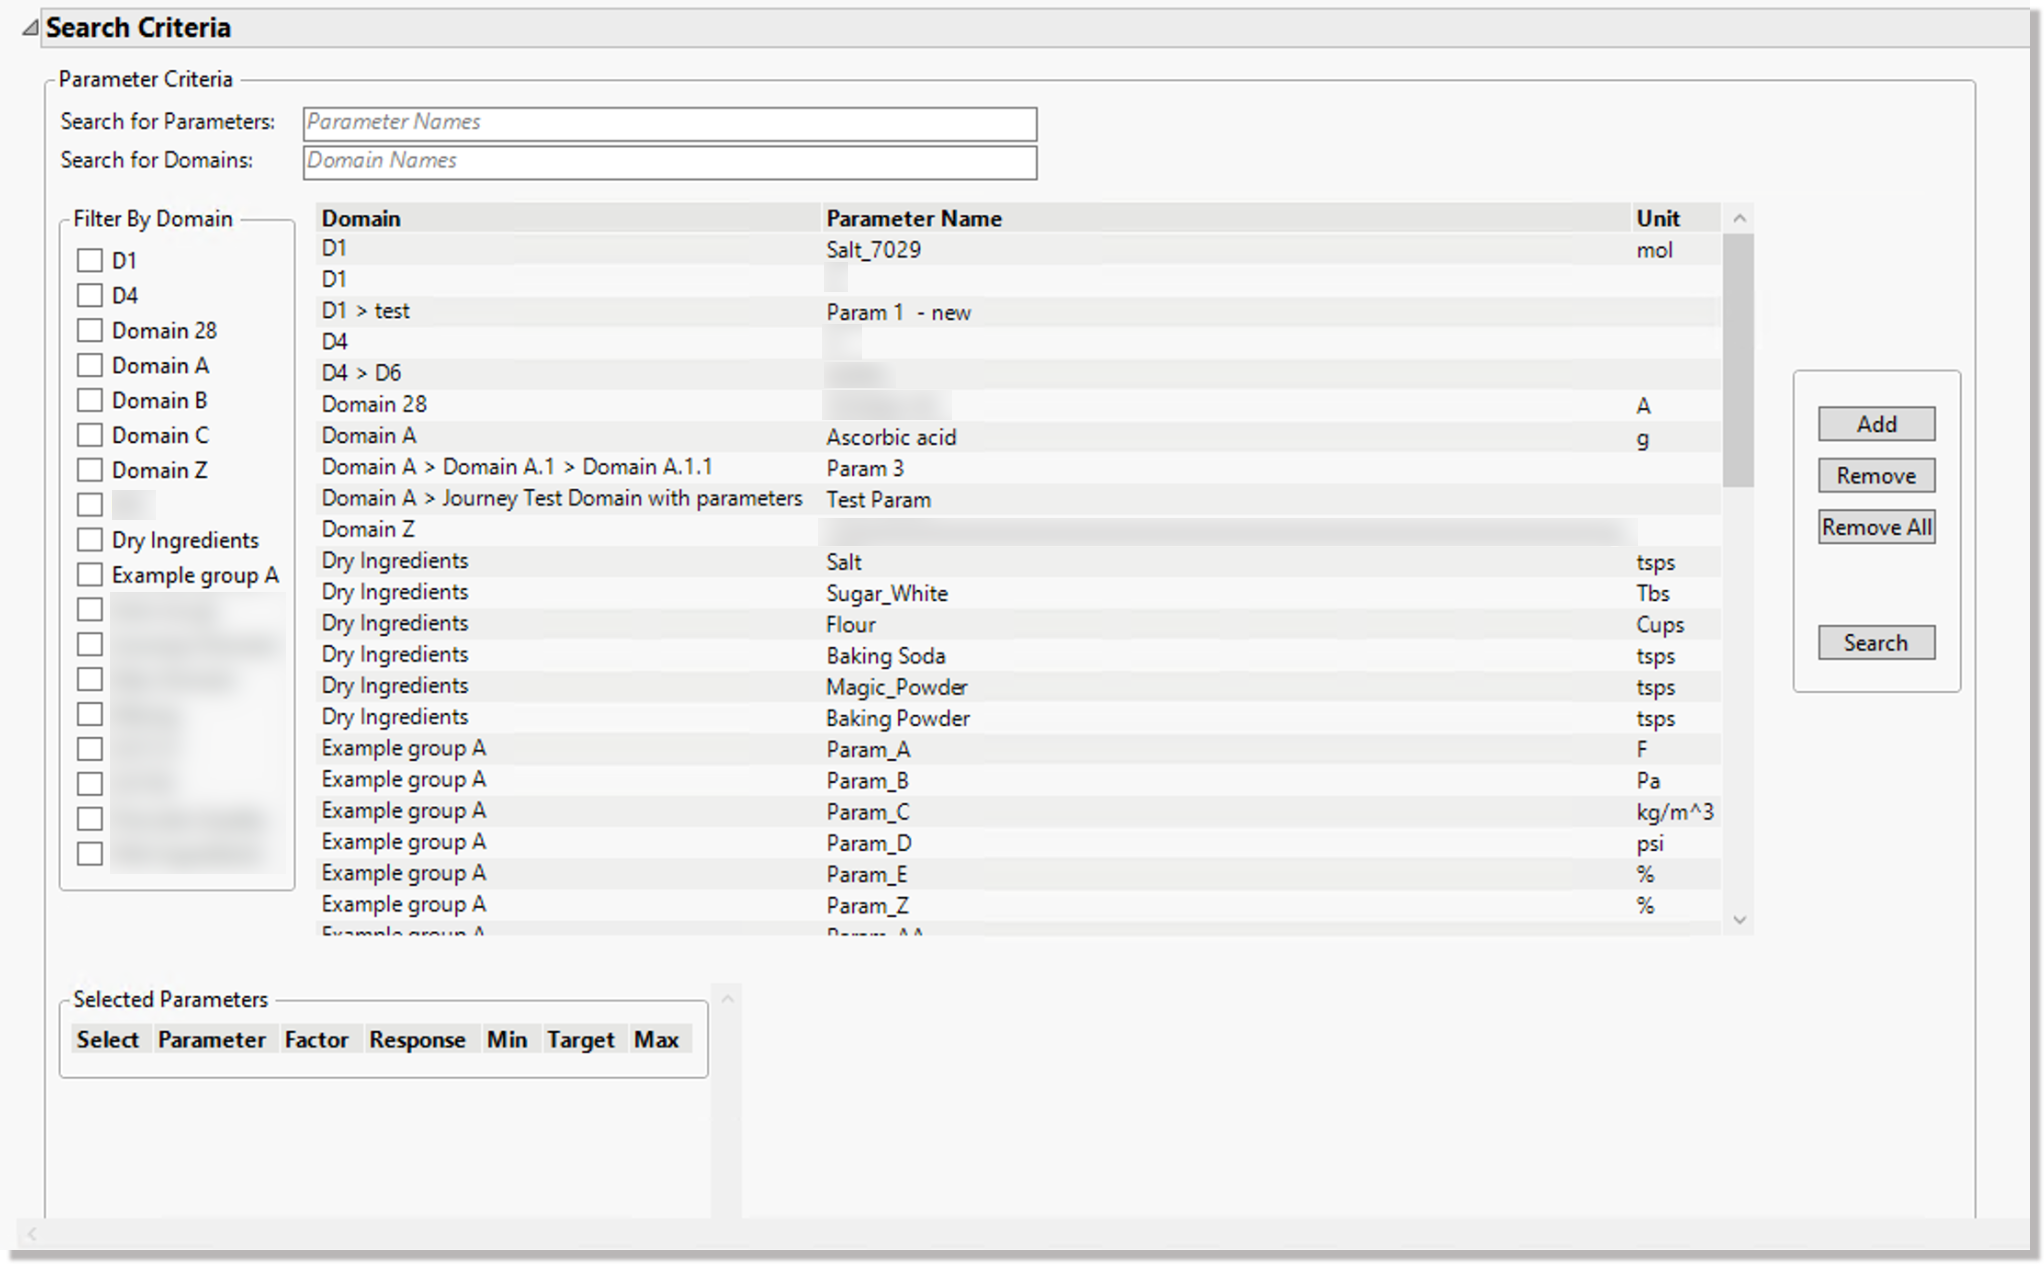
To narrow the list of parameters to choose from, define a partial or full domain name in the Domain field.
To select parameter filters, choose one or more parameters and click or tap the Add button. The selected parameters are listed in the Selected Parameters panel box.
Optional conditions for parameter filters
If you want to specify optional conditions for selected parameter filters, define any of the following:
-
Factor - turn on this checkbox if you want the search results to be filtered by the given parameter that is specified as a factor.
-
Response - turn on this checkbox if you want the search results to be filtered by the given parameter that is specified as a response.
Note
You can turn on a factor condition or a response condition for a given parameter, but not both condtions at the same time.
-
Range - If you want to narrow the search within a range of values of a given parameter, set one or both of the following range limits:
- a minimum, numeric value in the Min field and/or
- a maximum, numeric value in the Max field.
The add-in will return matching data tables containing parameter values fall within the specified range limits.
Search actions
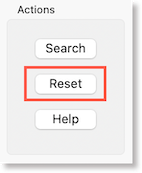
Once you have defined a set of search filters, click or tap the Search button to perform a search. The results of a search are displayed in the Search results outline box.
If you want to reset the Search view to clear specified filters and search results, click or tap the Reset button.
Search results
Search results are displayed are organized and displayed on the following tabs in the Search Results outline box:
-
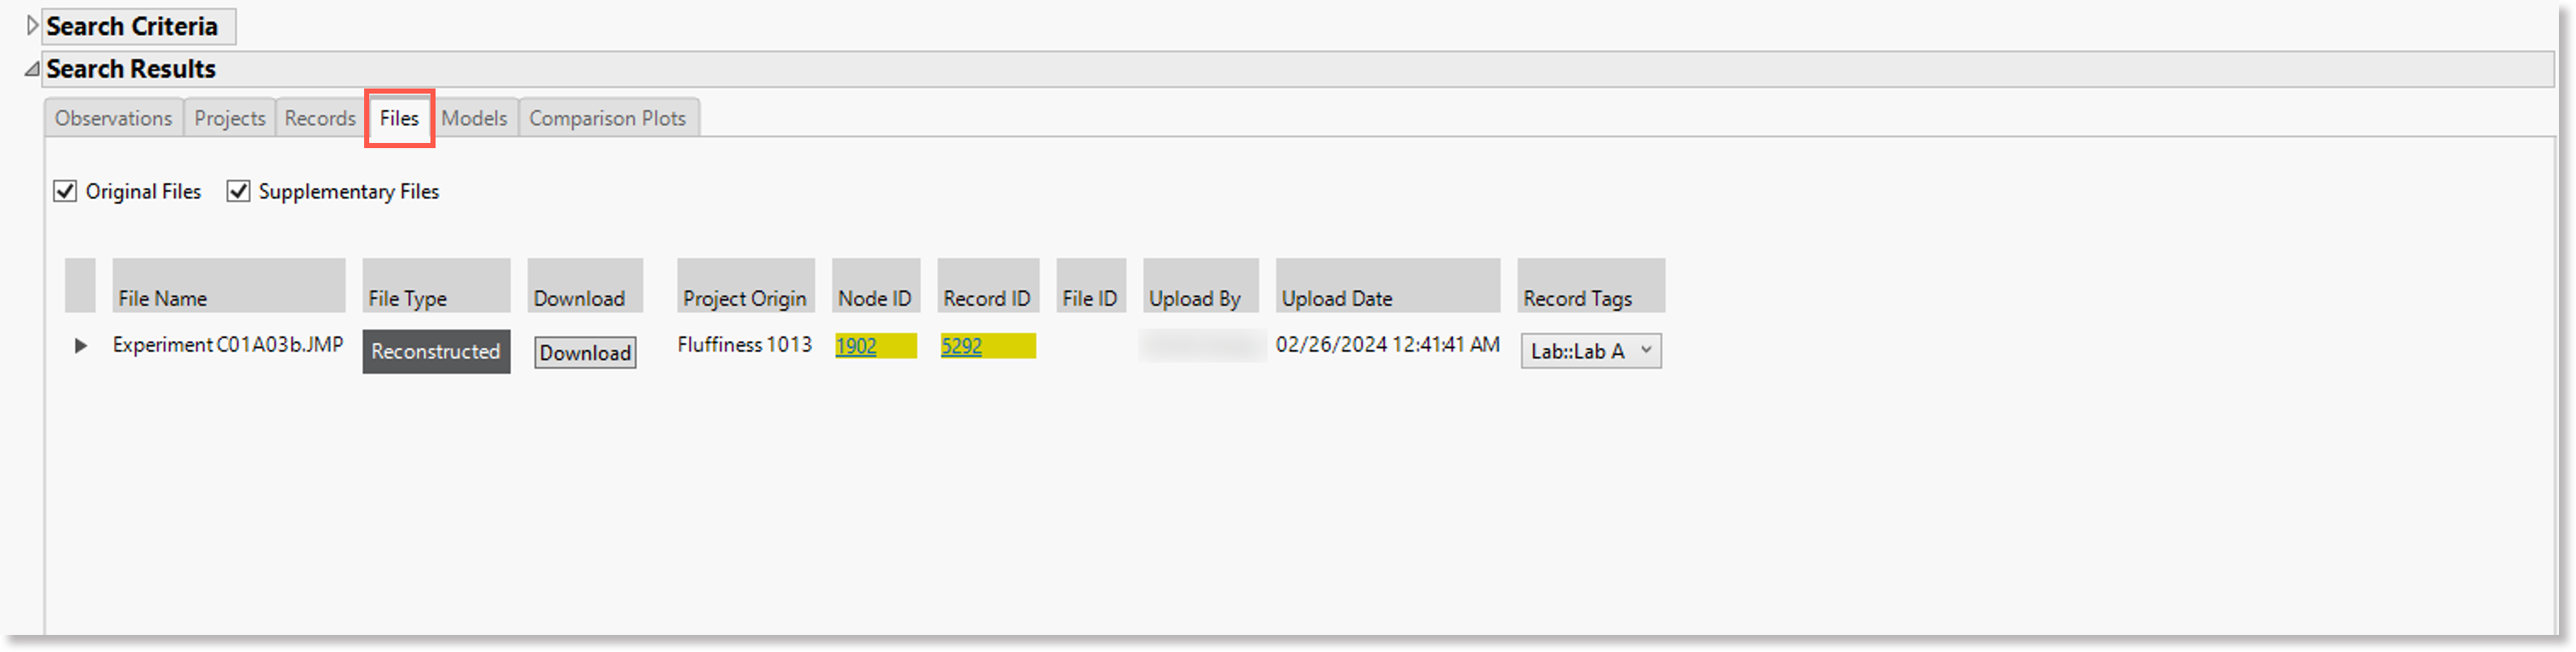
Files - files of data tables that match general criteria are listed on the Files tab, as well as related supplementary files which were uploaded in the same record as matching data tables.
-
Models - models that match the model tag filters are listed on the Models tab.
-
Comparison plots - comparison plots are generated automatically based on data tables in search results
Each tab organizes search results and provides features to help you work with the. For more details abouut the tabs that organize search results, see the following subsections.
Matching files in search results
Files that match your specified record filters in the search results are retrieved and displayed on the Files tab.
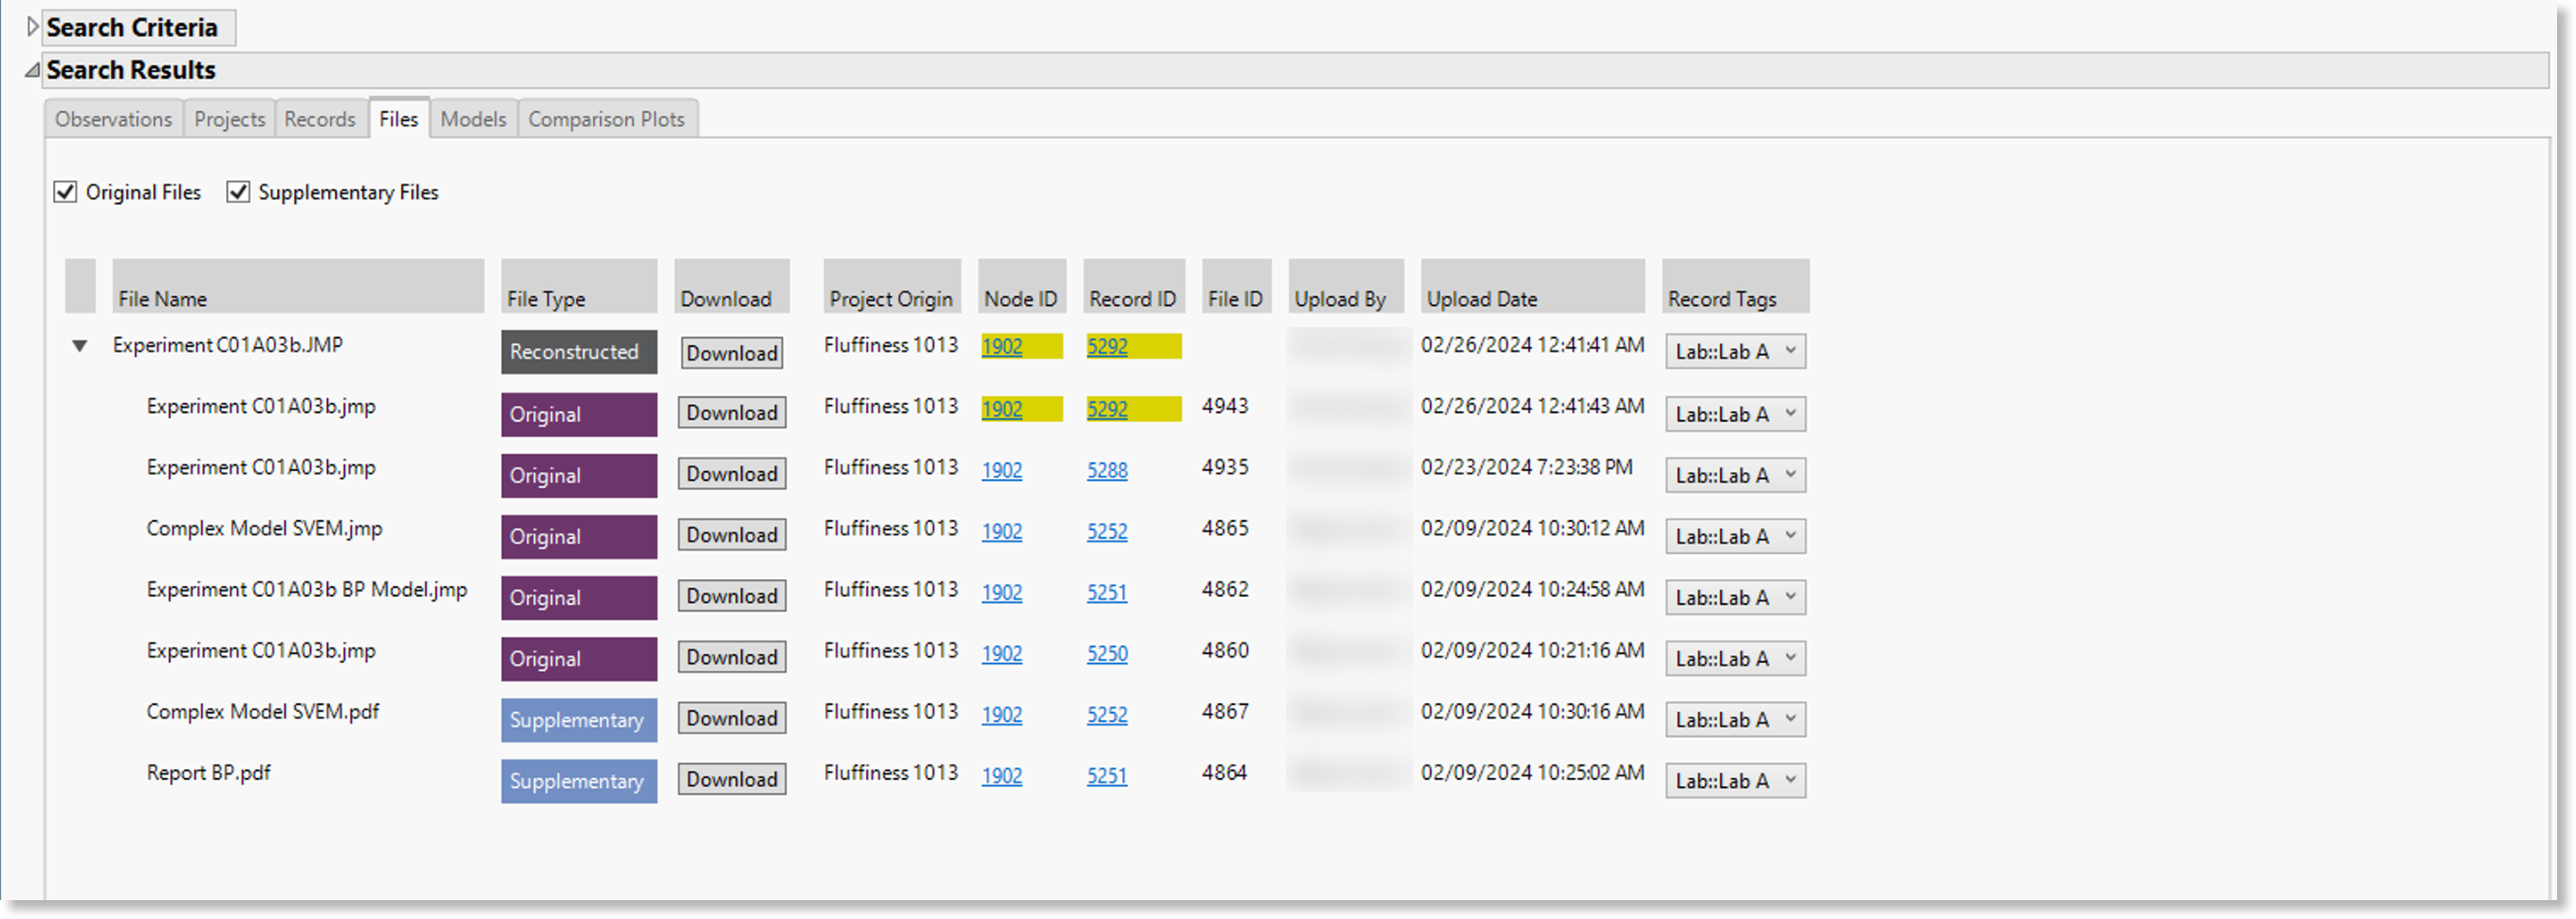
The following details are displayed for each matching data file in the list:
-
File Name column - lists the names of data files that match your search criteria. Each data file name is displayed as a collapsed accordion panel and may contain an original file, re-uploaded files containing changes, and supplementary files, which are specified in the File Type column.
-
File Type - the value displayed indicates whether a file is an original version, a reconstructed version, or a supplementary (related) file.
-
Download button - an action button to download a given data file your local directory.
-
Project Origin - the project related to the given data file
-
Node ID - the ID of a related project node
-
Record ID - the ID of a related project record
-
File ID - the ID of a data file
-
Uploaded Date - the date on which a data file was uploaded to the database
-
Uploaded By - the name of the user who performed the initial upload of a data file
-
Tags - tag names assigned to a given data file
How search results are organized for matching files
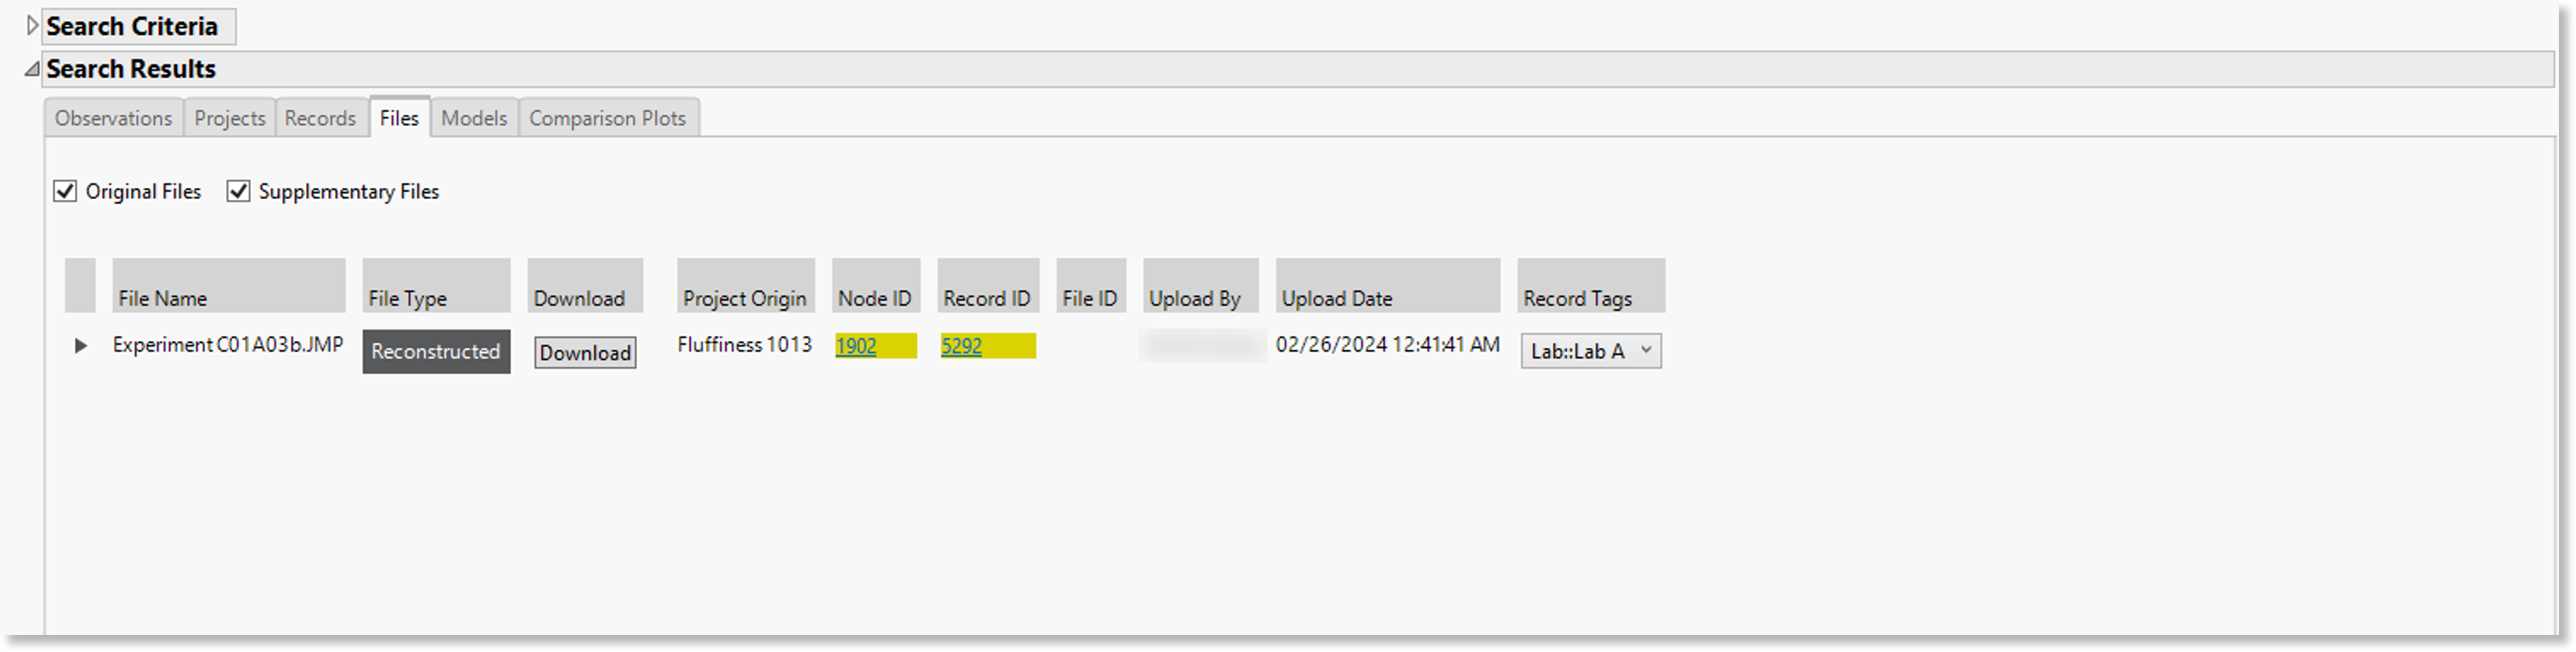
Matching files in search results are organized by file name in expandable and collapsible panel boxes.
If a matching file has multiple versions and/or supplementary that are related, they are grouped within a collapsed accordion panel by default. If you expand an accordion panel, you can view the full list of related files.
Status and versions of matching files
For each file name that is listed on the Files tab in the search results, a collapsed accordion panel is displayed by default. If you click the expand (right arrow) icon on the left of a file name, it expands an accordion panel so that you can view the file type of each version nder the File Type column:
-
Original - original versions of a file are labeled as "Original"
-
Reconstructed - modified versions of a file are labeled as "Reconstructed"
-
Supplementary - supplementary files that were uploaded with files containing data tables are labeled as "Supplementary"
Filter matching files in search results
The following checkboxes are used to filter the display of related files within an expanded accordion panel:
-
Original Files checkbox - this feature is turned on by default to display the original versions related to matching files in the search results. To hide the original versions of files from being displayed, turn off this checkbox.
-
Supplementary Files checkbox - this feature is turned on by default to display supplementary files that are related to the matching files in the search results. To hide the supplementary files from being displayed, turn off this check box.
If you turn off both of the above checkboxes, only files with a status of "Reconstructed" are displayed.
Models tab
Models that match your specified search filters are displayed on the Models tab in the search results.
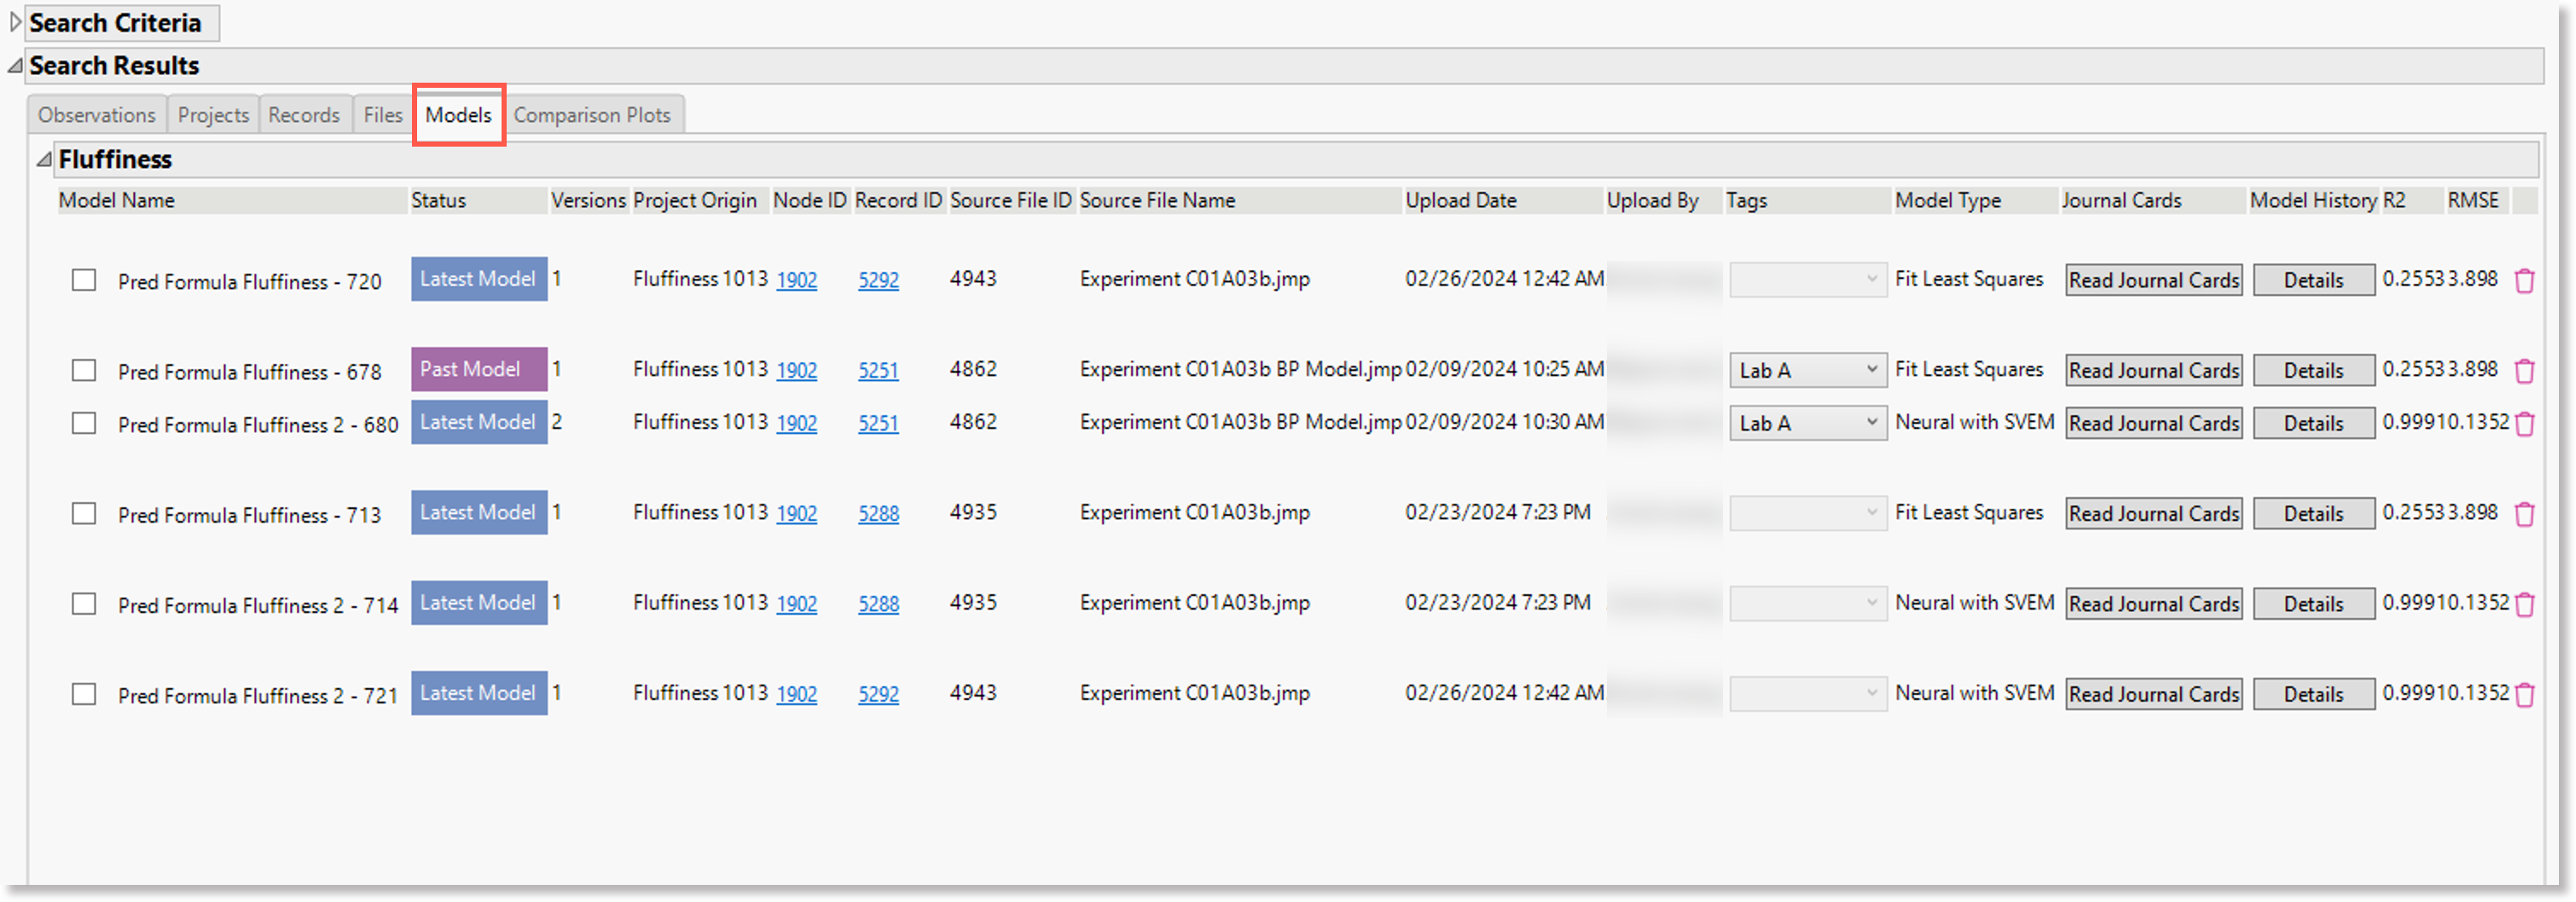
The following details are displayed for each model in the list:
-
Model name - model name and model ID
-
Status - the status indicating the version of the model. The latest, active version of a model is displayed with the "Latest" status. Any earlier, inactive versions of a model are displaye with the "Past" status.
-
Uploaded Date - the date on which a data file was uploaded to the database
-
Uploaded By - the name of the user who performed the initial upload of a data file
-
Tags - the tag name that matches the specified tag filter of your search. If other tags are also assigned to the model, they are also displayed.
-
Journal Cards - displays a button that opens a separate dialog containing journal cards defined for the model
-
Model History - displays a Details button, which opens a separate dialog containing more details about the model history.

For more information about viewing a model's history, see the View details of a model's history section on the Model management page.
-
R2 - the actual R2 value for the model is displayed
-
RMSE - the actual RMSE value for the model is displayed
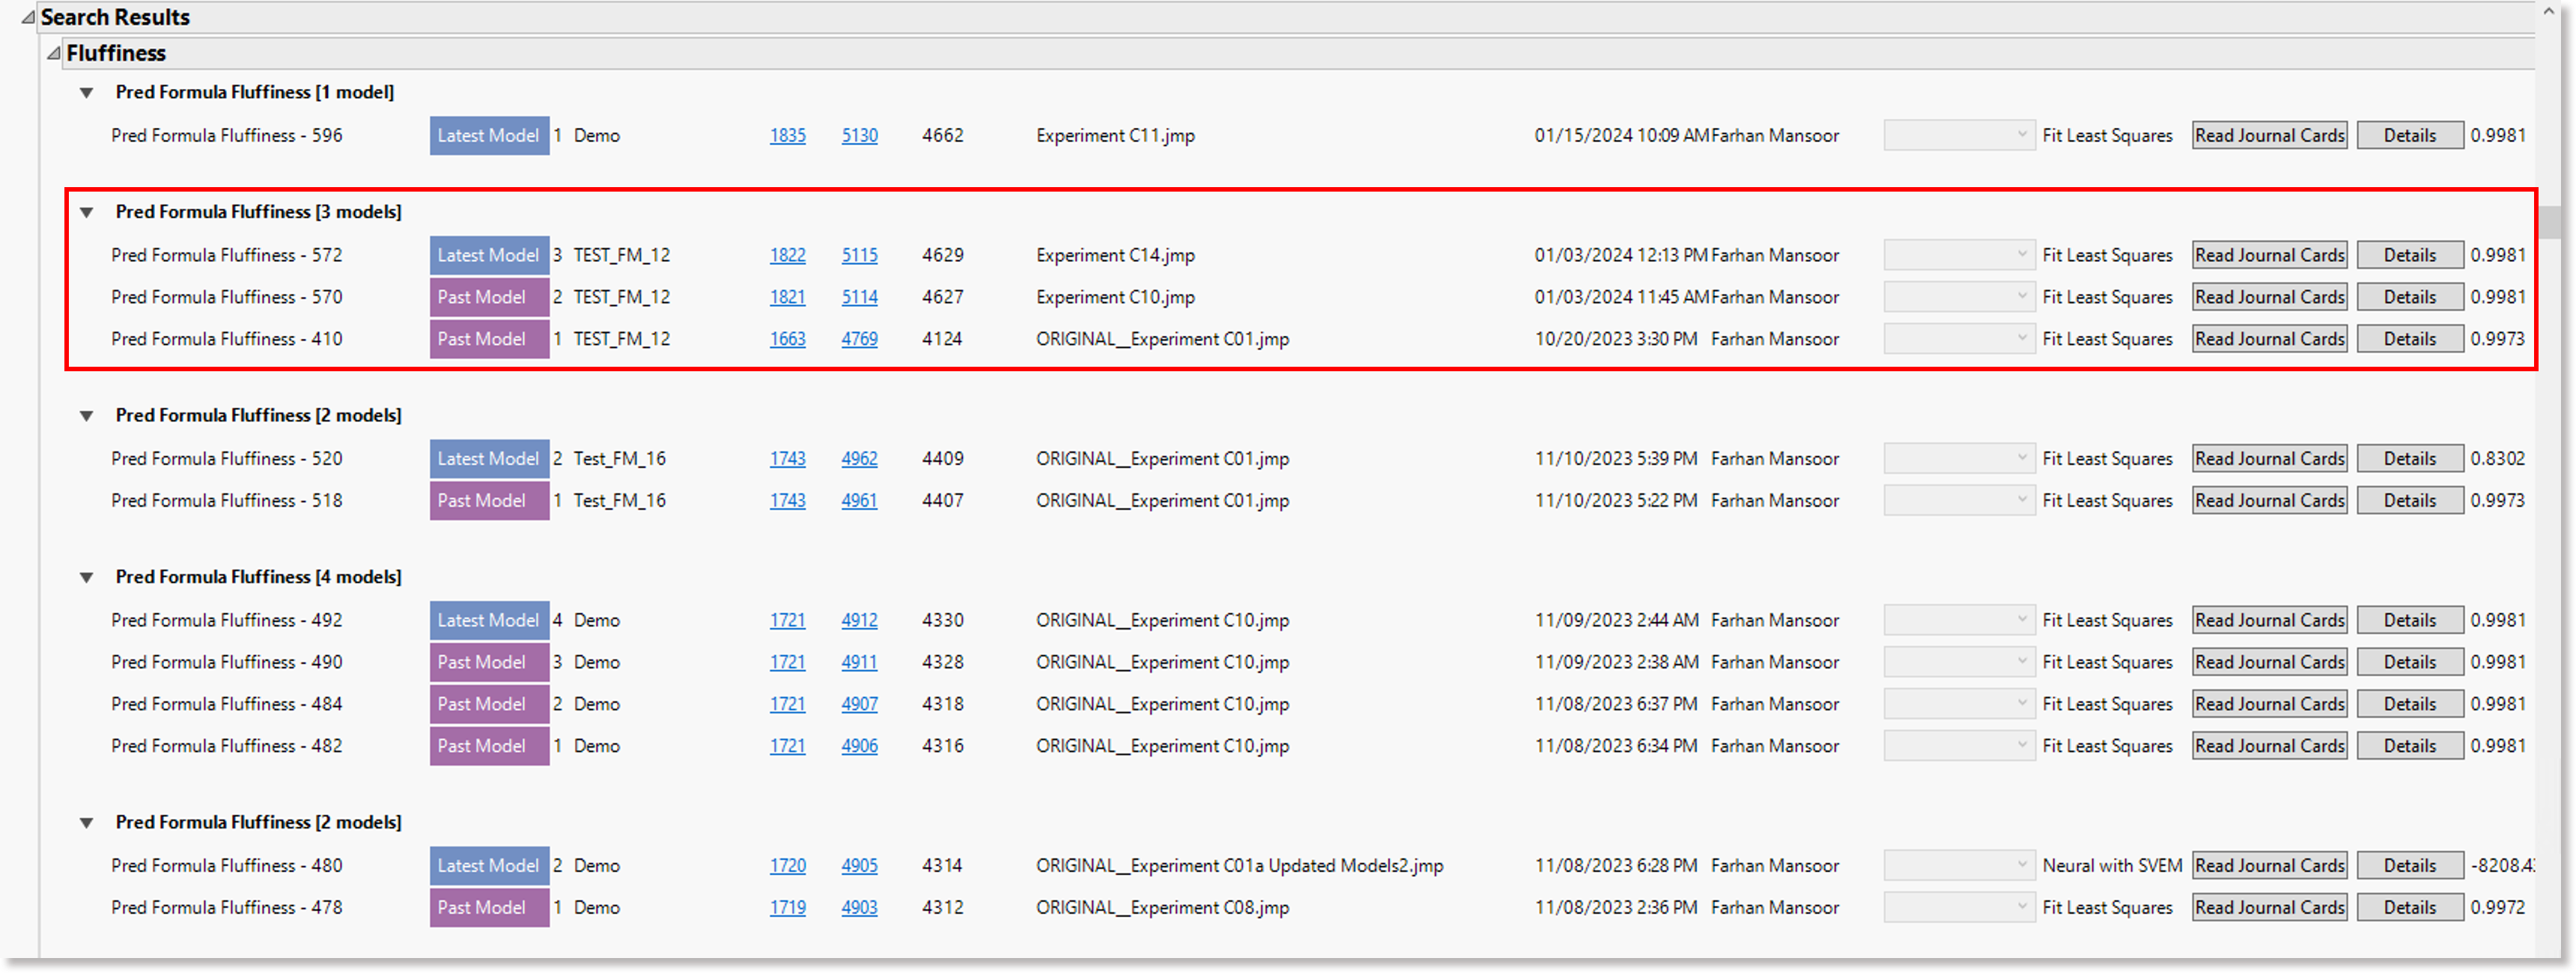
Grouped versions of a model
If a model in search results has an active version as well as inactive existing versions, all of the versions are grouped together under the root name of the model in an accordion panel. Each model version is indicated as "Latest" or "Past" in the Status column.
Download and edit a model
To download and edit a model from the search results on the Models tab:
-
Click the Details button beside the model of interest.
A model details dialog appears in a separate window.
-
In the model details dialog, click the Download model button to download the data table that contains the model.
-
Open the data table in JMP and edit the model details, as needed, and save the data table.
-
To upload the data table containing the edited model, open the Predictum > CoBaseKRM > Direct Upload to CoBaseKRM menu option.
The direct upload view is displayed in a separate window.
-
Select the file containing the data table with the edited model.
The add-in will perform a check of the parameter names automatically.
-
Expand the accordion panel containing the edited model and click the Update option.
-
In the bottom right of the dialog, click Upload.
Comparison Plots tab
Two types of comparison plots for analysis purposes are generated and organized by the following tabs, based on a set of search results:
Parameter Distribution - this tab displays a series of plots showing the distribution of data values by parameter
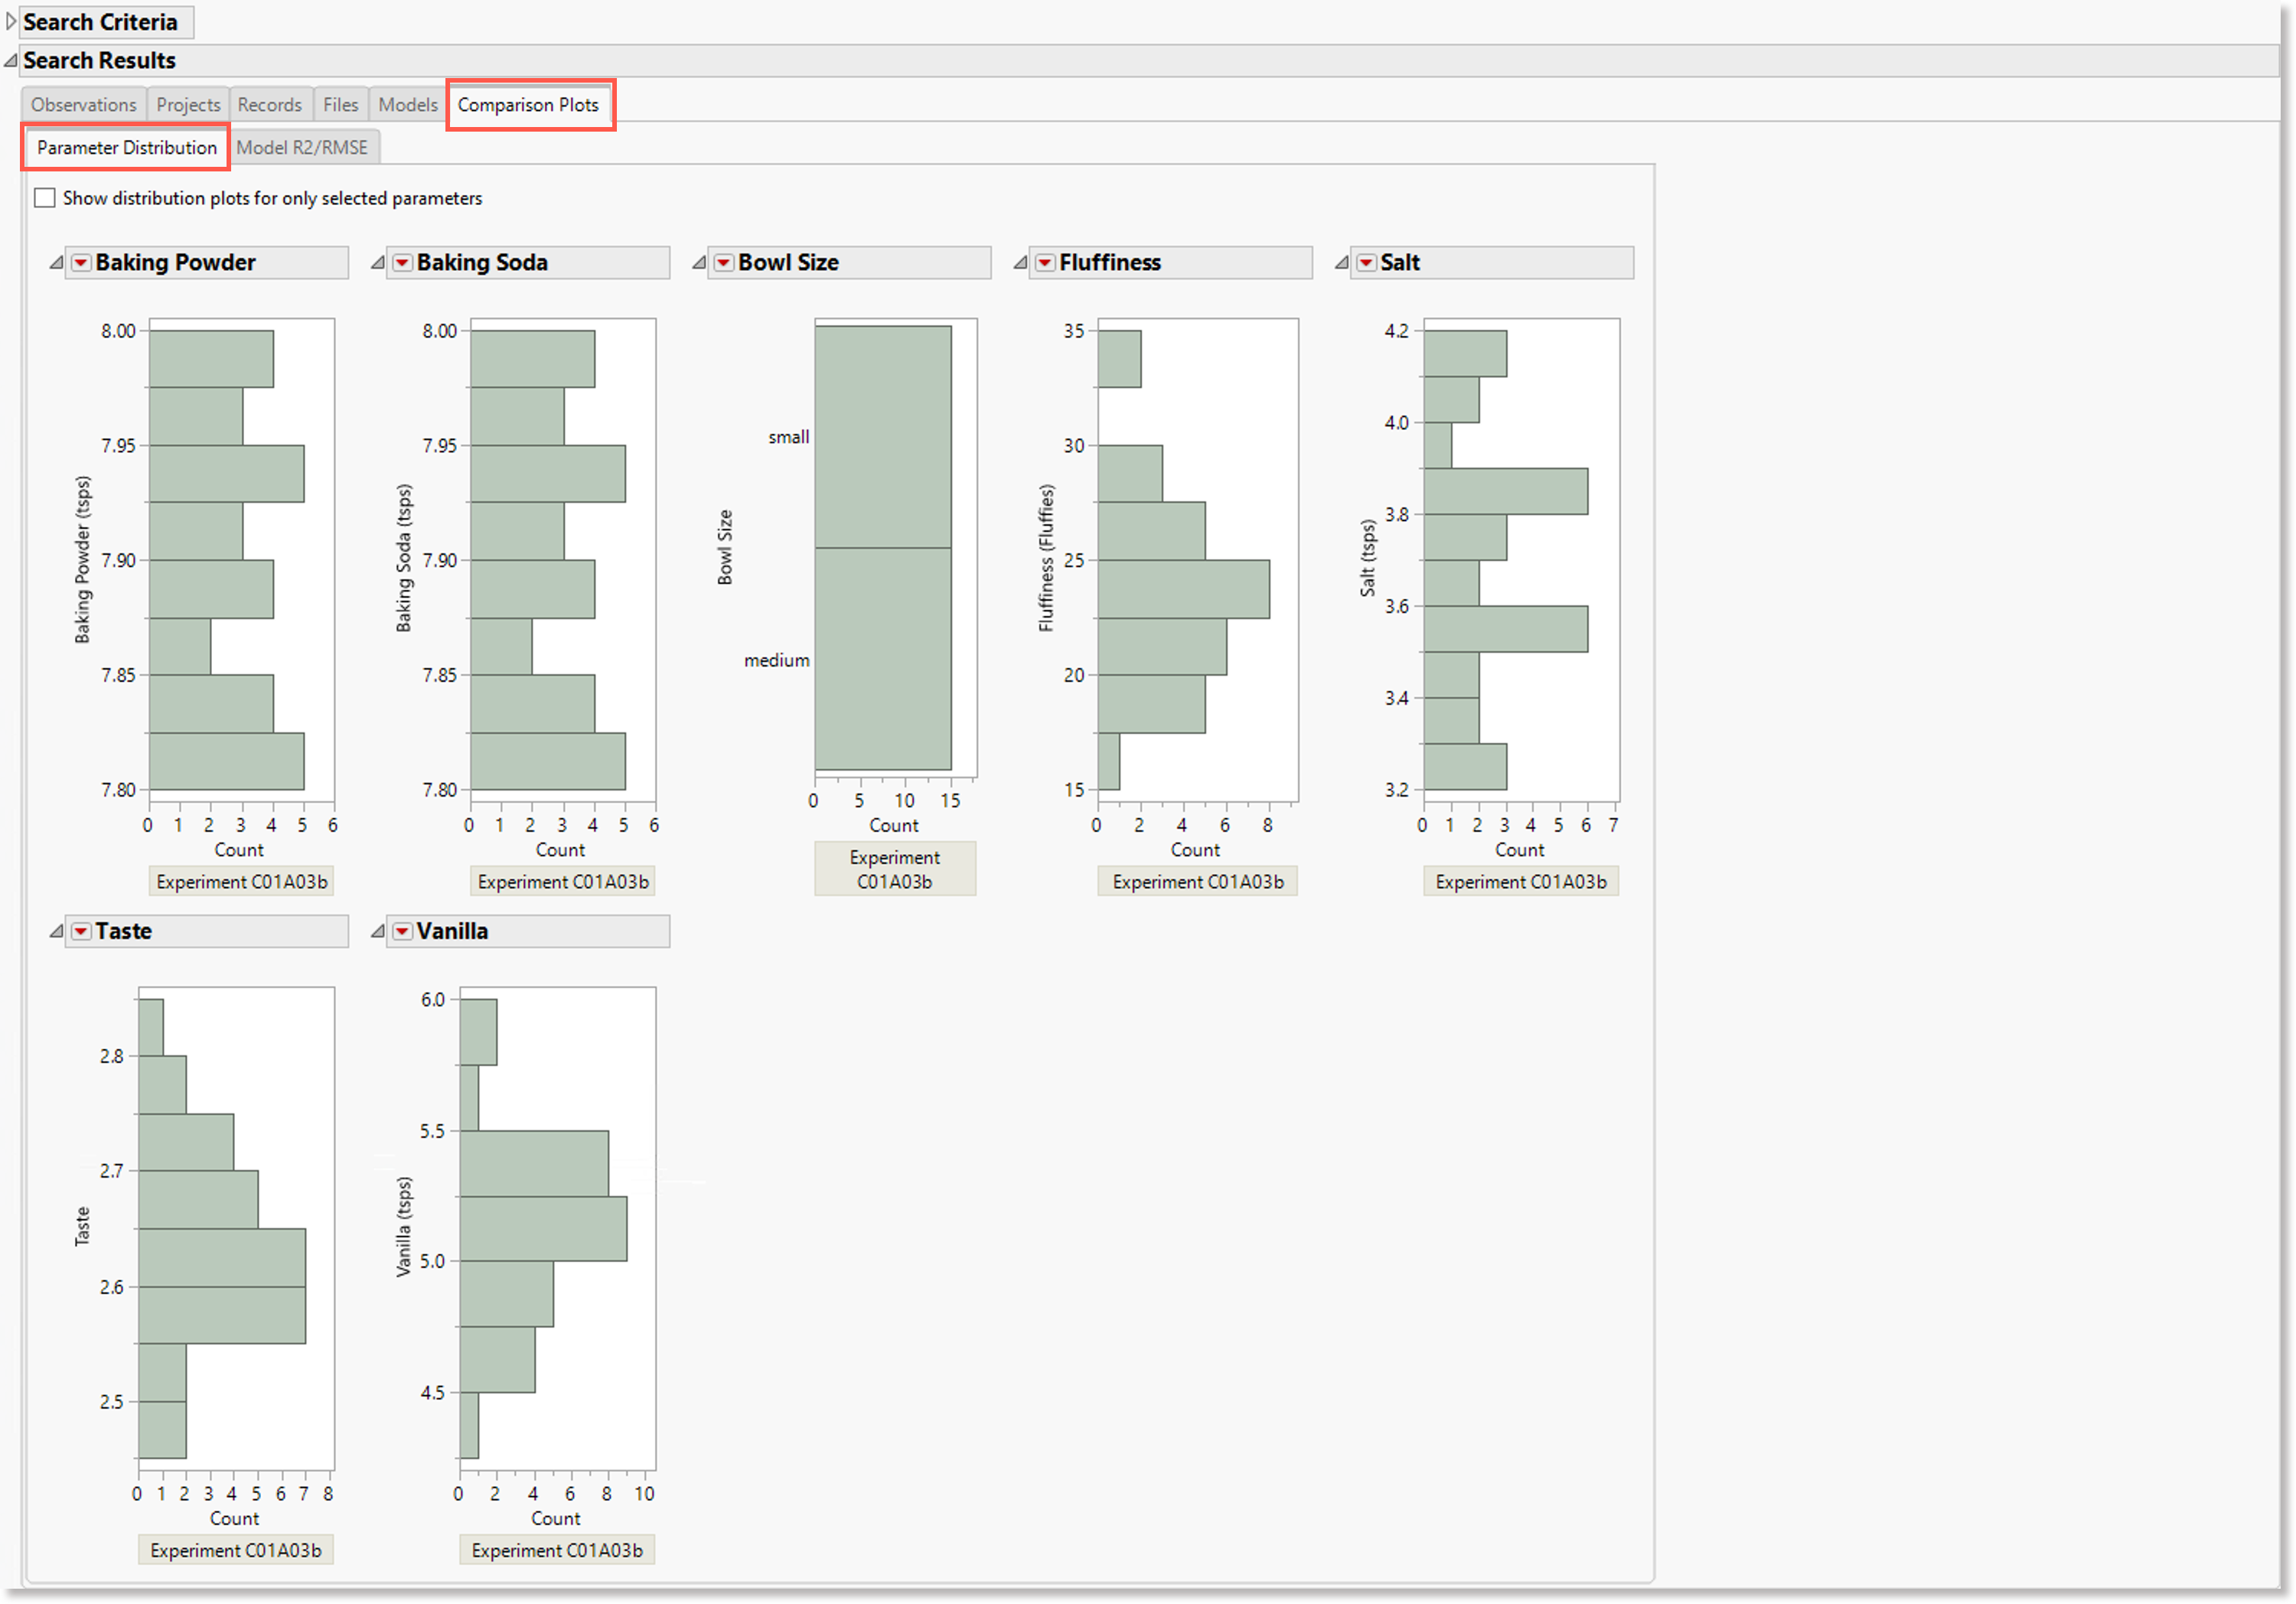
On each plot, the y-axis represents the parameter value and the x-axis represents the count of instances of the parameter value.
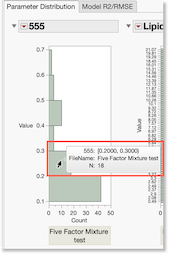
When you hover your cursor over a bar in a plot for a parameter, a tooltip is displayed with a summary of the following information:
-
Parameter name
-
Name of the data file containing the parameter
-
N value, which is the count of instances of a given parameter value
-
Model R2/RMSE - this tab displays a series of plots showing R2/RMSE values for models. If no models are found in the search results, no plots are displayed.
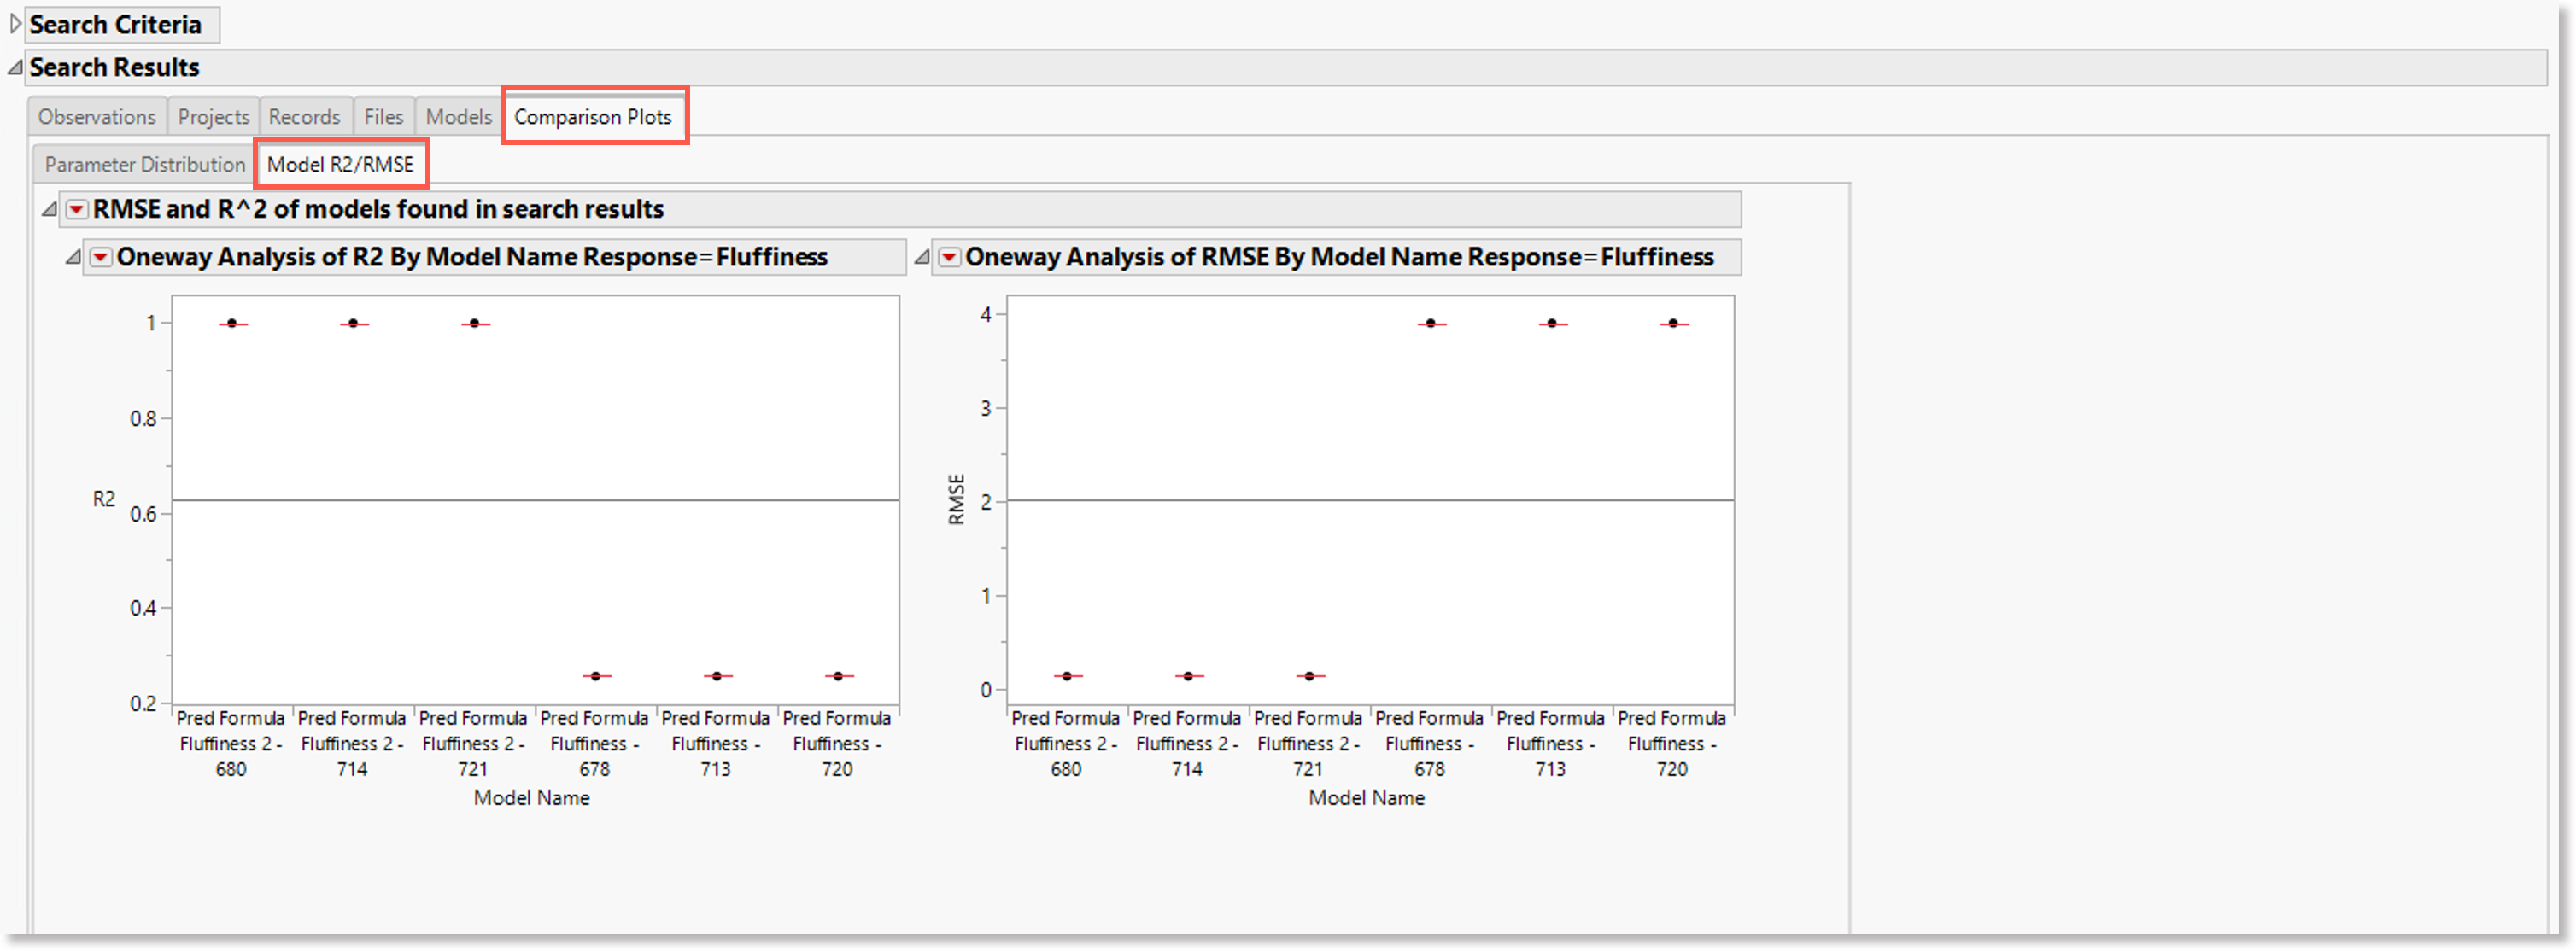
In the R-squared and RMSE plots, the x-axis displays the model names in the search results and the y-axis displays the R-squared values or RMSE values respectively.